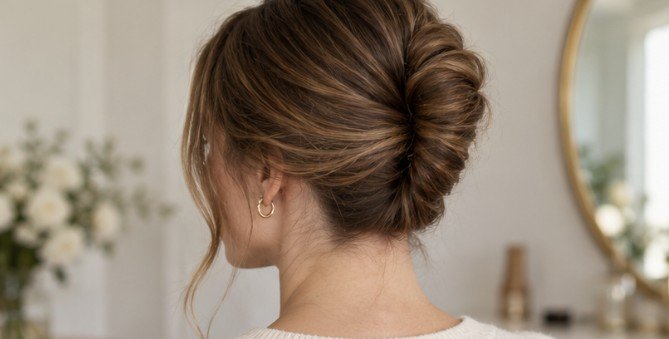
A French pin can look too simple to work: two prongs, one curve, no hinge, no elastic. Yet its hold is mechanical. The pin catches a small amount of hair, reverses direction, and traps the twist against the scalp. Once you understand that motion, the style stops feeling like guesswork.
This french pin tutorial for beginners focuses on that skill first. You will learn how to build a secure twist, insert the pin correctly, adapt it to your hair type, and avoid making the style painfully tight.
What a French Pin Is—and Why Beginners Often Use It Wrong
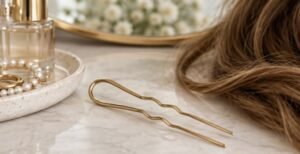
A French pin is a large U-shaped hairpin, usually made of metal or acetate, used for buns, chignons, French twists, and half-up styles.
Its hold comes from leverage. One side catches hair from the outside of the twist; then you rotate the pin toward the scalp and slide it back through the base. Beginners often push the pin straight through a bun, which catches hair but creates little resistance. The “catch, flip, and slide” movement creates the lock.
Set Yourself Up for an Easier First Attempt
Your first try is easier if your hair has some grip. Freshly washed, very smooth, or flat-ironed hair can be slippery. Current styling guides also recommend adding texture or avoiding an overly slick starting point.
Fine or silky hair may benefit from a light texturizing spray or dry shampoo. Curly, coily, or naturally textured hair often has enough grip already, so heavy smoothing products can make the pin less secure.
Pin size also matters. Shorter or finer hair generally works better with a lighter, smaller pin, while dense or long hair usually needs more length and stronger prongs.
The Core French Pin Technique in Six Steps
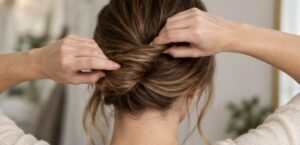
1. Gather Hair Low
Bring your hair to the nape as if making a low ponytail, but do not use an elastic. Hold it with your non-dominant hand. For wavy or curly hair, make sure to refresh strands before this step.
2. Twist Upward
Turn the ponytail in one direction and guide it upward along the back of your head. Keep enough tension for structure, but stop if your scalp feels pulled.
3. Tuck the Ends
Fold the loose ends into the inner side of the roll. If your hair is very long, wrap the excess around the base before tucking it.
4. Catch the Outer Edge
Hold the twist with one hand. Insert only the tips of the pin into the fuller outer edge and pick up a small section of hair.
5. Flip Toward the Scalp
Rotate the pin inward so the prongs turn toward your head. This is the step most beginners miss. The change in direction turns the hair you caught into an anchor.
6. Slide Through the Base
Push the pin along the scalp and through the dense center of the twist. It should feel secure, not sharp. If it pokes, remove it and try again at a flatter angle.
A Quick Fit Test for Your Hair
| Hair situation | What usually works better |
| Fine or silky hair | Smaller pin, firmer twist, added texture |
| Thick or dense hair | Larger pin and a deeper anchor |
| Short or layered hair | Half-up twist or mini bun |
| Curly or coily hair | Keep natural texture; avoid over-smoothing |
| Very long hair | Wrap excess length around the base first |
If the style falls within minutes, the issue is often a mismatch between pin size, twist tension, and how much base hair the pin catches.
Why Comfort Matters More Than Maximum Tightness
A secure French pin should feel stable, not painful. The American Academy of Dermatology warns that repeated pulling from tight hairstyles can contribute to traction alopecia, a form of hair loss caused by chronic tension. MedlinePlus also lists hairstyles that put excessive tension on follicles as a possible cause of hair loss.
That does not mean the accessory itself is damaging. The issue is repeated force. Johns Hopkins Medicine recommends reducing tension from tight hairstyles, while HealthyChildren.org notes that styles that feel tight or painful can lead to breakage. Harvard Health likewise identifies tightly pulled styles as a contributor to traction-related hair loss.
Use a simple rule: if your scalp stings, aches, or visibly lifts, loosen the style and reinsert the pin.
Troubleshooting the Three Problems Beginners Hit Most
The Pin Slides Out
Twist the hair a little more firmly and make sure the pin catches both the outer roll and a small amount of hair near the scalp. On silky hair, add light texture.
The Twist Unravels
Retwist, tuck the ends more completely, and keep holding the shape until the pin is fully seated.
The Pin Digs Into Your Scalp
The angle is probably too steep. After the flip, the pin should travel almost parallel to the scalp rather than point directly toward it.
Two Easier Styles to Learn First
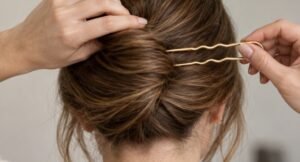
If a vertical twist feels difficult, start with a low bun. Twist the hair into a coil, catch a small section from the outer edge, flip the pin toward the scalp, and slide it through the bun’s base.
A half-up twist is useful for shoulder-length or layered hair. Gather the top section, twist it once or twice, then secure it with a smaller pin. This could be a great hairstyle fit for thinning hair. Because you are managing less hair, it is easier to feel the locking motion. Once those hold reliably, the classic French twist becomes much easier.
FAQ
1. How do you use a French pin for the first time?
Gather hair low, twist upward, tuck the ends, catch a small outer section, flip the pin toward the scalp, then slide it through the base.
2. Why does my French pin keep falling out?
Usually the twist is too loose, the hair is too slippery, or the pin is not catching enough hair near the scalp. Add texture and anchor deeper.
3. Can a French pin work on short hair?
Yes, if you can gather enough hair for a small twist or bun. A half-up style is often easier than a full French twist.
4. Should a French pin feel tight?
It should feel secure but comfortable. Pain, stinging, or strong pulling means the style is too tight and should be loosened.
The Skill Is in the Flip, Not the Force
The most useful lesson in a french pin tutorial for beginners is that hold comes from direction, not pressure. A pin shoved straight through hair is easy to dislodge; a pin that catches, reverses, and anchors near the scalp has something to work against.
Practice on a low bun first, where you can feel what the pin is doing. Then move to a French twist once your hands recognize the sequence. The goal is not the tightest possible updo. It is a secure, comfortable style that stays put because the pin is placed well.
Leave a Reply