Category: Makeup

  • Makeup for Hooded Eyes Step by Step: The Open-Eye Method

    Makeup for Hooded Eyes Step by Step: The Open-Eye Method

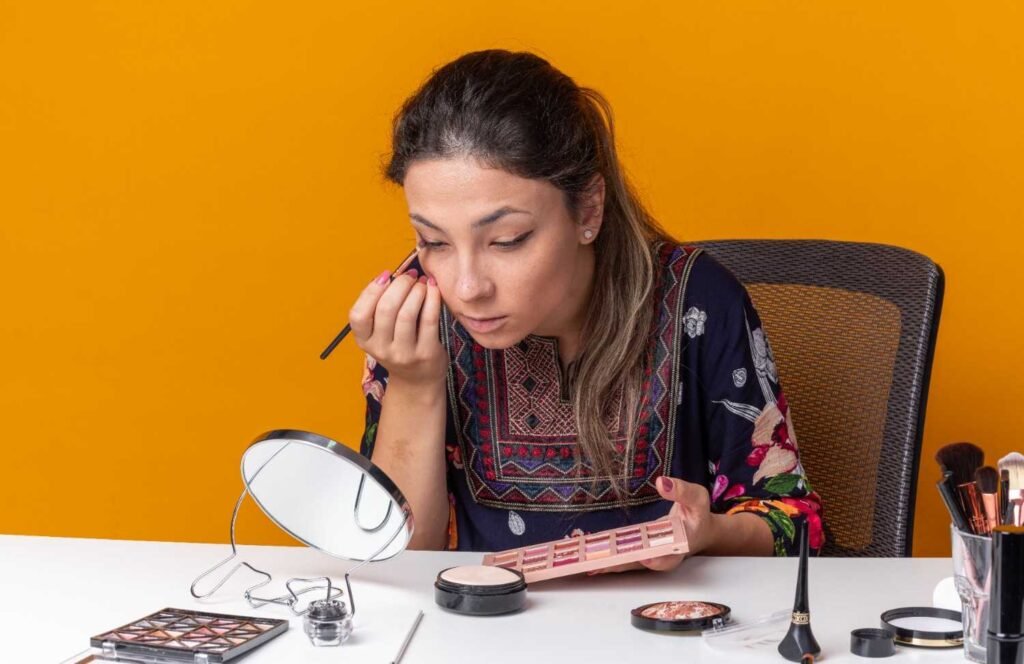
    For years, I thought better blending was the answer to getting eye makeup to show on hooded lids. What actually changed my results was much simpler: I stopped designing the look around a crease that disappeared when my eyes opened. Instead, I started treating my relaxed, open eye as the real canvas.

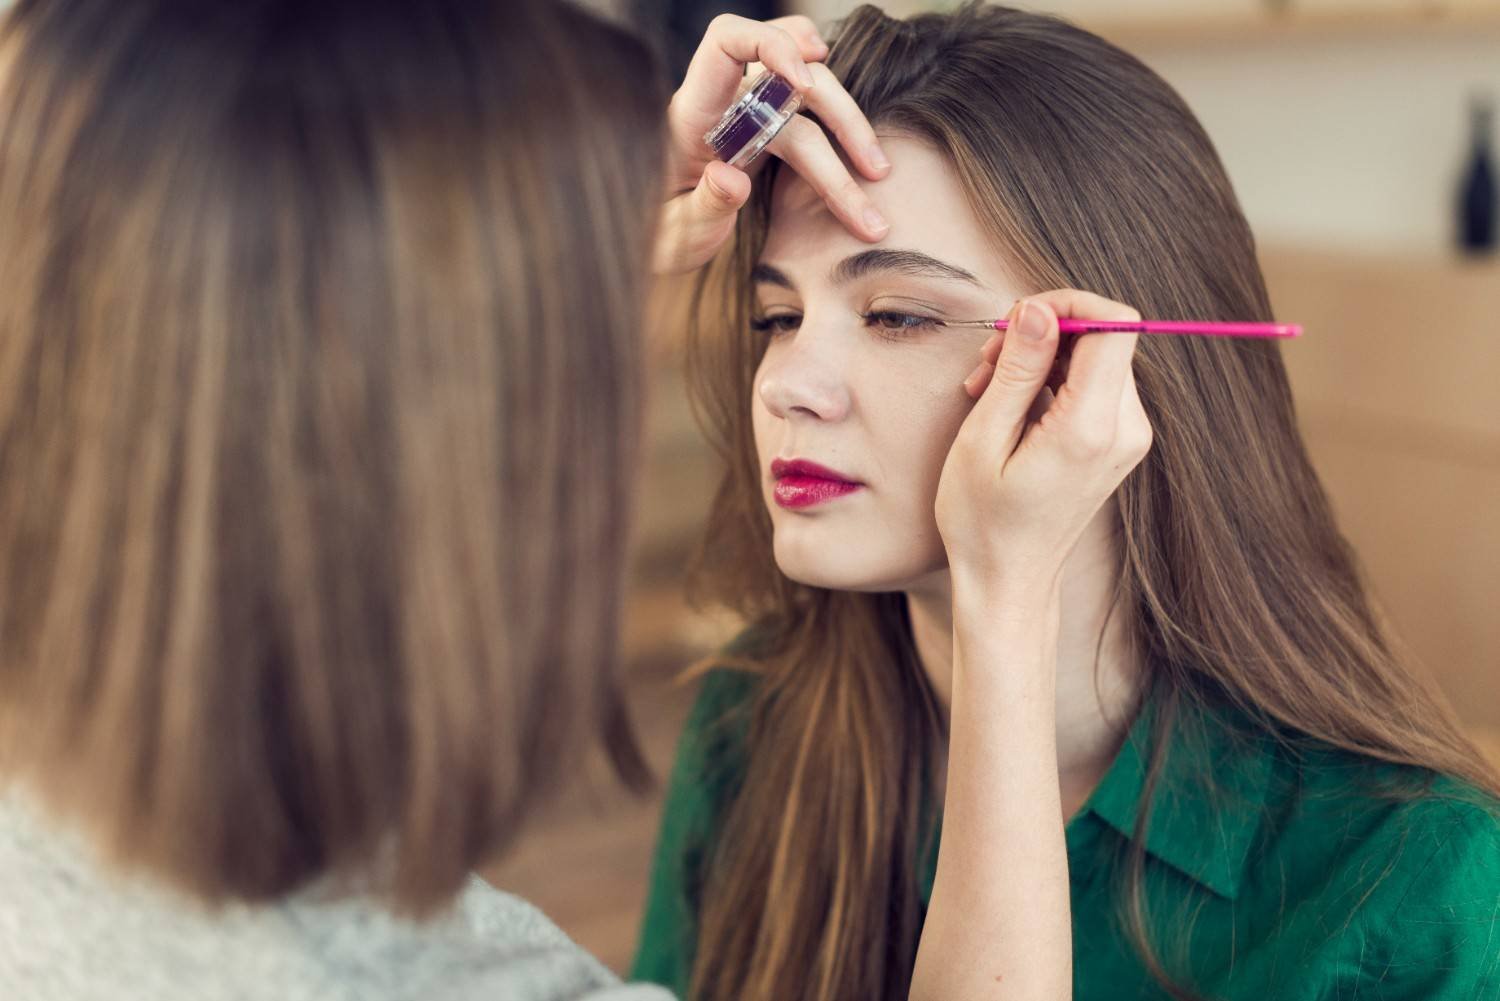
    That shift completely changed how I place shadow, liner, and mascara. In this makeup for hooded eyes step by step guide, I’ll use what I call the open-eye method—building the crease where it can actually be seen, lifting the outer corner instead of dragging it down, keeping the lash line slim, and using brightness only where it helps the eyes look more open.

    How Can I Tell If I Have Hooded Eyes?

    Hooded eyes have an extra fold of skin extending from the brow bone toward the lash line. When you look straight ahead, this fold may partially or almost completely cover the natural crease and mobile eyelid.

    I check my eye shape with my face relaxed and my eyes looking directly into a mirror. If most of the crease disappears, I use hooded-eye makeup techniques. Hooding can occur with almond, round, deep-set, or asymmetrical eyes, and it may become more noticeable as the skin changes with age.

    How Should I Prep Hooded Eyes So Makeup Does Not Crease?

    Because the upper fold can touch the mobile eyelid, hooded eyes may experience more eyeshadow and eyeliner transfer.

    I begin with clean, dry lids and smooth a thin layer of eye primer from the lash line toward the brow bone. If my eyelids become oily easily, I lightly press translucent powder over the primer after it settles.

    I avoid applying a thick layer of powder because too much can make shadow difficult to blend. The goal is simply to reduce excess slip and create a smoother base that helps eye makeup stay in place.

    What Is the Best Step-by-Step Eyeshadow Technique for Hooded Eyes?
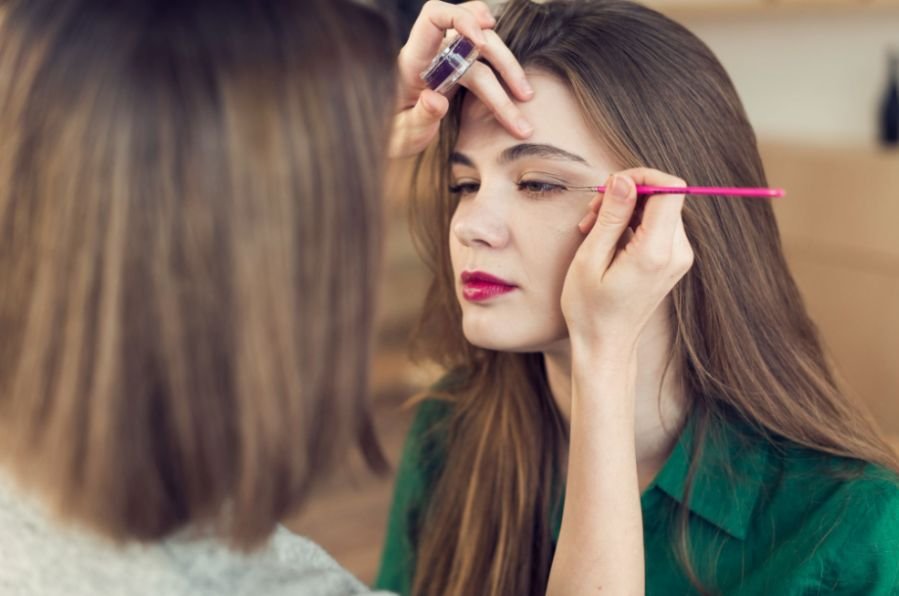
    What Is the Best Step-by-Step Eyeshadow Technique for Hooded Eyes?

    For a softer overall finish, these eye techniques can also be paired with a no makeup makeup look for beginners approach that keeps the rest of the makeup fresh and understated.

    Step 1: Map Your Eye Makeup While Looking Straight Ahead

    I keep my eyes open and look directly into the mirror before placing my transition shade.

    This is one of the most important hooded-eye makeup techniques because applying shadow only with closed eyes can hide much of the finished look beneath the fold.

    I keep checking my placement from this relaxed, straight-ahead position as I work.

    Step 2: Create a Faux Crease Above the Natural Fold

    Instead of following the hidden crease, I create a new visible crease slightly above it.

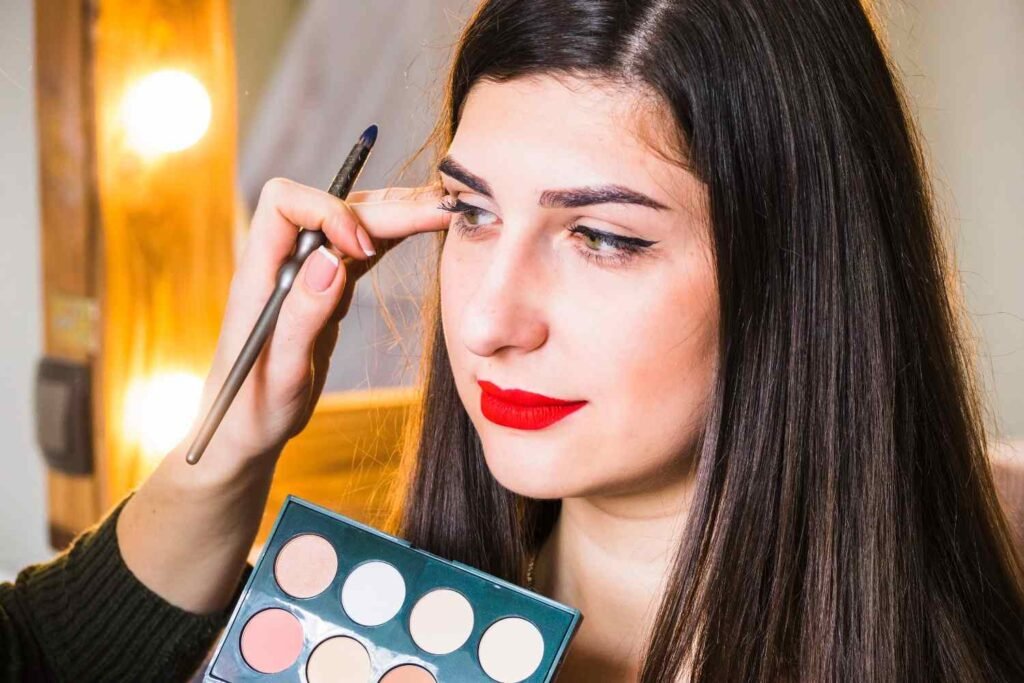
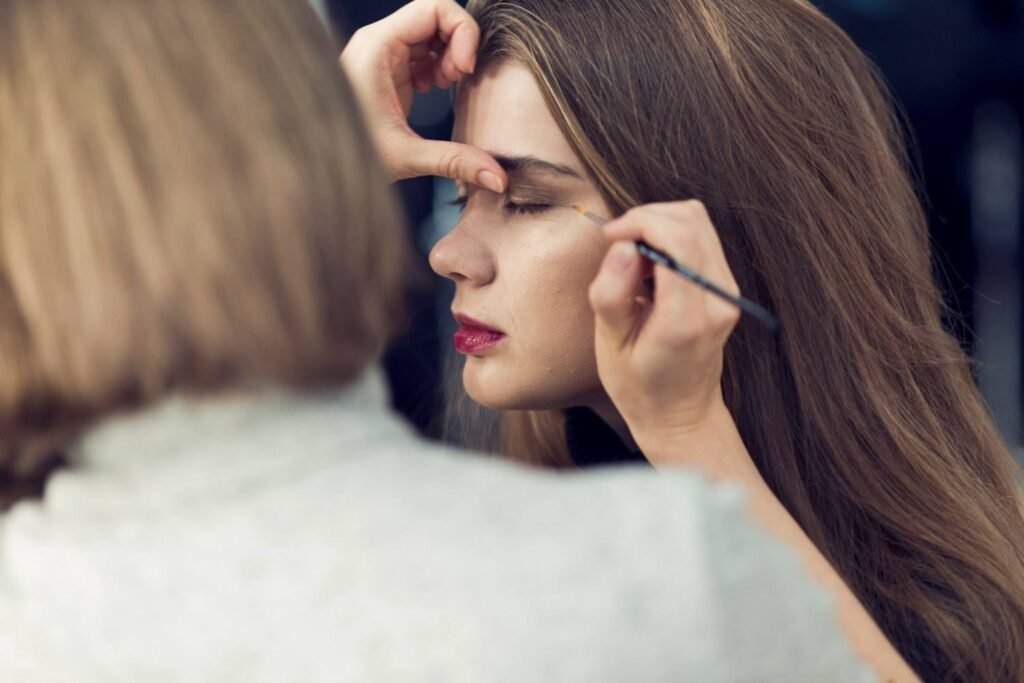
    Using a small blending brush and a matte mid-tone brown or another transition shade, I place a few faint dots or a soft guideline just above the natural fold. I position the color where it remains visible when my eyes are open.

    Then I connect and soften those marks with gentle blending motions.

    This technique creates the illusion of more lid space and gives the eye greater depth without requiring heavy shadow.

    Step 3: Deepen the Outer Corner for a Lifted Shape

    Next, I take a slightly darker matte shade and concentrate it on the outer corner.

    I form a small V-shape or upward-facing angle and blend the shadow outward and slightly toward the temple. I avoid pulling the darkest color downward because that can visually lower the eye.

    I also build pigment gradually. A soft outer corner generally looks more flattering on limited lid space than one dense patch of dark eyeshadow.

    Step 4: Brighten the Mobile Lid and Inner Corner

    I press a light ivory, soft beige, or champagne shade onto the mobile lid and around the inner corner.

    When appropriate, I bring the brighter shade slightly above the natural fold so it remains visible when the eye opens. This contrast between the lighter lid and deeper faux crease can make the center of the eye appear more open.

    I use shimmer selectively. Satin or subtle shimmer can brighten the lid beautifully, but heavy reflective shadow across a textured hood may emphasize the fold. For mature hooded eyes, I usually choose softer finishes and thinner layers.

    Step 5: Blend Everything Upward Instead of Downward
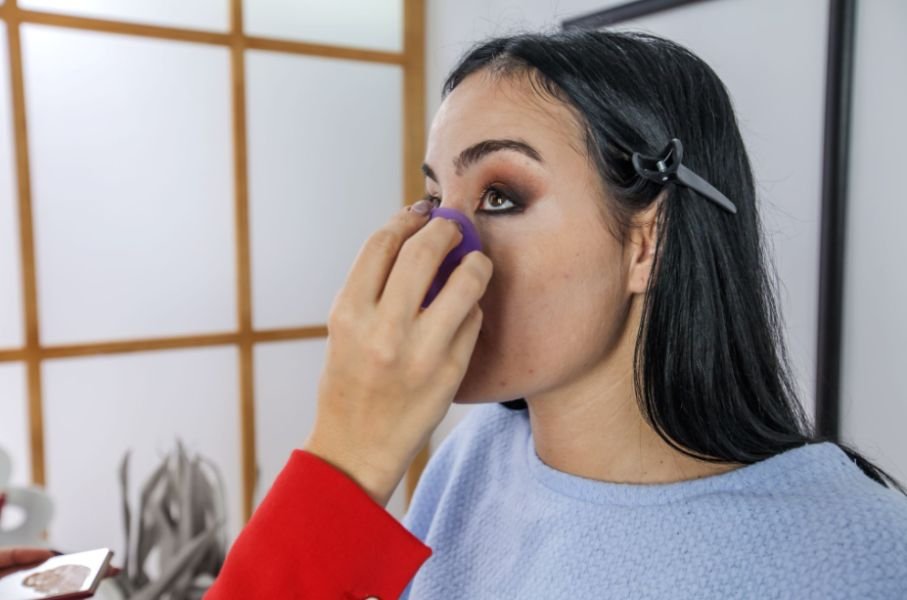
    Step 5: Blend Everything Upward Instead of Downward

    Once the main colors are in place, I soften the edges with a clean blending brush.

    My blending direction stays mostly upward and outward. I imagine an invisible diagonal line running from the outer corner toward the end of the eyebrow.

    That visual guide helps create a lifted eye makeup shape without requiring dramatic color.

    What Eyeliner Technique Works Best for Hooded Eyes?

    Thick eyeliner can consume much of the visible eyelid, so I prefer keeping definition extremely close to the lashes.

    For an easy everyday look, I tightline the upper lash area with a long-wearing waterproof gel pencil. I can then use a small angled brush to stamp dark brown or deep neutral eyeshadow directly into the roots of the upper lashes.

    This creates definition without drawing a thick black line across valuable lid space.

    Can You Wear Winged Eyeliner With Hooded Eyes?

    Yes, but I do not rely on the traditional closed-eye wing technique.

    For beginners, skipping a large wing and concentrating definition at the lash roots is often easier. If I want winged eyeliner, I map the outer shape while looking straight ahead.

    A batwing-style technique can work especially well because it accounts for the eyelid fold. The liner may look slightly different when the eye is closed, but what matters is that the wing appears smooth when the eyes are naturally open.

    How Do I Apply Mascara Without Smudging the Hood?

    I curl the upper lashes thoroughly before applying mascara because lifted lashes help open the eye visually.

    Then I apply a smudge-resistant or smudge-proof mascara, concentrating definition near the lash roots and outer lashes. I avoid repeatedly coating the very tips when they naturally touch the upper hood.

    I allow the mascara to dry before looking down or blinking forcefully. For some eye shapes, adding controlled definition to the lower lashes can further create a wide-awake appearance.

    What Hooded-Eye Makeup Mistakes Should I Avoid?
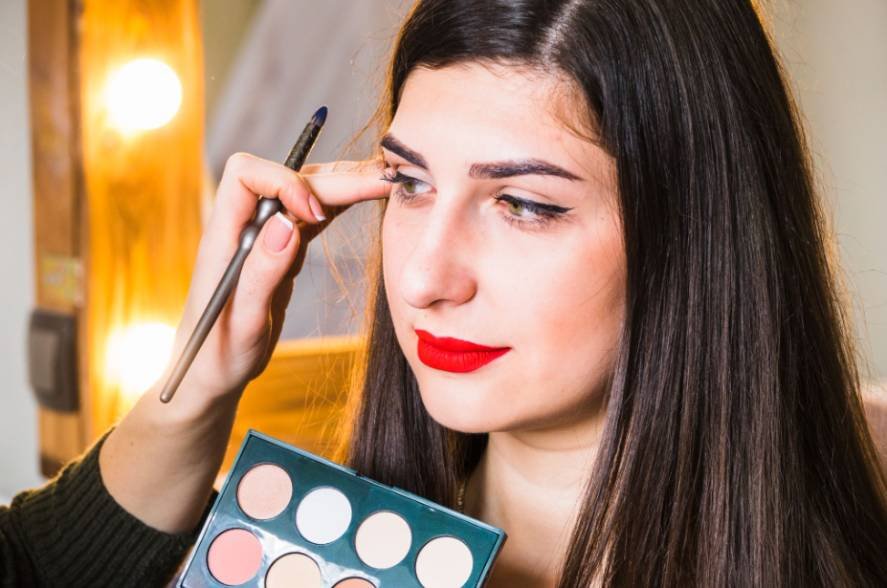
    What Hooded-Eye Makeup Mistakes Should I Avoid

    The most common mistake I see is applying an entire eye look while the eyelid is closed. The shadow may look beautiful during application but disappear once the eye opens.

    Another mistake is placing the crease color too low. Moving the transition shade slightly above the natural fold makes much more of the makeup visible.

    I also avoid overly thick liner, dark shadow blended downward, and excessive shimmer directly across a pronounced hood. These choices can visually reduce the limited space available around the eye.

    How Should Makeup Change for Mature Hooded Eyes?

    Mature hooded eyes may have additional texture, dryness, or softness around the eyelid, so I focus even more on thin layers.

    I lightly prep the skin for makeup, use soft matte transition shades, blend carefully, and avoid packing large amounts of powder into fine lines.

    Instead of creating an extremely sharp faux crease, I use a diffused shadow slightly above the fold. The result still provides definition but looks softer and more natural.

    For a softer everyday result, you can also follow this natural makeup look step by step approach and adapt the eye makeup to your hooded shape.

    Frequently Asked Questions 

    1. What is the easiest makeup for hooded eyes step-by-step technique for beginners?

    I start with primer, create a soft faux crease above the natural fold, deepen the outer corner in an upward direction, brighten the visible lid, define the lash roots with thin liner or shadow, curl the lashes, and finish with smudge-resistant mascara. Keeping the eyes open during placement makes every step easier to control.

    2. Should hooded eyes use matte or shimmer eyeshadow?

    Both can work. I prefer matte shades for the transition color, faux crease, and outer corner because they create controlled depth. I use satin or subtle shimmer on the visible lid or inner corner to add brightness.

    3. How can I make hooded eyes look bigger?

    I keep the center of the lid bright, raise the crease color slightly, blend the outer shadow upward, use thin lash-line definition, and curl the lashes. Together, these techniques preserve visible lid space and make the eyes appear more open.

    4. Where should eyeshadow go on hooded eyes?

    I place the transition shade above the natural fold where it remains visible with the eyes open. I keep deeper shadow mainly around the outer third and blend it upward rather than extending it heavily downward.

    Final Thoughts

    The biggest lesson I learned was that hooded-eye makeup works best when I stop trying to force conventional crease placement onto an eye shape that behaves differently. The most effective makeup for hooded eyes step-by-step routine starts with the eye open and relaxed, because that is how the finished makeup will actually be seen.

    By raising the faux crease, lifting the outer shadow, controlling shimmer, keeping liner close to the lashes, and defining the lashes without encouraging transfer, I can create anything from understated daytime makeup to a smoky evening look while keeping the eye shape bright and visible. 

    I also pay attention to allergens in cosmetics, especially around the sensitive eye area, and stop using any product that causes irritation or dis
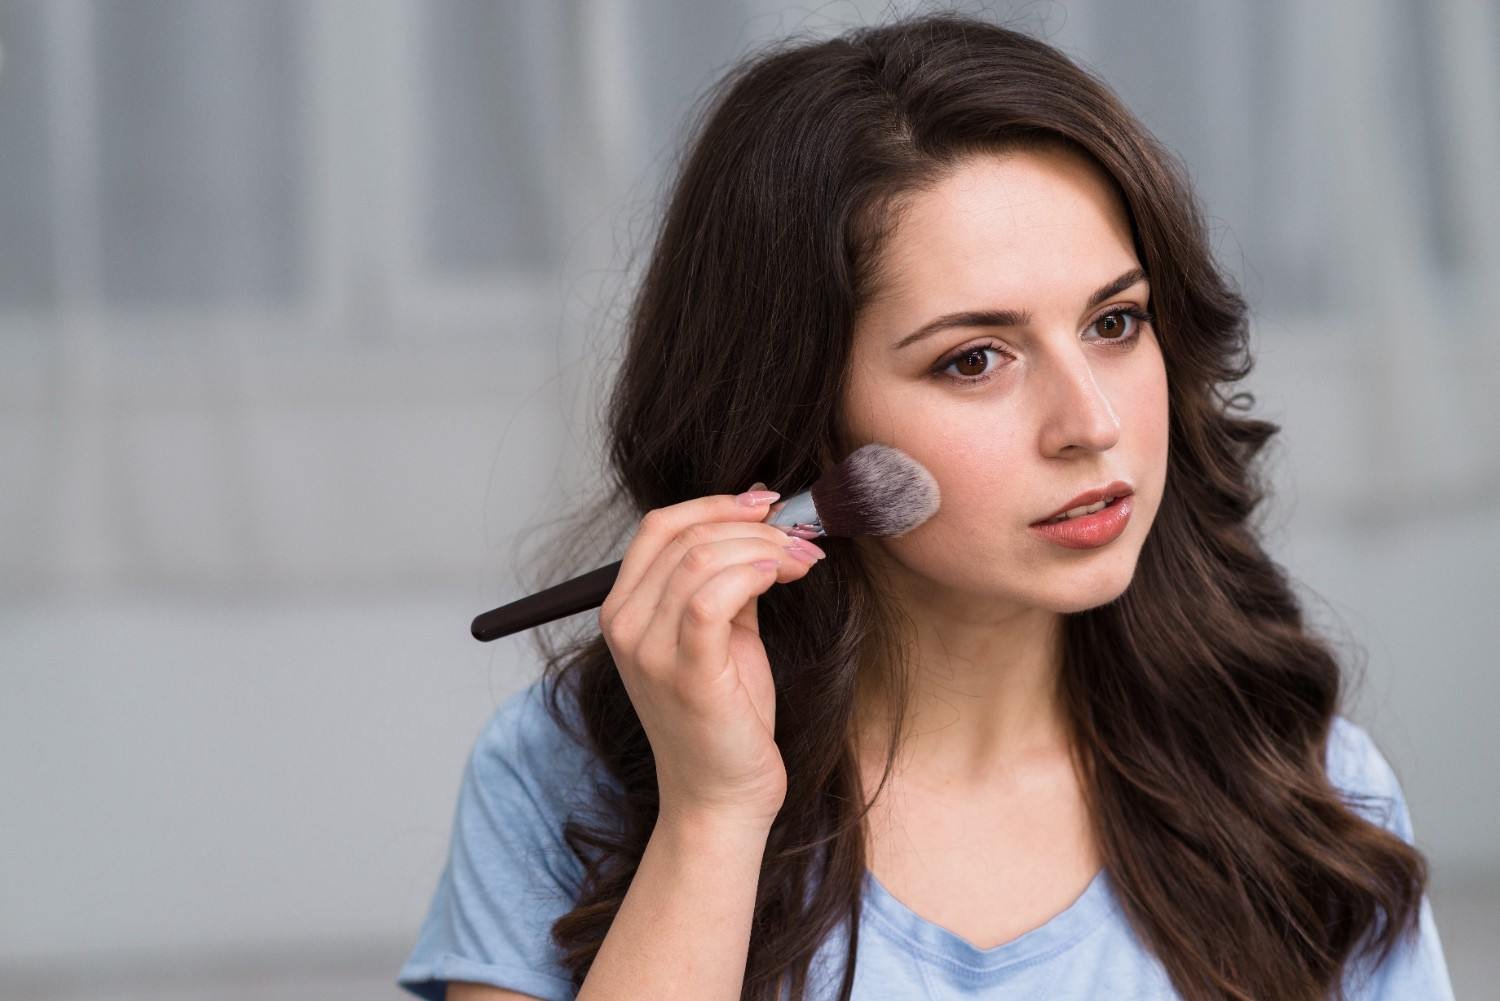
  • Best Foundation for Mature Skin: Smooth Coverage After 40

    Best Foundation for Mature Skin: Smooth Coverage After 40

    Foundation should make mature skin look fresher, not heavier. I’ve found that the best foundation for mature skin is usually lightweight, flexible, and easy to build rather than thick or overly matte. The goal is to even out discoloration, soften the look of fine lines, and create a skin-like finish without masking natural texture.

    For women in the US, climate matters too. Whether you live through dry Southwest weather, humid Southeast summers, cold Northeast winters, or constant indoor air conditioning, your environment can affect how foundation wears. Hydration and strategic setting can therefore matter just as much as coverage.

    What Type of Foundation Works Best for Mature Skin?

    Mature skin is not one specific skin type. It can be dry, oily, combination, sensitive, or acne-prone, so I choose a formula based on current skin needs rather than age alone.

    Light-to-medium buildable coverage usually gives the most natural result. A liquid or serum-like texture with a satin, natural, or softly radiant finish can help the complexion look smoother without making wrinkles or pores more obvious. Heavy full coverage may settle into expression lines when overapplied, while extremely matte foundation can exaggerate dry patches.

    For dry mature skin, look for hydrating ingredients such as glycerin, hyaluronic acid, squalane, ceramides, and niacinamide. These ingredients can improve comfort and help makeup sit more smoothly instead of emphasizing texture.

    How Should You Prep Mature Skin Before Foundation?

    How Should You Prep Mature Skin Before Foundation?

    Hydrate Before You Apply Makeup

    Prep is crucial. I start with a hydrating moisturizer and let it absorb before moving to makeup. If visible pores, uneven texture, or fine lines are concerns, a hydrating or smoothing primer can create a more even surface before foundation.

    For daytime makeup, sunscreen should remain part of the morning routine. I also let skincare and sunscreen settle before applying foundation because layering everything immediately can contribute to pilling or separation.

    Good prep should leave skin comfortable and supple rather than coated in multiple heavy layers. When the surface is dry, foundation is more likely to cling to flaky patches and collect around expression lines. Makeup-artist guidance for mature skin similarly emphasizes moisturizer and carefully selected primer before complexion makeup.

    How Much Foundation Should You Use on Mature Skin?

    Less is more. I start with a small amount at the center of the face, where redness, discoloration, and uneven skin tone are often most noticeable. I then blend outward toward the jawline and hairline. A well-planned skincare routine for aging skin can also help create a smoother, more hydrated base before foundation application.

    A damp makeup sponge is especially useful when I want a thin, natural-looking finish. Instead of dragging foundation across the face, I gently press or bounce it into the skin. A soft brush or clean fingers can also work, but I avoid loading too much foundation onto any application tool.

    I build thin layers only where extra coverage is actually needed. A second light layer over dark spots, redness, or pigmentation generally looks smoother than one thick coat covering the entire face. Current mature-skin application guidance also favors small amounts, thin layers, center-to-outward blending, and damp sponges.

    How Do You Stop Foundation From Settling Into Fine Lines?

    How Do You Stop Foundation From Settling Into Fine Lines?

    Too much foundation is one of the biggest reasons makeup collects around wrinkles. I use less around crow’s feet, smile lines, and the folds beside the nose.

    After blending, I check these areas before setting anything. If foundation has gathered in a line, I gently press it out with a clean, damp sponge. This prevents excess makeup from being locked into the crease when powder is applied.

    I also avoid trying to erase every bit of texture. Real skin has pores, lines, and movement. Flexible, buildable coverage usually looks more flattering than a thick layer designed to make the complexion appear perfectly flat.

    Should Mature Skin Use Setting Powder?

    Yes, but strategic powdering matters.

    I would not bake the entire face, particularly when the skin is dry or textured. Heavy powder can absorb moisture and make fine lines, wrinkles, and flaky areas look more noticeable.

    Instead, I apply a very light dusting only where shine or creasing tends to develop. Common areas include the sides of the nose, center of the forehead, and chin.

    I leave dry cheeks and heavily lined areas alone unless they genuinely need setting. This targeted technique also follows makeup-artist recommendations to use powder sparingly and concentrate it primarily on shine-prone areas such as the T-zone.

    Is Matte or Dewy Foundation Better for Mature Skin?

    Neither finish is automatically right for everyone.

    I generally prefer a natural satin or softly radiant finish because it gives the face dimension without making the complexion appear excessively shiny.

    Dry mature skin may look better with a radiant or slightly dewy finish, while oily or combination mature skin may prefer a natural satin finish. Very flat matte formulas can highlight dryness, texture, and wrinkles. On the other hand, extremely glossy finishes can sometimes draw more attention to enlarged pores.

    The goal is to find a finish that still looks natural several hours after application, not simply one that photographs well immediately after makeup is applied.

    How Do You Choose the Right Foundation Shade and Undertone?

    How Do You Choose the Right Foundation Shade and Undertone?

    I prefer testing foundation close to the jawline instead of relying only on a hand or wrist swatch. The correct shade should create a natural transition between the face and neck. This matters even more when foundation is layered over the best makeup primer for oily skin, because a smooth, controlled base can make shade and texture differences easier to notice.

    Undertone also matters. Warm undertones often appear golden or peach, cool undertones tend to lean pink or rosy, and neutral undertones fall somewhere between the two.

    Whenever possible, I check the shade in natural daylight. Artificial store lighting can change the way color appears and may make a foundation look warmer or cooler than it actually is.

    Frequently Asked Questions (FAQs)

    1. What is the best foundation for mature skin with wrinkles?

    For wrinkles, I look for a lightweight, hydrating, flexible formula with buildable coverage. A natural or satin finish combined with thin application can reduce the chance of makeup collecting around fine lines.

    2. Is full-coverage foundation bad for older skin?

    No. Full coverage can work on older skin when it is applied gradually. I recommend adding extra coverage only over dark spots, redness, or uneven pigmentation instead of placing a thick layer across the entire face.

    3. Is liquid foundation better than powder foundation for mature skin?

    Liquid formulas are often easier to work with on dry or textured mature skin because they tend to remain flexible. Powder foundation can still suit oilier mature skin when it is applied lightly over properly moisturized skin.

    4. How Can I Stop Foundation From Looking Cakey?

    Start with hydrated skin, use a small amount of foundation, and build coverage through thin layers. Keep setting powder to a minimum, particularly around wrinkles and dry areas. Adding more powder to already dry-looking makeup usually makes texture more visible instead of correcting it.

    How Can You Make Foundation Look Better on Mature Skin?

    I’ve learned that foundation performs best on mature skin when I focus on preparation instead of coverage alone. Hydrated skin, center-to-outward application, thin layers, a damp sponge, careful shade matching, and strategic powdering can make a bigger difference than simply choosing a heavier formula.

    The best foundation for mature skin should make the complexion look even while still allowing natural texture to show through. When makeup remains flexible, comfortable, and properly hydrated, fine lines, uneven tone, and texture become less distracting without making the skin look overdone.

  • Makeup for Dry, Flaky Skin: The Skin-First Method for a Seamless Glow

    Makeup for Dry, Flaky Skin: The Skin-First Method for a Seamless Glow

    Foundation can look perfect when I first apply it, then suddenly start separating around my nose, catching on rough patches, or making my cheeks look more textured than they did before makeup. When that happens, the foundation itself is not always the real problem. The condition of the skin underneath often determines whether the final result looks smooth or cakey.

    For makeup for dry, flaky skin, I focus on creating a comfortable, hydrated surface before building coverage. Gentle preparation, moisture-rich skincare, flexible base formulas, and light application techniques can help makeup settle more evenly without emphasizing every dry spot. The goal is not to hide natural skin texture, but to prevent unnecessary flaking and create a softer, healthier-looking finish.

    Why Does Foundation Look Patchy on Dry Skin?

    Foundation often looks patchy when it settles around dead skin cells or goes over skincare that has not fully absorbed. Very matte formulas, thick layers, heavy powder, and aggressive buffing can make the problem worse.

    I also watch for pilling. Serum, moisturizer, sunscreen, primer, and foundation can roll into tiny flakes when layered too quickly, so I give each layer time to settle.

    How Should I Prep Dry, Flaky Skin Before Makeup?

    I start with clean skin and avoid harsh scrubs. If flakes are mild and my skin feels calm, I may use a soft, damp washcloth or gentle exfoliating product to loosen dead surface cells. If my skin feels red, sore, burning, or irritated, I skip exfoliation and focus on hydration.

    How Do I Layer Hydration Before Foundation?

    How Do I Layer Hydration Before Foundation

    I like a hydrating serum with humectants such as hyaluronic acid or glycerin, which can help attract and retain water in the outer skin layers. I follow with a nourishing moisturizer, ideally with emollients or barrier-supporting ingredients such as ceramides.

    I let the moisturizer absorb for about five to ten minutes. This softens the skin without leaving an overly slippery surface that can make foundation separate.

    What Primer Works Best for Dry Skin?

    I usually choose a hydrating, smoothing, dewy, or lightly gripping primer instead of a strongly mattifying one. I apply a thin layer where makeup tends to catch, especially around the nose, between the brows, and around the mouth.

    Too much primer can encourage pilling, so I keep the layer light and make sure it works with the skincare underneath.

    What Foundation Formula Is Best for Dry, Flaky Skin?

    I prefer liquid foundation, skin tints, serum-like bases, water-gel textures, and natural, satin, luminous, or dewy finishes. Very matte or powder bases can emphasize rough texture.

    Before application, I sometimes warm a small amount of foundation between clean fingertips. I start in the center of the face and blend outward in a thin layer.

    Is a Damp Sponge Better Than a Brush for Dry Skin?

    A damp makeup sponge works well when flakes are visible because I can press or bounce foundation onto the skin instead of dragging it across the surface. This keeps coverage light.

    A soft brush can also work with gentle stippling, but I avoid aggressive buffing. If I need more coverage, I add a second thin layer only where needed.

    How Should I Apply Concealer, Blush, and Bronzer?

    How Should I Apply Concealer, Blush, and Bronzer

    I use a small amount of creamy or hydrating concealer and tap it into areas that need extra coverage. Thick layers under the eyes can settle into fine lines.

    For the eye area, I use the same light-handed approach described in this techniques to makeup for hooded eyes step by step, especially when layering concealer and other complexion products around the eyes.

    For blush and bronzer, I often favor cream, liquid, or gel textures. I press them over foundation instead of repeatedly swiping so the base underneath stays smooth.

    Should I Use Setting Powder on Dry Skin?

    I avoid powdering my entire face. Instead, I spot-set only where makeup tends to crease or become shiny, such as the sides of the nose, parts of the T-zone, or a small area beneath the eyes.

    I use a tiny amount of finely milled powder with a small fluffy brush. Heavy baking can absorb too much surface moisture and make dry patches stand out.

    How Do I Fix Flaky Foundation Without Starting Over?

    If makeup starts looking tight or powdery, I use a light hydrating or luminous mist, let it settle, and gently press the skin with a damp sponge. This can help cream layers look more unified.

    If the problem keeps happening, I can also follow a more detailed  techniques on how to keep foundation from clinging to dry patches for additional preparation and application techniques.

    If one patch becomes flaky, I do not add another thick layer. I remove a tiny amount of excess product if needed and blend the surrounding foundation back over the spot. Spot correction usually looks more natural than reapplying the entire face.

    What Mistakes Make Dry Makeup Look Cakey?

    What Mistakes Make Dry Makeup Look Cakey

    The biggest problems are over-exfoliating, rushing through skincare, using very matte formulas, applying too much foundation, buffing aggressively, and covering the whole face in powder. I also avoid stacking too many skincare products immediately before makeup because simpler layers often reduce pilling.

    Frequently Asked Questions 

    1. Why does foundation cling to dry patches after moisturizing?

    The moisturizer may not have fully absorbed, loose dead skin cells may still be present, or the foundation may be too matte or heavy. Product pilling can also mimic dryness.

    2. Should I exfoliate right before makeup?

    Only when my skin feels calm, and the exfoliation is gentle. If the skin is irritated, peeling, burning, or sensitive, I skip exfoliation and focus on moisture.

    3. Is dewy foundation always better for dry skin?

    Not always, but liquid and satin-to-dewy formulas often make texture look less obvious than very matte or powder-heavy bases. Application technique matters just as much as finish.

    4. What is the fastest way to smooth flaky makeup?

    I lightly press the area with a damp sponge, remove excess buildup if necessary, and use a small amount of hydrating mist. I avoid adding another heavy layer.

    Final Thoughts

    For me, the best makeup for dry, flaky skin is about improving how each layer sits on the face rather than hiding texture with more coverage. Gentle exfoliation when appropriate, layered hydration, enough moisturizer absorption time, a dewy or gripping primer, flexible base formulas, cream color products, minimal powder, and careful touch-ups all work together.

    Real skin has texture, but a light, hydrated routine can make dry patches less noticeable and leave the complexion looking smoother and more radiant.

  • No Makeup Makeup Look for Beginners: Easy Step-by-Step Guide

    No Makeup Makeup Look for Beginners: Easy Step-by-Step Guide

    The easiest natural makeup routines do not try to erase every pore, freckle, or bit of texture. I get the best result when I focus on fresh-looking skin and keep every layer light. A no-makeup makeup look for beginners should feel forgiving, quick, and realistic enough for work, school, errands, or a casual weekend.

    Once my skincare has settled, I can usually finish this routine in under 10 minutes. The goal is simple: hydrated skin, soft color, groomed brows, defined lashes, and lips that still look like my own.

    How Do You Prep Skin for a Natural Makeup Look?

    I start with clean, moisturized skin because makeup blends more smoothly over a hydrated base.

    If my skin feels unusually dry, tight, irritated, or sensitive after using exfoliating products, I focus on restoring it before applying makeup.

    This guide on how to repair the skin barrier after over-exfoliating explains practical steps for getting the skin back to a healthier state.

    If my skin feels dry, I pay extra attention to areas where foundation tends to catch. If it is oily, I still moisturize but use a lightweight formula.

    For daytime makeup, I apply sunscreen before complexion products. The American Academy of Dermatology recommends broad-spectrum, water-resistant sunscreen with SPF 30 or higher. I let it settle before moving on.

    What Is the Best Lightweight Base for Beginners?

    Heavy full-coverage foundation can make a barely-there look harder to achieve. If my skin already looks even, I skip foundation. If I want more polish, I use a sheer skin tint, tinted moisturizer, BB cream, or a thin layer of lightweight foundation.

    If I only have regular foundation, I can mix a small amount with a compatible moisturizer to sheer it out. I apply the base through the center of my face and blend outward with my fingers or a damp sponge so natural texture can still show.

    Even with a lightweight base, uneven application or incompatible skincare underneath can cause makeup to separate. If that happens, these tips on why foundation separates on your face can help identify the likely cause.

    Where Should You Apply Concealer for a Natural Finish?

    Where Should You Apply Concealer for a Natural Finish?

    I use concealer only where I need it. I tap a small amount under the eyes where darkness is visible, around the nose for redness, and directly onto blemishes or discoloration.

    For small areas, I often use my ring finger and press rather than drag the product. I blend the edges into the surrounding skin so the coverage disappears.

    How Do You Apply Blush Without Looking Overdone?

    After evening out my complexion, I bring color back with cream or liquid blush because these textures can melt into the base.

    I start with a tiny amount of warm peach, pink, or berry on the apples of my cheeks and blend upward toward the temples. For a subtle sun-kissed effect, I tap whatever is left on my finger across the bridge of my nose.

    How Should Beginners Do Brows and Eyes?

    I brush my brows upward and outward before deciding whether they need extra color. Clear or tinted brow gel may be enough. If I see gaps, I add soft, hair-like strokes rather than filling the entire brow heavily.

    For the eyes, I curl my lashes first, then use one thin coat of brown, soft black, or clear mascara. If I want extra definition, I softly blend a neutral brown shade close to the lash line instead of drawing a sharp line.

    What Lip Products Look Most Natural?

    A tinted balm, lip oil, gloss, or sheer lip color close to my natural lip tone usually gives me the finish I want.

    Another simple trick is to dab a little cream lipstick onto the center of the lips and press them together. It creates a soft, just-bitten effect without a sharply painted edge.

    Should You Use Powder for This Makeup Style?

    Should You Use Powder for This Makeup Style

    Powder is optional. If my skin is dry, I usually leave most of my face alone so I do not remove the glow. If I get oily, I lightly dust translucent powder only through the T-zone, especially the forehead, nose, and chin.

    I also check my makeup in natural light whenever possible. Bathroom lighting can make heavy application harder to notice, while daylight quickly shows whether my base, concealer, blush, or powder looks obvious.

    How Do You Adjust the Routine for Dry, Oily, or Textured Skin?

    For dry skin, I prioritize hydration and keep cream or liquid layers thin. For oily skin, I use lightweight skincare and control shine only where necessary.

    For acne or visible texture, I avoid covering the entire face with heavy foundation. Targeted concealer usually looks more natural because the surrounding skin stays sheer.

    What Beginner Mistakes Make Natural Makeup Look Heavy?

    The biggest mistake is adding more product before the first layer has been properly blended. Thin layers are easier to control and build.

    I also avoid making every feature equally strong. Bold brows, heavy mascara, full foundation, bright blush, and sharply lined lips can overpower a minimal look.

    How Can You Do This Look in Five Minutes?

    How Can You Do This Look in Five Minutes

    When I am short on time, I simplify the routine to sunscreen, sheer coverage where needed, spot concealer, cream blush, brushed brows, curled lashes with one coat of mascara, and a tinted lip product. I skip anything my face does not need that day.

    That flexibility is why I think a no-makeup makeup look for beginners works so well. It does not depend on perfect technique or a long product list. It simply makes me look polished while still looking like myself.

    Frequently Asked Questions 

    1. Can I Do This Without Foundation?

    Yes. I often skip foundation when my skin tone already looks fairly even and use concealer only on redness, blemishes, or dark areas.

    2. What Is the Difference Between Natural Makeup and No-Makeup Makeup?

    Natural makeup can still include noticeable shadow, liner, or lip color. No-makeup makeup aims to make the makeup itself much less noticeable.

    3. How Do I Make Minimal Makeup Last All Day?

    I let skincare settle, apply thin layers, avoid excess product, and use powder only where oil tends to break through.

    4. Is This Routine Good for Someone Who Has Never Worn Makeup?

    Yes. Most steps are optional, mistakes are easy to blend out, and the technique focuses on subtle enhancement rather than precise full-glam application.

    Final Thoughts

    For me, the best natural makeup is the kind that still lets my real skin show through. I do not need heavy foundation, sharp contour, or a long list of products to look polished. A light base, targeted concealer, soft blush, groomed brows, defined lashes, and a natural lip color can make a noticeable difference without making the makeup feel obvious.

    The key is to work in thin layers and stop before the look becomes too perfected. When I focus on enhancing rather than covering, the result feels fresher, faster, and much easier to recreate every day.

  • Makeup Routine for Oily Skin That Won’t Melt by Noon

    Makeup Routine for Oily Skin That Won’t Melt by Noon

    By midday, I used to notice the same frustrating pattern: extra shine across my forehead, foundation disappearing around my nose, and powder starting to look heavier every time I touched up. 

    I eventually realized that lasting makeup on oily skin is less about piling on matte products and more about controlling each layer from the start. My makeup routine for oily skin now focuses on lightweight hydration, strategic priming, thin complexion layers, targeted powder, and smarter touch-ups so my base stays fresh without looking dry, flat, or cakey.

    How Should I Prep Oily Skin Before Makeup?

    I start with a gentle foaming or gel cleanser to remove oil, sweat, and residue without scrubbing. Dermatologists recommend gentle cleansing and note that oily skin still needs moisture. Oil-free and non-comedogenic products can also suit acne-prone skin.

    If my skin tolerates it, I may use a lightweight BHA or pore-refining toner, but I treat toner as optional. Next, I apply a thin layer of lightweight moisturizer. For daytime wear in the US, I finish with broad-spectrum SPF 30 or higher and let my skincare settle before makeup.

    Does the Setting-Spray Sandwich Method Work for Oily Skin?

    On long workdays, humid summer days, or special occasions, I sometimes use the “sandwich” technique. Once skincare has settled, I mist a light layer of setting spray over the face and let it dry.

    Then I press mattifying or pore-blurring primer mainly into my T-zone—the forehead, nose, sides of the nose, and chin. I do not automatically cover my whole face because targeted shine control helps me avoid an excessively matte finish.

    How Do I Apply Foundation Without Making Oily Skin Cakey?

    How Do I Apply Foundation Without Making Oily Skin Cakey?

    I choose a water-based, natural-matte, matte, or long-wear foundation and apply it in thin, buildable layers.

    For a lighter, more understated finish, I can also follow a natural makeup look step-by-step approach while keeping foundation layers thin and targeted.

    I start near the center of my face and blend outward with a damp sponge or stippling brush. Pressing and tapping gives me a smoother result than repeatedly dragging a tool across the skin.

    I add lightweight liquid concealer only where I need it, such as under my eyes or over blemishes. If I am using the sandwich method, I follow the liquid and cream products with another fine mist of setting spray and let it dry before applying powder.

    How Much Powder Should I Use on an Oily T-Zone?

    I press loose translucent setting powder into my forehead, nose, chin, and other high-shine areas with a powder puff. I may lightly bake extremely oily areas for a special occasion, but I keep baking optional because too much powder can emphasize pores and skin texture.

    For blush, bronzer, and highlighter, powder formulas are easy for me to manage on very oily skin. I can still use cream formulas, but I apply them sparingly and set strategically instead of assuming every cream product will automatically slide off.

    How Do I Stop Eye Makeup and Lip Color From Smudging?

    How Do I Stop Eye Makeup and Lip Color From Smudging?

    I keep heavy skincare away from my eyelids, use a small amount of matte eye primer, and lightly set it when necessary. Eye primer can help reduce creasing and movement when my eyelids become oily. This lighter approach can also suit skincare for aging skin, where excessive product around the eyes may emphasize texture.

    In heat and humidity, I prefer long-wearing gel or waterproof eyeliner and tubing or waterproof mascara if smudging is a recurring problem.

    For my lips, I apply thin layers of long-wear or transfer-resistant color and allow them to set. A very light dusting of translucent powder around the lip edge can also help limit transfer.

    I finish my entire face with an even mist of oil-control or long-wear setting spray. An X-and-T spraying pattern can help distribute the mist, but I avoid soaking my skin with more spray than I need.

    What Should I Do When My Face Gets Oily During the Day?

    My most important touch-up rule is simple: blot before adding more powder. Applying powder directly over a visible layer of oil can make foundation look thick, uneven, and cakey.

    I gently press blotting paper onto my forehead, nose, and chin without rubbing. After blotting, I add only a small amount of powder wherever shine remains.

    This technique is especially useful during humid US summers, outdoor events, long commutes, and days spent moving repeatedly between heat and air conditioning.

    Why Does Foundation Separate Around My Nose?

    My nose is often the first place where my makeup breaks down because the area combines natural oil, visible pores, facial movement, and frequent touching.

    I use less moisturizer, primer, foundation, and powder there than I might instinctively apply. If my makeup separates later, I blot the oil first, gently press the remaining foundation back into place, and add a trace of powder only when necessary.

    Adding another thick coat of foundation usually makes the separation more noticeable rather than fixing it.

    What Mistakes Make Oily-Skin Makeup Wear Off Faster?

    What Mistakes Make Oily-Skin Makeup Wear Off Faster

    The biggest mistake I avoid is using too much of everything. Thick moisturizer followed by heavy primer, full-coverage foundation, and lots of powder can create a bulky surface that starts looking textured once natural oils emerge.

    I also do not skip moisturizer solely because my skin is oily. Instead, I choose a lightweight formula and give it time to absorb before moving on to makeup.

    Even when my skin is oily, I still pay attention to areas that may become dehydrated or flaky, since the right makeup for dry flaky skin techniques can help me adjust my base when my skin needs more moisture.

    At night, I remove my makeup completely before going to bed, particularly when I am prone to breakouts.

    Frequently Asked Questions 

    1. How Long Should a Makeup Routine for Oily Skin Last?

    There is no universal number of hours because wear depends on natural oil production, climate, activity, formulas, and application. I concentrate on thin layers, strategic setting, and blot-first touch-ups rather than expecting completely matte skin from morning until night.

    2. Should I Put Powder on Before Foundation?

    A very light dusting of loose powder over the T-zone can work as an optional oil-control technique. Some makeup artists use it to absorb surface oil before foundation, but too much powder underneath the base can create patchiness.

    3. Is Matte Foundation Always Best for Oily Skin?

    Not necessarily. Matte and natural-matte formulas can reduce visible shine, but technique matters just as much. I would rather wear a thin layer of a compatible foundation than a thick layer chosen solely because the label says matte.

    4. How Can I Keep Oily-Skin Makeup From Looking Flat?

    I set my T-zone more thoroughly while using less powder on calmer areas such as my outer cheeks. That targeted technique controls unwanted shine without removing every bit of dimension from my complexion.

    Final Takeaway

    When I want my makeup to survive a long US workday, hot summer weather, or an evening out, I rely on balance rather than excessive mattifying. I cleanse gently, hydrate lightly, let sunscreen settle, prime strategically, build foundation and concealer in thin layers, set my T-zone, and finish with setting spray.

    Blotting before repowdering, using less product around my nose, and controlling oil only where necessary have made the biggest difference in my makeup routine for oily skin. The result looks smoother and fresher without the heavy, cakey finish that often comes from trying to cover every sign of natural shine.

  • Makeup Routine for Beginners Step by Step: Easy Everyday Guide

    Makeup Routine for Beginners Step by Step: Easy Everyday Guide

    Learning makeup should not feel complicated. I find it easier to think in four phases: prepare the skin, create an even base, define the eyes and brows, then finish with cheeks and lips. This makeup routine for beginners step by step, keeps each stage simple while explaining why it matters.

    For a US audience dealing with dry winters, humid summers, indoor heating, and air-conditioning, flexibility matters. Your skin type, climate, and preferred finish should guide how much makeup you use.

    How Should Beginners Prepare Their Skin Before Makeup?

    Step 1: Cleanse and Moisturize

    Start with clean skin, then moisturize. Hydrated skin usually helps makeup spread evenly and reduces dry or patchy areas. Let skincare settle for a few minutes before continuing so the next layers are less likely to pill or slide.

    Step 2: Apply Sunscreen During the Day

    For daytime makeup, apply broad-spectrum sunscreen before makeup and give it time to set. This helps create a stable base while keeping sun protection part of your daily routine.

    Step 3: Use Primer Only Where You Need It

    Primer is optional. I would use it only when it addresses visible pores, excess shine, dryness, or short wear time. A small amount through the T-zone or other problem areas is often enough.

    What Is the Correct Order for a Smooth Makeup Base?

    What Is the Correct Order for a Smooth Makeup Base?

    Step 4: Apply a Light, Even Base

    Start with a small amount of foundation, BB cream, or another light base and blend from the center of the face outward. A damp sponge, clean fingers, or a brush can all work. Build coverage gradually instead of applying a thick layer at once.

    For a natural-looking shade, compare it against your jawline and neck in natural light. Check both depth and undertone so the face does not look noticeably different from the neck.

    Step 5: Apply Concealer After the Base

    I generally apply concealer after foundation because the base may already cover some redness, dark circles, or blemishes. Dab a small amount only where extra coverage remains and tap it into the skin.

    Step 6: Set Only the Areas That Need Powder

    Use a small amount of powder under the eyes or through the T-zone if those areas crease or become shiny. Dry skin may need very little, while oily skin may benefit from slightly more. Too much can make the finish look heavy.

    Step 7: Add Bronzer and Blush Gradually

    Sweep bronzer lightly where you want warmth, then add blush for fresh color. I prefer building both slowly because excess pigment is harder to correct. Soft blending matters more than strong color.

    How Can Beginners Make Eye Makeup Look Natural?

    How Can Beginners Make Eye Makeup Look Natural?

    Step 8: Fill Brows With Light Strokes

    Brush the brows into place and fill only sparse areas. Use short, hair-like strokes rather than creating one solid block of color. Keeping the inner portion softer usually looks more natural.

    Step 9: Keep Eyeshadow Simple

    For everyday makeup, one or two neutral shades are enough. Sweep a soft neutral shade across the lid and blend a slightly deeper shade through the crease if you want more dimension. Blend until there are no obvious lines.

    Step 10: Add Eyeliner and Mascara

    Eyeliner is optional. If you use it, keep it close to the upper lash line. Finish with mascara from the roots toward the tips. One or two light coats usually look cleaner than several heavy layers.

    How Should Beginners Finish the Look?

    Step 11: Keep the Lips Simple

    Choose a comfortable lip finish that suits the look, whether that means sheer color, gloss, or a more defined neutral shade. Softer finishes are usually easier for beginners to apply and maintain.

    Step 12: Use Setting Spray If Needed

    Setting spray is optional. Hold it away from the face, mist lightly, and let it dry naturally. It can help the layers look more blended and may improve wear during long days or warmer weather.

    What Beginner Makeup Mistakes Should You Avoid?

    The biggest mistake I see is applying too much too soon. Thick foundation, heavy concealer, excessive powder, dark brows, and strong blush make blending harder.

    Another mistake is copying someone else’s routine without considering skin type or climate. Makeup that works during a humid Florida summer may need different preparation from makeup worn during a dry Colorado winter.

    Do not rush blending either. Soft edges make complexion makeup, eyeshadow, bronzer, and blush look more polished.

    How Can Beginners Do Makeup in Five Minutes?

    How Can Beginners Do Makeup in Five Minutes?

    When I am short on time, I even out only the areas that need coverage, lightly define the brows and lashes, add a little cheek color, and finish the lips. Choosing the best drugstore makeup products makes this routine affordable, simple, and easy to complete without sacrificing a polished look. This quick routine works well for busy workdays, college mornings, school runs, or casual weekends.

    Frequently Asked Questions (FAQs)

    1. What is the easiest makeup routine for beginners step by step?

    Start with clean, moisturized, sun-protected skin, create a light base, add concealer where needed, set areas that crease, define the brows and eyes, add cheek color, finish the lips, and use setting spray only when useful.

    2. Should concealer go before or after foundation?

    For most beginners, foundation first is easier because it may already cover some discoloration. You can then use less concealer and apply it only where extra coverage is needed.

    3. Do beginners need primer and setting spray?

    No. Both are optional. Use them when they address a real concern such as shine, texture, dryness, or makeup longevity.

    4. Should makeup always be layered from lightest to heaviest?

    Not necessarily. Formula matters. Cream, liquid, and powder textures behave differently, and some people prefer doing eye makeup before their complexion. Think of the standard order as a beginner-friendly framework rather than an unbreakable rule.

    Final Thoughts

    A good beginner routine should make makeup easier, not more intimidating. I recommend learning one technique at a time, keeping layers thin, and adjusting the routine to your skin and environment. Once the basics feel natural, you can experiment with different finishes and levels of definition.

  • Makeup That Lasts All Day: A Long-Wear Routine That Works

    Makeup That Lasts All Day: A Long-Wear Routine That Works

    A fresh makeup look should not disappear before lunch. Heat, humidity, commuting, office air conditioning, facial oil, and everyday touching can make foundation fade, crease, or separate. I have found that how to make makeup last all day is less about piling on more product and more about preparing the skin well, applying thin layers, and setting only where extra hold is needed.

    Why Does Makeup Fade, Separate, or Crease?

    Makeup usually breaks down because oil, sweat, movement, or excess product weakens its grip. Heavy moisturizer can leave skin too slick, while dry patches can make foundation cling unevenly. Hot, humid weather can speed up fading during US summers.

    Formula compatibility matters too. If primer and foundation pill, separate, or slide when layered, I simplify the routine or change one formula.

    How Should I Prep My Skin Before Makeup?

    I start with clean skin and a lightweight moisturizer suited to my skin type. During the day, I apply sunscreen and give my skincare time to absorb before starting makeup. Applying foundation while the surface still feels wet or greasy can make later layers move.

    Primer should solve a specific problem. On an oily T-zone, I may use a gripping or mattifying primer. On dry skin, I prefer a smoother, more hydrating base. I keep the layer thin before foundation.

    How Do I Apply Foundation So It Lasts Longer?

    How Do I Apply Foundation So It Lasts Longer?

    Thin, buildable layers usually wear better than one thick coat. I apply a small amount where I need coverage most and blend outward.

    Instead of swiping repeatedly, I press and push foundation into the skin with a damp sponge or dense brush. If I need extra coverage, I build another light layer only over redness or discoloration.

    I also avoid loading unnecessary product onto high-movement areas such as the sides of the nose and upper lip. If those spots look even, less product often means less separation later.

    What Is the Sandwich Setting Method?

    The sandwich-setting technique adds hold without relying on a heavy final layer of powder. After liquid and cream complexion products, I lightly mist setting spray and let it settle. Then I press a small amount of translucent loose powder into areas that crease or become oily, such as the T-zone, around the nose, and under the eyes when needed. This lighter approach can be especially useful when wearing the best concealer for mature skin, since too much powder may emphasize fine lines or dryness.

    After blush, bronzer, eye makeup, and lips are finished, I use another light mist of setting spray. Some makeup artists also mist between selected steps for very long days, but I avoid soaking the skin.

    How Can I Keep Blush, Bronzer, Eyes, and Lips From Fading?

    For extra staying power, I layer a light cream or liquid blush or bronzer under a small amount of powder in a similar shade. The first layer gives color and grip, while the powder helps set it.

    For eye makeup, I keep excess skincare away from the lids and use eye primer if creasing is common. Waterproof eyeliner and tubing or water-resistant mascara can help reduce smudging in sweat and humidity.

    For lips, longer-wear or transfer-resistant formulas generally hold up better than very creamy textures.

    How Do I Make Makeup Last on Oily or Dry Skin?

    How Do I Make Makeup Last on Oily or Dry Skin?

    For oily skin, I concentrate oil control where I need it most. A mattifying or gripping primer through the T-zone, thin foundation, and pressed powder can improve wear without making the entire face look flat.

    For dry skin, I prioritize hydration and use powder sparingly. Too much powder can exaggerate flakes and texture. Combination skin often benefits from more setting around the forehead, nose, and chin, with lighter powder elsewhere.

    How Do I Keep Makeup On in Heat and Humidity?

    When temperatures rise, I simplify. Heavy skincare and thick complexion layers are more likely to move once sweat appears.

    I use lighter layers and give each step time to set. Long-wear, transfer-resistant, smudge-resistant, and waterproof formulas can be useful when I expect an outdoor event, humid commute, or long summer day.

    Most importantly, I do not powder directly over sweat. I blot moisture first and then touch up only where necessary.

    How Should I Touch Up Makeup Without Making It Cakey?

    How Should I Touch Up Makeup Without Making It Cakey?

    When shine appears, I blot instead of immediately adding powder. Blotting papers or a clean tissue can remove excess oil without building extra texture.

    If foundation has shifted, I gently press the existing makeup back into place before adding anything. Only then do I use a tiny amount of concealer, foundation, or powder if coverage is still needed. I also keep my hands off my face because oils from the fingers can break down base makeup.

    For me, how to make makeup last all day comes down to controlled layering rather than maximum layering.

    FAQs About Long-Lasting Makeup

    1. Should I Use Both Setting Powder and Setting Spray?

    Yes, when used strategically. Powder helps control oil and stabilize cream or liquid makeup, while setting spray can help the finished layers meld together and improve wear.

    2. Does Primer Really Make Makeup Last Longer?

    It can, especially when it targets oiliness, texture, or poor foundation grip. I do not consider primer mandatory for every skin type, so I use it only where it improves wear or finish.

    3. How Can I Stop Makeup From Melting by Midday?

    Use lightweight skincare, let layers set, apply foundation sparingly, press instead of swipe, set oily areas, and blot before touching up. In hot weather, lighter layers usually wear better than thick ones.

    4. What Is the Best Way to Keep Makeup Fresh From Morning to Night?

    The most reliable answer to how to make makeup last all day is balanced skin prep, thin application, targeted powder, setting spray, durable eye and lip formulas, and minimal midday touch-ups.

    Final Thoughts

    Long-lasting makeup should still look like skin. I get better wear when I build coverage gradually, press products into place, and set strategically. A consistent skin care routine can also create a smoother, more balanced base for makeup, especially when it supports the skin’s hydration needs.

    The exact routine can change with oiliness, dryness, temperature, and humidity, but the core approach stays the same: prep carefully, layer lightly, set intelligently, and touch up only when needed.

  • Best Concealer for Mature Skin: Smooth, Natural Coverage

    Best Concealer for Mature Skin: Smooth, Natural Coverage

    As skin changes with age, concealer has to do more than cover dark circles. It should brighten without looking heavy, soften discoloration without settling into fine lines, and stay comfortable on drier or more textured skin. When I look for the best concealer for mature skin, I focus on hydration, flexibility, buildable coverage, and a finish that still looks like real skin.

    For mature under-eyes, I usually get the smoothest result from thin layers and a natural or softly radiant finish. Even a hydrating concealer can crease when I use too much.

    What Type of Concealer Works Best on Mature Skin?

    I generally prefer lightweight liquid or serum-like textures under the eyes because they spread easily and give me control over coverage. When choosing the best concealer for dark circles, I also look for a flexible formula that moves naturally around crow’s feet and expression lines rather than drying into a thick, rigid layer.

    Cream concealers can be useful for age spots, redness, and hyperpigmentation. I apply them only where extra pigment is needed and soften the edges instead of covering the whole area.

    Is Radiant or Matte Concealer Better for Fine Lines?

    For dry or textured mature skin, I usually choose a natural, satin, or softly radiant finish. These finishes can make the under-eye area look fresher without adding obvious shimmer.

    Very matte formulas can work for oilier skin, but I use them carefully around fine lines because powdery textures may emphasize dryness.

    What Ingredients Should I Look for in Concealer?

    What Ingredients Should I Look for in Concealer?

    Hydrating ingredients can make concealer more comfortable on dry mature skin. Hyaluronic acid and glycerin are common humectants, while squalane and other emollients can add softness and slip. I still judge the whole formula because texture and finish matter just as much as the ingredient list.

    How Should I Prep Mature Under-Eyes Before Concealer?

    Skincare comes first. I prep with a lightweight hydrating eye cream or a small amount of hyaluronic acid serum, then give it time to absorb before applying makeup.

    I avoid leaving a thick or greasy layer behind because excess skincare can make concealer slide or separate. The goal is comfortable hydration, especially if the under-eye area looks dry or crepey.

    How Much Concealer Should I Use on Mature Skin?

    Less is usually more. Instead of drawing a large triangle beneath each eye, I start with one or two tiny dots.

    I place them where shadows are strongest, usually near the inner corner and, if needed, toward the outer edge. Then I gently pat the product into the skin with my ring finger or a damp makeup sponge.

    If darkness is still visible, I add another very thin layer. Building coverage gradually usually looks smoother than applying a thick coat at once.

    How Can I Cover Dark Circles Without Looking Cakey?

    How Can I Cover Dark Circles Without Looking Cakey?

    Dark circles may look blue, purple, brown, or gray depending on skin tone and the cause of discoloration. When ordinary concealer is not enough, I prefer subtle color correction rather than piling on more product.

    Peach or warmer tones can help neutralize blue or purple shadows for many complexions. I also avoid choosing a shade that is dramatically lighter than my skin because it can create an ashy effect or emphasize puffiness.

    How Do I Stop Concealer From Creasing in Fine Lines?

    Some movement is normal because the eye area moves whenever we blink, smile, or squint. After blending, I let the concealer settle briefly and gently tap away anything that collects in a line.

    If I need powder, I avoid baking. I use a tiny dusting of finely milled, soft-focus translucent powder only where creasing occurs. A small tapered brush or triangle puff gives me better control and helps prevent a dry, heavy finish.

    How Do I Conceal Age Spots and Hyperpigmentation?

    For age spots, redness, or uneven pigmentation, I use targeted coverage. I place a small amount directly over the discoloration and blend only the edges into the surrounding skin. Changes linked to sun exposure and premature aging can make some areas more noticeable, so precise application helps maintain a natural finish.

    If I still see the spot, I add another thin layer. This avoids the mask-like effect of applying full coverage everywhere.

    What Concealer Mistakes Can Make Mature Skin Look Older?

    What Concealer Mistakes Can Make Mature Skin Look Older?

    The biggest mistake I avoid is overapplication. Thick layers are more likely to settle into lines, separate, and emphasize texture.

    I also avoid skipping moisturizer, applying too much eye cream immediately before makeup, choosing a shade that is far too light, and coating the entire under-eye area with heavy setting powder.

    FAQs About Concealer for Mature Skin

    1. Is Liquid or Cream Concealer Better for Mature Under-Eyes?

    I usually prefer a lightweight liquid formula under the eyes because it is easier to apply in thin layers. Cream formulas can be useful for dark spots or pigmentation.

    2. How Do I Keep Concealer From Settling Into Wrinkles?

    I use lightweight hydration, minimal product, gentle tapping, and only a small amount of setting powder. Thin layers tend to move more naturally with mature skin.

    3. Should I Use Setting Powder Over Concealer After 50?

    Yes, if needed, but I recommend using very little. A finely milled translucent powder applied only where concealer creases can improve wear without making the area look dry.

    4. Should Mature Skin Use a Lighter Concealer Under the Eyes?

    A slightly lighter shade can brighten, but I avoid going several shades lighter. A close match usually looks more natural and reduces the risk of an ashy finish.

    Final Thoughts

    For me, choosing the best concealer for mature skin comes down to using the right texture in the right place. I look for flexible under-eye coverage, targeted pigment for age spots, hydrating skincare underneath, and minimal powder. These choices also fit naturally into a broader approach to skin care and aging, where maintaining hydration and avoiding overly heavy products can help makeup sit more smoothly.

    Thin layers, strategic placement, and a skin-like finish can brighten dark circles and soften discoloration without hiding the natural character of mature skin.

  • Makeup for Glasses Without Foundation Rubbing Off: Easy Fixes

    Makeup for Glasses Without Foundation Rubbing Off: Easy Fixes

    Glasses can frame the face beautifully, but they can also leave two obvious bare patches where the nose pads or bridge rest. I have found that the best fix is not adding more foundation. It is reducing product at the contact points, controlling oil, and creating a thin base that can handle pressure. 

    For makeup for glasses without foundation rubbing off, I treat the nose differently from the rest of the face and focus on grip rather than coverage.

    Why Does Foundation Rub Off Under Glasses?

    Foundation usually breaks down because pressure, movement, facial oil, sweat, sunscreen, and skincare combine under the frames. Small movements create friction, while oil makes the surface more slippery. A thick layer gives the glasses even more product to pick up.

    This becomes especially noticeable during hot US summers or humid weather when the T-zone gets oilier. I keep the nose bridge lighter and drier.

    How Should I Prep My Nose Before Makeup?

    I apply skincare and sunscreen, but I use less around the nose bridge. Dry skin still needs moisture, so I do not skip moisturizer. I simply avoid leaving a greasy layer where the frames will sit.

    After letting skincare settle, I blot any shine. Then I apply a very thin layer of gripping or oil-controlling primer to the contact points.

    Can Eyeshadow Primer Stop Makeup From Rubbing Off?

    Can Eyeshadow Primer Stop Makeup From Rubbing Off?

    A tiny amount of matte, non-sticky eye primer can help where nose pads rest. Because eye primer is designed to grip pigment and resist oil, it can work as a targeted barrier. I keep the layer thin because too much primer can pill or create buildup.

    Should I Skip Foundation Where My Glasses Touch?

    If foundation always disappears from the same spots, I use almost none there. I apply my regular base elsewhere and use only the leftover product on my sponge around the nose.

    If redness still shows, I use a micro-layer of concealer instead of another coat of foundation. Less product means less makeup for the frames to lift.

    Next, I press a clean, damp makeup sponge over the bridge and sides of my nose without swiping. This lifts excess fluid and leaves a thinner layer before setting.

    How Do I Set Nose Makeup Without Making It Cakey?

    For normal or dry skin, I press a small amount of translucent setting powder into the contact areas with a puff. If my nose is very oily or transfer is severe, I may bake the area by applying more powder, letting it sit briefly, and brushing away the excess. I use this selectively because heavy baking can emphasize dryness and texture.

    I finish with setting spray and let it dry completely before putting my glasses back on. Setting spray can improve longevity, but it cannot compensate for thick foundation or constant frame movement.

    Should I Put Powder on My Glasses Nose Pads?

    Should I Put Powder on My Glasses Nose Pads?

    Some beauty tutorials recommend tapping a tiny amount of setting powder onto clean nose pads to create a drier contact surface. I consider this optional rather than essential.

    I also keep the pads and bridge clean because oil, sunscreen, and old makeup can transfer back onto fresh makeup. While alcohol in everyday life is commonly used for cleaning and disinfecting, I would use rubbing alcohol on eyewear only if the frame or nose-pad manufacturer confirms the material is alcohol-safe. Otherwise, I follow the eyewear maker’s cleaning instructions.

    How Do I Stop an Oily Nose From Ruining My Makeup?

    When shine appears, I blot first rather than immediately adding more powder. This removes surface oil without creating a thick mix of oil, foundation, and powder. After blotting, I press on a small amount of powder only if necessary.

    How Do I Fix Foundation After My Glasses Rub It Off?

    I do not apply fresh foundation directly over an oily, separated patch. I blot the area, smooth the edges, then press a tiny amount of concealer or foundation into the bare spot and set it lightly.

    If my glasses constantly slide down, I also have the fit checked by an optician. Repeatedly pushing frames back into place creates more friction, while very tight frames can leave deeper marks.

    What Eye and Face Makeup Works Best With Glasses?

    What Eye and Face Makeup Works Best With Glasses?

    Glasses can cast shadows under the eyes, so I use a light layer of brightening concealer instead of heavy coverage that may crease. I place blush slightly higher on the cheekbones rather than too close to the nose.

    For lashes, I curl them before mascara and favor definition and volume over extreme length so they are less likely to brush the lenses. These adjustments keep the look balanced around the frames.

    Frequently Asked Questions (FAQs)

    1. How do I stop foundation from rubbing off on my glasses?

    Use very little foundation where the frames touch, let skincare absorb, apply a thin primer, lift excess makeup with a damp sponge, and press setting powder into the contact points.

    2. Can I use concealer instead of foundation under nose pads?

    Yes. A micro-layer of concealer can cover redness while leaving less product for the frames to disturb.

    3. Why do my glasses leave marks after I set my makeup?

    Pressure, friction, oil, sliding frames, or too much product can still create marks even when makeup is powdered.

    4. Do I need to bake my nose when wearing glasses?

    No. Lightly pressed setting powder works for many people. Baking is better reserved for very oily skin or stubborn transfer.

    Final Thoughts

    The most effective approach is built around strategic placement. I use lighter skincare on the contact area, a thin gripping primer, minimal foundation, a damp sponge to remove excess, and targeted powder according to my skin type. These small adjustments also help make makeup that last all day by reducing unnecessary buildup in areas where products are most likely to shift.

    I also keep my frames clean, let setting spray dry fully, blot oil before touching up, and check the glasses fit if they constantly slide. When I want makeup for glasses without foundation rubbing off, reducing friction and excess product gives me a smoother, more natural result than simply adding more layers.

  • Smooth Base, No Flakes: How to Keep Foundation From Clinging to Dry Patches

    Smooth Base, No Flakes: How to Keep Foundation From Clinging to Dry Patches

    Nothing ruins a smooth makeup base faster than foundation collecting around flaky skin on my nose, cheeks, chin, or forehead. I have found that how to keep foundation from clinging to dry patches has much less to do with adding more coverage and much more to do with preparing the skin correctly.

    When my complexion is dry, dehydrated, or slightly flaky, I focus on gentle exfoliation, layered hydration, enough absorption time, thin foundation layers, and pressing rather than rubbing the product into my skin. These small changes can make foundation look noticeably smoother without trying to hide normal skin texture.

    Why Does Foundation Cling to Dry and Flaky Skin?

    Foundation sticks to dry patches because loose skin cells create an uneven surface. Pigment collects around the edges of those flakes, making texture appear more obvious than it did before makeup.

    Dry skin and dehydrated skin are also different. Dry skin generally lacks enough natural oil, while dehydrated skin lacks water. That means even someone with oily or combination skin can experience flaky foundation. Supporting hydration and protecting skin elasticity can also help maintain a smoother-looking surface over time.

    In the U.S., cold winter air, indoor heating, low-humidity climates, and constant air conditioning can make this problem even more noticeable. Harsh cleansers, excessive exfoliation, matte makeup, too much powder, or a disrupted skin barrier can add to the problem.

    How Should I Exfoliate Before Applying Foundation?

    When loose flakes are the problem, gentle exfoliation can create a smoother surface. I prefer mild chemical exfoliation as part of my regular skincare routine rather than aggressively scrubbing my face immediately before makeup.

    Ingredients such as lactic acid can help remove excess dead skin for some people, but exfoliation should not become an everyday emergency fix. If my skin feels red, raw, tight, cracked, or irritated, I skip acids and physical scrubs and focus on hydration and barrier-supportive skincare instead.

    Over-exfoliation can make foundation cling even more because irritated skin often becomes rougher and more sensitive.

    How Can I Hydrate My Skin Before Foundation?

    How Can I Hydrate My Skin Before Foundation

    Hydration works best for me when I layer it rather than applying one extremely heavy cream immediately before makeup.

    I may begin with a hydrating serum containing humectants such as hyaluronic acid or glycerin. Applying these types of products according to their directions can help the skin hold onto moisture.

    I then follow with a comfortable moisturizer. Ceramides, glycerin, hyaluronic acid, squalane, and other moisturizing ingredients can all be useful depending on my skin type and the overall formula.

    However, more skincare is not always better. A thick, slippery layer can make foundation move, separate, or pill.

    How Long Should I Wait After Moisturizer Before Applying Makeup?

    I generally allow moisturizer to settle for around five to ten minutes before applying foundation.

    This gives my skincare time to absorb instead of leaving several wet layers underneath my makeup. If foundation goes on while moisturizer or serum is still sitting heavily on the surface, the products can sometimes roll together, separate, or form tiny flakes known as pilling.

    I want my skin to feel soft and hydrated before makeup, but not greasy or overly wet.

    Should I Use Primer When My Skin Has Dry Patches?

    A hydrating or gripping primer can add another smoothing layer, especially when my foundation tends to disappear or separate during the day.

    I avoid automatically covering flaky areas with thick mattifying or heavy pore-filling primers. Those formulas can work beautifully for oily areas, but they may emphasize dryness when the skin already lacks moisture.

    A lightweight hydrating primer usually makes more sense when dryness is the main concern. Still, primer cannot replace proper skincare. If my skin is visibly peeling, adding another makeup layer will not completely disguise it.

    What Foundation Finish Works Best for Dry Skin?

    What Foundation Finish Works Best for Dry Skin?

    I usually choose natural, satin, radiant, or dewy finishes when my skin is noticeably dry. Flexible formulas tend to make surface texture less obvious than very flat matte foundations.

    When choosing the rest of my makeup, I also consider how eye makeup interacts with the overall finish, especially when creating a soft, balanced make up look  for hooded eyes.

    Coverage also matters. A full-coverage formula is not automatically better for flaky skin. The thicker the foundation layer becomes, the easier it is for pigment to accumulate around rough areas.

    When choosing a foundation for dry or textured skin, I also consider formulas designed for mature skin, since the right foundation for mature skin can help create a more comfortable, natural-looking finish.

    I prefer starting sheer and building coverage only where redness, pigmentation, or uneven tone actually needs it.

    Is a Damp Sponge Better Than a Brush for Dry Skin?

    A damp makeup sponge is one of my favorite tools when dryness is noticeable.

    Dense brushes can sometimes disturb loose flakes when I repeatedly buff them across the skin. Rather than dragging foundation over textured areas, I thoroughly squeeze excess water from my sponge and gently bounce or press the makeup into place.

    This does not mean brushes are always unsuitable for dry skin. A soft brush can still work when I use light stippling motions. The important part is avoiding repeated friction.

    Where Should I Apply Foundation First?

    I put most of my foundation toward the center of my face, where redness and uneven tone are often more noticeable, then blend outward.

    When I reach especially dry areas around my nose, mouth, or cheeks, I use whatever small amount remains on my sponge rather than adding a fresh pump of foundation.

    This low-product approach prevents excess pigment from collecting around flakes.

    How Do I Stop Foundation From Becoming Cakey?

    For me, thin layers make the biggest difference.

    If a dry patch is visible through my first application, covering it with another thick layer rarely makes it disappear. Instead, more foundation usually makes the texture easier to see.

    I apply a light first layer and add a second small amount only where I genuinely need more coverage. This keeps the complexion more skin-like and prevents makeup from becoming heavy.

    Should I Put Setting Powder Over Dry Skin?

    Should I Put Setting Powder Over Dry Skin?

    I avoid heavily powdering areas that are already dry.

    Instead, I concentrate powder where makeup actually tends to move or become shiny, such as the center of my forehead, nose, or chin. I may leave very dry cheeks almost powder-free.

    A hydrating setting spray can also help take down an overly powdery appearance and make makeup look less flat. I still use it lightly rather than soaking my face.

    How Can I Fix Foundation That Is Already Sticking to Dry Patches?

    If I notice flaky foundation after finishing my makeup, I do not immediately add another layer.

    I gently press the area with a clean, slightly damp sponge. This can remove excess pigment and soften the edges of the patch without disturbing the entire base.

    If necessary, I use a tiny amount of moisturizer around the affected area and press carefully rather than rub. Too much moisturizer over finished makeup can break the foundation apart, so less is better.

    Community makeup discussions often reach a similar conclusion: good moisturization and gentle application frequently make a bigger difference than simply changing foundation.

    Frequently Asked Questions 

    1. Why does foundation look flaky even after I moisturize?

    Your skin may still have loose surface flakes, your skincare may not have absorbed fully, or your foundation may be too matte or heavy. Applying too much moisturizer can also cause slipping or pilling rather than solving dryness.

    2. Can dehydrated skin make foundation patchy?

    Yes. Dehydrated skin lacks water and can feel tight or look textured even when it produces plenty of oil. A combination of hydration, gentle skincare, and thinner makeup layers often creates a smoother finish.

    3. How to keep foundation from clinging to dry patches throughout the day?

    I start with properly hydrated skin, allow skincare to absorb, apply minimal foundation over flaky areas, press it in with a damp sponge, and avoid excessive setting powder. If dryness appears later, I gently press the area instead of piling on more makeup.

    Final Thoughts

    Once I understood how to keep foundation from clinging to dry patches, I stopped treating extra foundation as the solution. A smoother base begins with comfortable skin.

    I get better results when I exfoliate gently when appropriate, layer hydration without overloading my face, wait five to ten minutes after moisturizing, choose a flexible foundation finish, and apply thin layers with pressing motions. Using less product around flaky areas and limiting powder also helps my makeup remain natural-looking throughout the day.

    Real skin will always have some texture, and I do not expect foundation to erase it. My goal is simply to keep my makeup from drawing unnecessary attention to dryness.