Blog

  • Lip Care Routine for Dry Lips: A Daily Reset That Actually Works

    Lip Care Routine for Dry Lips: A Daily Reset That Actually Works

    Your lips do not have the oil glands that help much of the rest of your skin stay naturally lubricated. That small anatomical difference helps explain why wind, indoor heating, sun exposure, lip licking, or the wrong balm can quickly turn tight lips into painful peeling and cracks.

    A practical lip care routine for dry lips should do three things well: limit irritation, restore moisture, and reduce water loss. Most people do not need a shelf full of treatments. They need a few simple steps repeated consistently.

    Why Dry Lips Keep Coming Back

    Chapped or inflamed lips are often described medically as cheilitis. Cold or dry air, sun exposure, frequent lip licking, dehydration, allergies, certain medications, and some medical conditions can all contribute.

    That means drinking more water alone will not necessarily solve the problem. If dry winter air is continually pulling moisture from the lips, or a fragranced balm is causing irritation every few hours, hydration cannot remove the trigger.

    The American Academy of Dermatology’s dry-lip guidance also makes an important point: burning, stinging, or tingling after applying a lip product can signal irritation rather than effectiveness.

    The goal should be barrier recovery, not forcing every visible flake away.

    The Three-Step Lip Repair Method

    A useful routine is easier to remember when reduced to three functions.

    Step What to do Why it matters
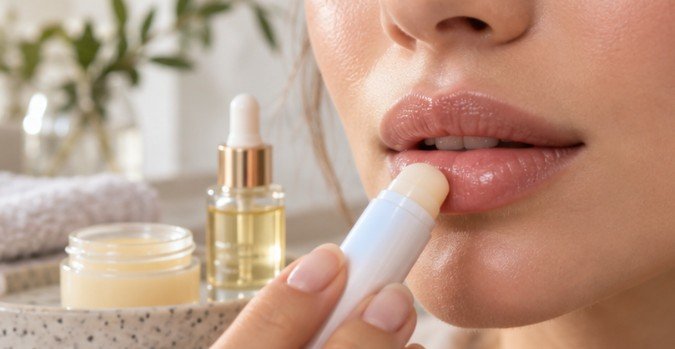
    Hydrate Apply a bland moisturizing balm Supports moisture in the lip surface
    Seal Add petrolatum or another thick ointment when needed Reduces moisture loss and protects cracked areas
    Protect Wear an SPF 30+ lip product outdoors Reduces UV exposure and further damage

    The AAD recommends applying a non-irritating lip balm several times daily and using a thick ointment such as white petroleum jelly when lips are extremely dry or cracked.

    MedlinePlus guidance on chapped lips similarly recommends petrolatum as a straightforward option for soothing chapping.

    Morning: Keep the Routine Gentle

    Morning Keep the Routine Gentle

    Clean Without Scrubbing

    You normally do not need a special lip cleanser. After brushing your teeth, rinse away toothpaste residue, dampen the lips with water, and pat gently.

    If a loose piece of skin lifts easily with a soft damp cloth, it can be removed carefully. Avoid scrubbing until the surface feels artificially smooth. Repeated rubbing can aggravate already damaged tissue.

    Apply a Simple Moisturizing Product

    Look for formulas that feel comfortable immediately. Ingredients commonly used in moisturizing or protective products include petrolatum, glycerin, mineral oil, dimethicone, ceramides, and shea butter.

    Humectants such as glycerin can help attract water, while occlusive ingredients help keep that moisture from escaping. For badly chapped lips, a simple ointment may therefore be more useful than a complicated cosmetic treatment.

    If a product causes persistent burning, itching, or increasing tightness, stop using it.

    Finish With SPF

    Lip sunscreen should not be reserved for beach days. UV exposure can contribute to chronically dry, damaged lips, particularly the lower lip.

    The American Cancer Society recommends SPF 30 or higher for lip protection and advises using a sunscreen-containing lip balm when outside.

    Choose a broad-spectrum formula you will actually reapply. Zinc oxide and titanium dioxide are common mineral sunscreen filters found in lip products.

    Daytime: Break the Lick-and-Dry Cycle

    Licking dry lips feels helpful for a few seconds but can make the problem continue. Saliva repeatedly contacting the skin may create irritation, while evaporation leaves the surface dry again.

    DermNet describes lip-licker’s dermatitis as an irritant contact dermatitis caused by repeated saliva exposure.

    Reapply balm after meals, drinks, or whenever the lips begin feeling tight. Outdoors, follow the sunscreen label and reapply your SPF lip product regularly; commonly recommended sun-protection guidance calls for reapplication around every two hours.

    Dry indoor environments matter too. Running a humidifier during periods of heavy indoor heating can help reduce exposure to extremely dry air.

    Night: Give the Barrier Time to Repair

    Night Give the Barrier Time to Repair

    Bedtime is a good opportunity for a heavier protective layer because eating, drinking, and wiping or hydro lip fillers are less likely to remove it.

    Apply a generous layer of a plain ointment before sleeping. You can use an overnight lip mask, but check the formulation rather than assuming that a product labeled “repair” or “sleeping mask” is automatically gentle.

    Menthol, camphor, eucalyptus, fragrance, and certain flavorings can irritate already chapped lips in some people.

    Exfoliation should also be limited. If the lips are mildly flaky rather than cracked or bleeding, very gentle use of a damp cloth occasionally may be enough. Active fissures need protection, not polishing.

    Check More Than Your Lip Balm

    Persistent dryness is sometimes triggered by something that does not look like a lip treatment.

    Lipsticks, flavored balms, toothpaste, mouthwash, dental products, foods, and cosmetics can contribute to irritant or allergic cheilitis in susceptible people.

    If symptoms began after introducing a new product, try removing that exposure rather than continuously adding more moisturizers.

    A useful troubleshooting checklist is simple:

    1. Stop products that sting or tingle.
    2. Use one fragrance-free moisturizing balm.
    3. Add petrolatum at night.
    4. Stop licking and picking.
    5. Use SPF 30+ outdoors.
    6. Review recently introduced toothpaste, cosmetics, and lip products.

    This approach makes it easier to identify what is actually helping.

    When Dry Lips Need Medical Attention

    Not every case of peeling lips is ordinary weather-related chapping.

    When Dry Lips Need Medical Attention

    The NCBI clinical review of cheilitis explains that lip inflammation may result from irritants, allergic reactions, chronic sun exposure, nutritional deficiencies, dermatologic conditions, and systemic illnesses.

    Seek medical advice if your lips continue worsening despite routine care, repeatedly bleed, remain swollen, develop persistent sores, or fail to improve over several weeks.

    Long-term sun exposure deserves particular attention. Chronic UV damage can cause actinic cheilitis, a potentially precancerous change that may appear as persistently rough, dry, scaly, or ulcerated areas, particularly on the lower lip.

    For additional patient guidance, Cleveland Clinic’s overview of chapped lips explains common causes, treatment options, and circumstances that warrant professional evaluation.

    Frequently Asked Questions

    1.How often should I apply lip balm for dry lips?

    Apply it whenever your lips become dry and after eating or drinking. A thicker ointment before bedtime can provide longer-lasting protection overnight.

    2. Should I exfoliate peeling lips every day?

    No. Frequent scrubbing may increase irritation. If peeling is mild, exfoliate very gently and occasionally. Avoid exfoliation entirely when your lips are cracked, painful, or bleeding.

    3. What is the best lip care routine for dry lips during winter?

    Use a bland moisturizing balm during the day, SPF 30+ outdoors, a thicker ointment at night, and consider a humidifier when indoor air is very dry.

    4. Can chronically dry lips indicate a medical problem?

    Yes. Persistent cheilitis can sometimes involve allergies, eczema, medications, nutritional issues, infection, or sun damage. Have ongoing or worsening symptoms evaluated by a healthcare professional.

    The Takeaway: Calm Lips Beat Perfect Lips

    The easiest mistake to make with dry lips is assuming they need more products. Often, recovery begins by doing less: remove irritants, stop licking and picking, shield the lips from sun and dry air, and rely on one or two simple protective products.

    A dependable lip care routine for dry lips is not designed to make every flake disappear overnight. It creates the conditions that let the lip barrier repair itself. Remember the simplest test when choosing a product: your lips should feel calmer after you apply it, not hotter, tighter, or more irritated.
  • How Long Do Hydro Lip Fillers Last? A Realistic Timeline

    How Long Do Hydro Lip Fillers Last? A Realistic Timeline

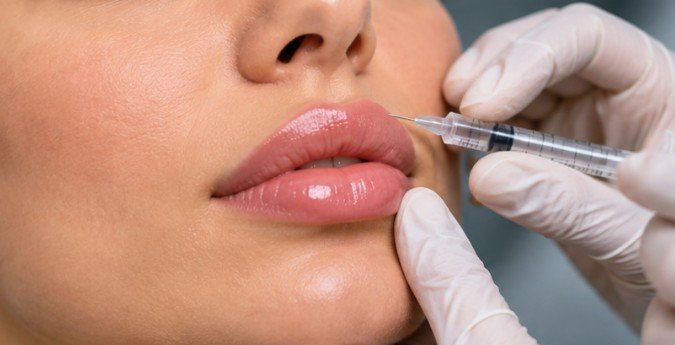
    For most people asking how long do hydro lip fillers last, the useful answer is about 6 to 12 months for hyaluronic acid (HA) lip filler, although some products and patients retain visible improvement beyond a year. The change is gradual; filler does not suddenly “expire.”

    There is also a naming issue worth knowing. “Hydro lip filler” is not a standardized FDA filler category. In U.S. clinics, the phrase is often used informally for HA-based lip injections promoted for hydration, softness, or natural-looking volume. The FDA instead identifies specific filler materials and approved products, including hyaluronic acid fillers. Before comparing longevity, ask for the exact product name.

    Why 6 to 12 Months Is the Best General Estimate

    The American Academy of Dermatology says HA gel fillers generally last 4 to 12 months. The American Society of Plastic Surgeons describes HA lip-filler results as commonly lasting around 6 to 12 months, and Cleveland Clinic gives a similar six-month-to-one-year range for lip augmentation.

    Research helps explain the spread. A 2021 meta-analysis found that about 74% of patients still met the study definition of improved lip fullness at six months and about 46% did at 12 months. A randomized HA-filler study found improvement through 48 weeks. For FDA-approved RHA 3, visible effects were reported in about 48% of patients at one year.

    Those numbers do not tell us the precise amount of gel remaining. Clinical trials usually measure visible improvement using grading scales, so “lasting” means a noticeable aesthetic effect rather than a known percentage of filler still present.

    What the Filler Timeline Looks Like

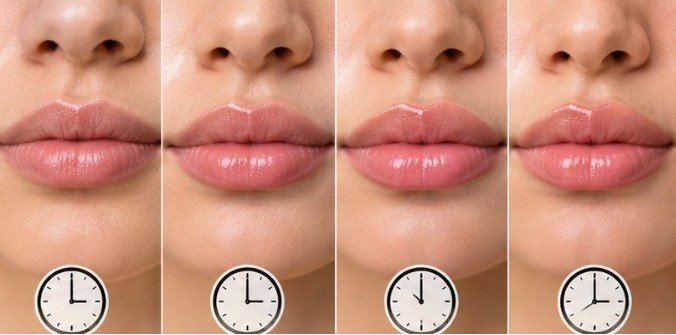
    The first few days can be misleading. Swelling, firmness, tenderness, and bruising may make lips look fuller than the settled result. Cleveland Clinic notes that swelling commonly improves within 24 to 48 hours, although it can take about a week to resolve.

    Time after treatment What you may notice
    First week Swelling and bruising can exaggerate volume
    2–4 weeks Shape looks more settled and easier to judge
    3–6 months Enhancement is usually still clearly visible
    6–12 months Gradual softening and volume loss become more noticeable
    12+ months Some people retain benefit; others are ready for reassessment

    A prospective imaging study following HA-injected lips found that volume declined progressively over nine months. That supports a key point: lip filler fades along a curve, not on a single expiration date.

    What Makes One Person’s Results Last Longer?

    What Makes One Person’s Results Last Longer

    The Exact HA Product Matters

    HA fillers differ in concentration, cross-linking, particle characteristics, elasticity, and intended placement. Johns Hopkins Medicine explains that hyaluronic acid products can be designed with different characteristics for different treatment needs.

    A softer gel may be selected for movement or subtle shaping, while another formula may provide more structure. Longer-lasting does not automatically mean better. Product selection should match your lip anatomy, desired definition, and the injector’s treatment plan.

    Lips Move Constantly

    Talking, eating, smiling, and other facial movements repeatedly stretch and compress lip tissue. The lips are far more dynamic than many other areas treated with filler, which helps explain why maintenance intervals can differ by treatment location.

    Metabolism may also influence duration. Cleveland Clinic notes that how quickly a person’s body breaks material down can affect filler longevity. However, fitness level alone cannot reliably predict how rapidly someone will lose visible volume.

    Dose Changes What You Notice

    A conservative treatment can look natural yet seem to fade sooner because there is less added volume to see. Using more filler simply to extend duration is not a good strategy; excessive volume can distort normal lip proportions.

    Maintenance also changes perception. Small, clinician-guided touch-ups before all visible correction has disappeared can create a more continuous result than repeatedly allowing the lips to return completely to baseline.

    The Three Questions That Matter Before Treatment

    Instead of asking only how long do hydro lip fillers last, ask your injector what exact product will be used, what its U.S. clinical data show at six and 12 months, and when your lips should be reassessed based on your anatomy and desired result.

    Ask to see the sealed, labeled syringe as well. The FDA advises choosing a licensed health care professional who understands facial anatomy and can recognize and manage complications. It also warns against needle-free “hyaluron pens,” which are not FDA-approved for injecting dermal fillers and have been associated with serious injuries.

    Can You Make Lip Filler Last Longer?

    Can You Make Lip Filler Last Longer

    No home routine has been proven to stop HA filler from breaking down. Sunscreen, sensible skin care without piling, hydration, and avoiding smoking support overall skin health, but they should not be marketed as methods for dramatically extending injectable filler life.

    The practical approach is periodic reassessment. A qualified injector can determine whether you need a touch-up, no treatment, or simply more time. Adding additional filler too early can produce an overfilled appearance instead of extending a natural-looking result.

    Know the Difference Between Fading and a Warning Sign

    Normal fading is slow. Severe pain, whitening or dusky skin discoloration, or visual symptoms after injection are not normal signs of filler wearing off.

    The FDA identifies accidental injection of filler into a blood vessel as the most serious complication because it can cause tissue death, stroke, or blindness. Although such complications are uncommon, they can be permanent.

    This is why provider qualifications matter as much as product choice. Lip filler is a medical procedure, even when it is marketed as a quick beauty treatment.

    Frequently Asked Questions

    1. Do hydro lip fillers completely disappear?

    HA filler is gradually broken down and absorbed. Visible fullness usually decreases over months, with timing affected by the product, dose, anatomy, and individual biology.

    2. Can lip filler last 18 months?

    Yes, in some patients. One multicenter study found a subset still showed measurable lip improvement at 18 months, but this is longer than the typical expectation.

    3. When should I get a touch-up?

    Many people reassess around 6 to 12 months, but there is no universal schedule. Timing should depend on remaining volume, lip shape, tissue condition, and your goals.

    4. Is hydro lip filler the same as a lip flip?

    No. HA filler adds physical volume. A lip flip uses botulinum toxin to alter upper-lip movement, so its mechanism, appearance, and duration are different.

    The Takeaway

    Most HA-based “hydro” lip filler results fit a 6-to-12-month window, while some products and patients retain visible improvement longer. The exact injectable, dose, anatomy, and treatment plan matter more than a marketing promise built around the word “hydro.”

    Before treatment, verify the product, review its FDA status and patient labeling, and choose an injector who can discuss both expected duration and potential complications. The best filler plan is not simply the one that lasts longest; it is the one that remains proportionate, predictable, and medically supervised.

  • How to Stop Concealer From Creasing Under Eyes Without Caking

    How to Stop Concealer From Creasing Under Eyes Without Caking

    The surprising truth about under-eye creasing is that more makeup usually makes the problem worse, not better. Every time you smile, squint, blink, or look down, the skin beneath your eyes moves. A thick layer of concealer has nowhere to go except into those natural folds.

    Learning how to stop concealer from creasing under eyes is therefore less about finding an impossibly crease-proof formula and more about controlling hydration, product quantity, placement, blending, and setting.

    The goal is not to make the under-eye area completely motionless. It is to create a thin, flexible layer that moves with your skin instead of collecting inside fine lines.

    Why Concealer Creases Under Your Eyes

    Creasing happens when concealer migrates into small folds in the skin. Three factors usually make it noticeably worse: dryness, excessive product, and movement.

    Dry under-eye skin can exaggerate texture before makeup is even applied. The American Academy of Dermatology explains that dehydrated skin can make fine lines appear more noticeable, while moisturizer helps trap water in the skin. American Academy of Dermatology dry-skin guidance

    Moisturizing does not erase wrinkles, but it can temporarily make the skin surface look smoother. Mayo Clinic similarly notes that moisturizers hold water in the skin and can reduce the visible appearance of small lines. 

    That matters because concealer sitting over dry, textured skin is more likely to look heavy and fragmented.

    Start With Less Under-Eye Skincare Than You Think

    Hydration helps, but an overly rich layer immediately before makeup can create another problem: slip.

    Apply a small amount of lightweight moisturizer or eye cream beneath the eyes and allow it to settle before applying complexion makeup. If the surface still feels wet or greasy, give it more time rather than immediately covering it.

    Harvard Health moisturizer guidance suggests that commonly use ingredients such as glycerin and other humectants to bind water to the skin. The objective before makeup is hydrated skin—not a thick film sitting on top of it.

    People with very dry under-eyes may need slightly richer preparation. Oily or combination skin may need much less.

    Do Not Stack Foundation and Concealer Without a Reason

    Do Not Stack Foundation and Concealer Without a Reason

    One of the easiest ways to create creasing is placing foundation beneath the eyes and then adding a full layer of concealer over it.

    If your foundation already provides enough coverage around the orbital area, keep it minimal there. Then add concealer only where discoloration remains.

    This can cut the total amount of complexion product sitting inside your fine lines nearly in half.

    Use Concealer Where Darkness Actually Exists

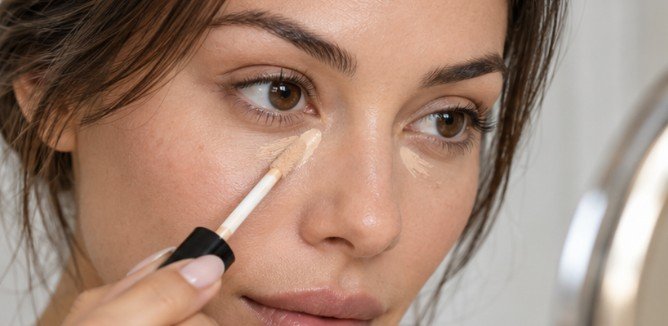
    A common application mistake is painting a large triangle of concealer from the lower lash line halfway down the cheek. Most people do not need that much product. Make sure to use hypochlorous acid spray before putting concealer for that extra hydration.

    Look straight into a mirror and identify the darkest areas. For many people, that means the inner corner and the hollow running beneath the eye rather than the entire under-eye surface.

    Place tiny amounts there first.

    Then blend outward with tapping motions. Avoid dragging the product aggressively across the skin because this spreads pigment into areas that never needed coverage.

    If additional coverage is necessary, add another extremely thin layer rather than applying one heavy coat.

    The 30-Second Crease Test

    After blending, do not immediately reach for powder.

    Wait roughly 20 to 30 seconds. Blink normally, smile once, and look downward.

    Then inspect the under-eye area closely.

    If concealer has already settled into a line, gently tap that line with a clean fingertip, small brush, or slightly damp sponge. This removes or redistributes the excess product before powder locks it into place.

    This small step can make a bigger difference than adding more setting powder.

    Diagnose Your Creasing Pattern

    What you notice Likely problem What to change
    Concealer looks dry and cracked Under-eye dehydration or too much powder Moisturize lightly and reduce powder
    Creases appear within minutes Too much concealer Use a thinner layer
    Makeup slides around Excess skincare or oil Use less prep and allow absorption time
    Fine lines become more obvious after setting Powder layer is too heavy Use a smaller brush and less powder
    Only the lash-line area creases Concealer is placed too high Keep most product below the deepest folds

    This troubleshooting approach is more useful than automatically switching products because it identifies which part of the routine is causing the failure.

    Set the Under-Eye Area Strategically

    Powder can reduce movement, but excessive powder can emphasize every line.

    Set the Under-Eye Area Strategically

    Before setting, make sure no concealer is visibly sitting inside a crease. Once the surface looks smooth, pick up a very small amount of finely textured setting powder using a small fluffy brush.

    Tap off excess powder.

    Press or lightly sweep it only over the areas that need setting, especially where concealer normally moves. Avoid repeatedly layering powder throughout the day.

    A heavy powder application may initially look smooth but become increasingly dry as the hours pass.

    What About Mature or Very Dry Under-Eyes?

    People with mature skin often need a different strategy than someone with oily skin.

    With age, skin tends to hold less moisture. The American Academy of Dermatology notes that dryness and fine lines become more common as skin ages and that moisturizing can improve their appearance.

    That means aggressive powdering can be counterproductive.

    For mature or noticeably dry under-eyes, prioritize a thin, flexible concealer layer and set only where necessary. You may find that leaving the outer eye largely unpowdered creates a smoother appearance than attempting to completely mattify it.

    Research indexed by PubMed also describes the periorbital region as particularly prone to early visible aging and wrinkles, reinforcing why this area often behaves differently from the rest of the face. 

    How to Fix Concealer Creasing During the Day

    Do not immediately add another layer of concealer.

    First, wash or sanitize your hands. Then gently press a clean fingertip over the crease. The warmth of your finger can soften the existing makeup enough to redistribute it.

    If necessary, use a clean sponge to tap the edges smooth.

    Adding more liquid concealer over dried makeup often creates another visible layer, while piling on powder can make the area look chalky.

    Hygiene matters around the eyes as well. The U.S. Food and Drug Administration advises keeping hands and cosmetic tools clean and stopping use of eye-area cosmetics if irritation or infection develops. 

    When Creasing Is Actually Irritation

    When Creasing Is Actually Irritation

    Persistent flaking, redness, burning, swelling, or itching should not automatically be treated as a makeup-performance problem.

    Cosmetics can sometimes contribute to irritation or contact dermatitis. MedlinePlus lists cosmetics among substances capable of triggering contact dermatitis and notes that makeup can also irritate the eye itself. 

    If the area is inflamed, stop applying makeup until the skin has recovered. Persistent symptoms deserve evaluation by a dermatologist, optometrist, or ophthalmologist.

    Frequently Asked Questions

    1. Why does my concealer crease even after powder?

    You may be setting too much product. Remove excess concealer from fine lines before powdering, then apply only a very thin powder layer.

    2. Should I put foundation under my eyes before concealer?

    Usually only if you need the additional coverage. Layering foundation and concealer can increase product buildup and make creasing more noticeable.

    3. Should concealer go directly under the lower lashes?

    Not necessarily. Keeping most concealer over areas of darkness rather than deep folds close to the lash line can reduce product accumulation.

    4. Can dry skin make under-eye concealer crease?

    Yes. Dehydrated skin can make fine lines more visible. Light moisturizing before makeup can create a smoother-looking surface, although excessive skincare can make concealer slide.

    The Thin-Layer Rule Usually Wins

    The most reliable answer to how to stop concealer from creasing under eyes is surprisingly simple: give the moving skin beneath your eyes less makeup to move around.

    Hydrate enough to soften visible dryness, avoid unnecessary foundation underneath, concentrate concealer where darkness actually exists, remove anything that settles before setting, and use powder sparingly.

    Some movement and fine-line settling will always be normal because your face is supposed to move. Successful under-eye makeup is not makeup that behaves like cement. It is makeup thin and flexible enough that you can blink, smile, and go through the day without constantly repairing it.

  • Beta Glucan vs Hyaluronic Acid for Acne: Which Hydrator Helps More?

    Beta Glucan vs Hyaluronic Acid for Acne: Which Hydrator Helps More?

    The biggest mistake in comparing beta-glucan with hyaluronic acid is treating either one like an acne medication. Neither unclogs pores like salicylic acid, normalizes cell turnover like a retinoid, nor reduces acne-associated bacteria like benzoyl peroxide. Their value is different: they help acne-prone skin stay hydrated enough to tolerate treatment.

    For beta glucan vs hyaluronic acid for acne, beta-glucan may have an edge when inflammation and a damaged skin barrier are the main problems. Hyaluronic acid remains an excellent lightweight humectant when dehydration is the bigger issue.

    The Short Answer: Treat the Problem Around the Acne

    If your face is red, reactive, flaky, or stinging after adapalene, tretinoin, benzoyl peroxide, or exfoliating acids, beta-glucan is often the more logical hydrator. Research on oat beta-glucan suggests it can support epidermal barrier repair by influencing skin differentiation, cell junctions, and lipid production.

    If your acne-prone skin is simply dehydrated but otherwise calm, hyaluronic acid is a proven humectant that can improve skin hydration without adding much heaviness. The American Academy of Dermatology also notes that moisturizer can make drying acne treatments easier to tolerate. 

    What Beta-Glucan Actually Does

    What Beta-Glucan Actually Does

    Beta-glucans are polysaccharides found in oats, yeast, mushrooms, and other fungi. Their activity varies with their source, molecular structure, and formulation, so “beta-glucan” is not one identical ingredient across every serum.

    A 2024 study indexed by the U.S. National Library of Medicine found that oat beta-glucan accelerated recovery of a damaged epidermal barrier in experimental models. Researchers observed effects involving epidermal differentiation, cell-to-cell junctions, and lipid synthesis through Dectin-1 signaling. 

    That matters for acne routines because irritation often becomes the limiting factor when someone uses strong actives consistently. Beta-glucan does not remove comedones, but better-supported barrier function may make an evidence-based acne routine easier to tolerate.

    Where Hyaluronic Acid Still Wins

    Hyaluronic acid is a glycosaminoglycan naturally present in the body. It is widely used in topical skincare because of its ability to retain water. Cleveland Clinic describes hydration as one of HA’s major roles and notes its widespread use in creams, lotions, ointments, and serums. It is one of the beauty products you must invest in.

    One common internet claim says hyaluronic acid only sits on the skin’s surface. That is too simplistic. Larger HA molecules mainly act closer to the surface, but molecular weight and delivery technology change how formulations behave. Research on micronized and liposomal forms has demonstrated improved skin penetration and hydration.

    The warning that HA always “pulls water out of skin” in dry weather is also overstated. In a practical skincare routine, the entire formula matters. Humectants generally work best as part of a routine that includes a moisturizer to reduce water loss.

    Beta Glucan vs Hyaluronic Acid for Acne: Side-by-Side

    Question Beta-Glucan Hyaluronic Acid
    Directly treats acne lesions? No No
    Main role Hydration, soothing, barrier support Humectant hydration and plumping
    Best fit Red, sensitized, over-treated skin Dehydrated but relatively calm skin
    Evidence Promising barrier-repair research; limited acne-specific trials Strong hydration evidence; limited evidence as an acne treatment
    Works with acne actives? Usually, in a gentle formula Usually, in a gentle formula

    The first row matters most. Neither ingredient should replace proven therapy when acne is persistent, inflammatory, cystic, or scarring.

    Why Moisture Matters More Than It Sounds

    Why Moisture Matters More Than It Sounds

    Acne treatments frequently create a second problem while solving the first: irritation. Benzoyl peroxide can cause dryness and scaling, while topical retinoids often cause irritation during the adjustment period.

    That is why dermatologists commonly pair treatment with gentle moisturization. Yale Medicine, for example, recommends following adapalene with a gentle moisturizer and starting the retinoid gradually when irritation is a concern.

    A hydrator can therefore strengthen an acne routine without treating acne itself. Consistency matters. A treatment someone can tolerate for months is more useful than an aggressive routine abandoned after five days.

    A Four-Step Test for Picking the Better Ingredient

    1. Identify the main problem. Favor beta-glucan for redness, stinging, peeling, and sensitivity. Favor HA for uncomplicated dehydration and tightness.
    2. Check the complete formula. Choose noncomedogenic products and, if you are sensitive, fragrance-free options. One “hero” ingredient cannot compensate for an irritating formula.
    3. Introduce one product at a time. This makes it easier to identify irritation or a new breakout pattern instead of guessing which of several new products caused the problem.
    4. Seal in hydration. Apply the hydrating product after cleansing, follow with moisturizer, and use broad-spectrum SPF 30 or higher during the day.

    Mayo Clinic recommends nonoily, water-based or noncomedogenic facial products for acne-prone skin and advises avoiding unnecessarily irritating products. 

    Can You Use Both?

    Yes. Most people do not need to choose only one. A product containing both can combine humectant hydration with the additional soothing and barrier-support potential of beta-glucan.

    Still, more layers are not automatically better. Acne-prone skin often responds well to a routine in which every step has a clear job: gentle cleanser, proven acne treatment, moisturizer, and sunscreen.

    Add beta-glucan or HA because it solves a specific dryness or irritation problem, not because another serum seems like it should be part of a longer routine.

    What the Marketing Often Gets Wrong

    What the Marketing Often Gets Wrong

    There is no strong acne-specific clinical evidence establishing that beta-glucan is universally “20% more hydrating” than hyaluronic acid. Such figures can originate from ingredient testing or individual brand comparisons and should not automatically be applied to every finished product or every person with acne.

    It is equally inaccurate to dismiss hyaluronic acid because much of conventional HA works close to the skin’s surface. Hydration of the stratum corneum is still valuable, and HA performance varies substantially with molecular weight and formulation technology.

    The larger limitation is shared by both ingredients: the available research does not show that either is a substitute for established acne treatments.

    If acne is painful, nodular, scarring, suddenly worsening, or failing to improve after several months of appropriate over-the-counter treatment, choosing a different hydrator is not the priority. A dermatologist can address the underlying acne mechanisms directly.

    FAQs

    1. Does beta-glucan clog pores?

    Beta-glucan itself is not generally considered an acne treatment that clogs pores. Breakout risk depends on the complete formulation, so choose noncomedogenic products and monitor your skin’s response.

    2. Is hyaluronic acid safe with benzoyl peroxide?

    Usually, yes. Hyaluronic acid can help with treatment-related dehydration. Significant burning, swelling, or persistent irritation from benzoyl peroxide should not simply be ignored.

    3. Which is better with adapalene or tretinoin?

    Beta-glucan may be particularly useful when retinoids cause redness or barrier irritation. Hyaluronic acid also helps dehydration. A gentle moisturizer remains important with either option.

    4. Can I use beta-glucan and hyaluronic acid every day?

    Most gentle topical formulas can be used daily. Start gradually if your skin is reactive, and discontinue products that repeatedly cause burning, rash, or worsening breakouts.

    The Takeaway

    The smarter answer to beta glucan vs hyaluronic acid for acne is not that one ingredient always wins. Beta-glucan is the more compelling option when acne treatment has left skin inflamed, reactive, or barrier-stressed because its research extends beyond simple water binding. Hyaluronic acid remains a dependable choice for lightweight hydration when skin is otherwise stable.

    Use either as support, not as the main acne treatment. If your routine causes constant peeling or stinging, simplify it and restore comfort first. Clearer skin usually comes from sustained, tolerable treatment—not from chasing the most hyped hydrator.

  • French Pin Tutorial for Beginners: The Twist-and-Lock Method That Actually Holds

    French Pin Tutorial for Beginners: The Twist-and-Lock Method That Actually Holds

    A French pin can look too simple to work: two prongs, one curve, no hinge, no elastic. Yet its hold is mechanical. The pin catches a small amount of hair, reverses direction, and traps the twist against the scalp. Once you understand that motion, the style stops feeling like guesswork.

    This french pin tutorial for beginners focuses on that skill first. You will learn how to build a secure twist, insert the pin correctly, adapt it to your hair type, and avoid making the style painfully tight.

    What a French Pin Is—and Why Beginners Often Use It Wrong

    A French pin is a large U-shaped hairpin, usually made of metal or acetate, used for buns, chignons, French twists, and half-up styles.

    Its hold comes from leverage. One side catches hair from the outside of the twist; then you rotate the pin toward the scalp and slide it back through the base. Beginners often push the pin straight through a bun, which catches hair but creates little resistance. The “catch, flip, and slide” movement creates the lock.

    Set Yourself Up for an Easier First Attempt

    Your first try is easier if your hair has some grip. Freshly washed, very smooth, or flat-ironed hair can be slippery. Current styling guides also recommend adding texture or avoiding an overly slick starting point.

    Fine or silky hair may benefit from a light texturizing spray or dry shampoo. Curly, coily, or naturally textured hair often has enough grip already, so heavy smoothing products can make the pin less secure.

    Pin size also matters. Shorter or finer hair generally works better with a lighter, smaller pin, while dense or long hair usually needs more length and stronger prongs.

    The Core French Pin Technique in Six Steps

    The Core French Pin Technique in Six Steps

    1. Gather Hair Low

    Bring your hair to the nape as if making a low ponytail, but do not use an elastic. Hold it with your non-dominant hand. For wavy or curly hair, make sure to refresh strands before this step.

    2. Twist Upward

    Turn the ponytail in one direction and guide it upward along the back of your head. Keep enough tension for structure, but stop if your scalp feels pulled.

    3. Tuck the Ends

    Fold the loose ends into the inner side of the roll. If your hair is very long, wrap the excess around the base before tucking it.

    4. Catch the Outer Edge

    Hold the twist with one hand. Insert only the tips of the pin into the fuller outer edge and pick up a small section of hair.

    5. Flip Toward the Scalp

    Rotate the pin inward so the prongs turn toward your head. This is the step most beginners miss. The change in direction turns the hair you caught into an anchor.

    6. Slide Through the Base

    Push the pin along the scalp and through the dense center of the twist. It should feel secure, not sharp. If it pokes, remove it and try again at a flatter angle.

    A Quick Fit Test for Your Hair

    Hair situation What usually works better
    Fine or silky hair Smaller pin, firmer twist, added texture
    Thick or dense hair Larger pin and a deeper anchor
    Short or layered hair Half-up twist or mini bun
    Curly or coily hair Keep natural texture; avoid over-smoothing
    Very long hair Wrap excess length around the base first

    If the style falls within minutes, the issue is often a mismatch between pin size, twist tension, and how much base hair the pin catches.

    Why Comfort Matters More Than Maximum Tightness

    Why Comfort Matters More Than Maximum Tightness

    A secure French pin should feel stable, not painful. The American Academy of Dermatology warns that repeated pulling from tight hairstyles can contribute to traction alopecia, a form of hair loss caused by chronic tension. MedlinePlus also lists hairstyles that put excessive tension on follicles as a possible cause of hair loss.

    That does not mean the accessory itself is damaging. The issue is repeated force. Johns Hopkins Medicine recommends reducing tension from tight hairstyles, while HealthyChildren.org notes that styles that feel tight or painful can lead to breakage. Harvard Health likewise identifies tightly pulled styles as a contributor to traction-related hair loss.

    Use a simple rule: if your scalp stings, aches, or visibly lifts, loosen the style and reinsert the pin.

    Troubleshooting the Three Problems Beginners Hit Most

    The Pin Slides Out

    Twist the hair a little more firmly and make sure the pin catches both the outer roll and a small amount of hair near the scalp. On silky hair, add light texture.

    The Twist Unravels

    Retwist, tuck the ends more completely, and keep holding the shape until the pin is fully seated.

    The Pin Digs Into Your Scalp

    The angle is probably too steep. After the flip, the pin should travel almost parallel to the scalp rather than point directly toward it.

    Two Easier Styles to Learn First

    Two Easier Styles to Learn First

    If a vertical twist feels difficult, start with a low bun. Twist the hair into a coil, catch a small section from the outer edge, flip the pin toward the scalp, and slide it through the bun’s base.

    A half-up twist is useful for shoulder-length or layered hair. Gather the top section, twist it once or twice, then secure it with a smaller pin. This could be a great hairstyle fit for thinning hair. Because you are managing less hair, it is easier to feel the locking motion. Once those hold reliably, the classic French twist becomes much easier.

    FAQ

    1. How do you use a French pin for the first time?

    Gather hair low, twist upward, tuck the ends, catch a small outer section, flip the pin toward the scalp, then slide it through the base.

    2. Why does my French pin keep falling out?

    Usually the twist is too loose, the hair is too slippery, or the pin is not catching enough hair near the scalp. Add texture and anchor deeper.

    3. Can a French pin work on short hair?

    Yes, if you can gather enough hair for a small twist or bun. A half-up style is often easier than a full French twist.

    4. Should a French pin feel tight?

    It should feel secure but comfortable. Pain, stinging, or strong pulling means the style is too tight and should be loosened.

    The Skill Is in the Flip, Not the Force

    The most useful lesson in a french pin tutorial for beginners is that hold comes from direction, not pressure. A pin shoved straight through hair is easy to dislodge; a pin that catches, reverses, and anchors near the scalp has something to work against.

    Practice on a low bun first, where you can feel what the pin is doing. Then move to a French twist once your hands recognize the sequence. The goal is not the tightest possible updo. It is a secure, comfortable style that stays put because the pin is placed well.

  • Water Based vs Silicone Based Foundation: Which Fits Your Skin?

    Water Based vs Silicone Based Foundation: Which Fits Your Skin?

    A foundation can list water first and still behave like a silicone-heavy formula. That is why choosing between water based vs silicone based foundation is less about spotting “aqua” on a label and more about understanding what comes next.

    Neither type is universally better. Water-dominant formulas often feel lighter and more skin-like, while silicone-rich formulas tend to smooth texture and hold pigment in place longer. The best choice depends on your skin, prep routine, and preferred finish.

    What the Labels Actually Tell You

    Liquid foundation is usually an emulsion containing water, pigments, emollients, film-formers, preservatives, and other ingredients. That is why the first ingredient alone can mislead you.

    Under U.S. cosmetic-labeling rules, ingredients are generally listed in descending order of predominance. The FDA’s cosmetic ingredient guidance therefore makes the top of the ingredient list the best place to start, although it does not reveal exact percentages.

    A water-dominant foundation usually lists water first without major silicones near the top. A silicone-dominant formula may also list water first, but ingredients such as dimethicone, cyclopentasiloxane, cyclohexasiloxane, phenyl trimethicone, or related “-cone” and “-siloxane” ingredients appear early.

    Silicones are not just fillers. Dermatology literature describes dimethicone as an emollient and barrier-supporting ingredient, while Harvard Health’s moisturizer guidance identifies dimethicone and cyclomethicone as silicone occlusives used in skin-care formulas.

    Water Based vs Silicone Based Foundation at a Glance

    Factor Water-dominant foundation Silicone-dominant foundation
    Feel Thin, fluid, lightweight Silky, velvety, more slip
    Common finish Natural to dewy Satin to soft-matte
    Texture effect Leaves more natural texture visible Often blurs pores and unevenness
    Wear tendency Comfortable, but may fade faster on very oily skin Often grips longer and resists movement better
    Often suits Dry, dehydrated, sensitive-feeling skin Oily, combination, textured skin
    Main caution Can break down faster with excess oil Can emphasize flakes if skin is poorly prepped

    These are tendencies rather than rules. A water-rich foundation can be long-wearing, and a silicone-rich formula can look luminous. Pigments, powders, oils, humectants, and film-formers all influence the final performance.

    When a Water-Dominant Formula Makes Sense

    When a Water-Dominant Formula Makes Sense

    Dry or Dehydrated Skin

    Water-based foundations are often paired with humectants and lightweight emollients, which can make them feel flexible on tight or flaky skin. They also tend to preserve more natural surface texture.

    Still, “water-based” does not automatically mean moisturizing. DermNet’s guidance on moisturizers and emollients explains that hydration products work through combinations of humectants, emollients, and occlusives. That means the complete foundation formula—and the moisturizer underneath—matters more than water alone.

    Sensitive-Feeling Skin

    People who dislike a heavy or coated sensation may prefer a thinner water-dominant base. However, fragrance, alcohol, preservatives, botanical extracts, and other ingredients may be more relevant to sensitivity than whether silicone appears in the formula.

    Anyone with persistent burning, swelling, itching, or a recurring rash should stop using the suspected product rather than continuing to experiment with different bases.

    Acne-Prone Skin

    This is where online foundation advice often becomes too absolute. Water-based makeup is frequently recommended for breakouts, but silicone alone is not a reliable way to predict whether a formula will clog pores.

    The American Academy of Dermatology’s acne and makeup guidance recommends choosing products labeled “oil-free,” “non-comedogenic,” or “won’t clog pores.” Yale Medicine’s acne guidance also notes that certain cosmetics can contribute to clogged follicles.

    In practical terms, the finished formula and your personal reaction matter more than avoiding every ingredient ending in “-cone.”

    When Silicone-Rich Foundation Has an Advantage

    When Silicone-Rich Foundation Has an Advantage

    Oily or Combination Skin

    Silicone-heavy formulas often create a smoother film with more slip and stronger pigment hold. That can help if foundation repeatedly moves around the nose, forehead, or chin.

    However, oily skin does not automatically require silicone. The American Academy of Dermatology also recommends oil-free, water-based makeup for oily complexions and notes that matte formulas may help reduce visible shine.

    If your T-zone becomes oily but your cheeks feel normal or dry, a lighter foundation combined with strategic powdering may work better than choosing the heaviest matte formula available.

    Visible Pores and Uneven Texture

    Silicones can make texture appear smoother by filling tiny surface irregularities and creating a more uniform optical surface.

    This does not physically shrink pores or erase fine lines. It is a temporary cosmetic effect that helps pigment spread more evenly instead of settling sharply around texture.

    Long Wear and Humid Weather

    For long workdays, weddings, outdoor events, or hot and humid parts of the United States, silicone-rich formulas may offer useful staying power because silicones can improve spreadability and create an even film across the skin.

    That does not make them sweat-proof. Skin oil, humidity, sunscreen, powder, application thickness, and touching the face can all affect how long foundation lasts.

    The 60-Second Ingredient-List Test

    Start by reading the first five to seven ingredients. Water in position one is common in both foundation categories, so do not stop there.

    Next, scan for dimethicone, cyclopentasiloxane, cyclohexasiloxane, trimethicone, or siloxane-type names. If several appear near the top, the foundation is probably silicone-dominant.

    If water appears first while silicones are absent or much farther down the list, the formula is more likely water-dominant.

    Then check claims that match your actual concern. Look for non-comedogenic labeling if you are breakout-prone, fragrance-free formulas if fragrance bothers you, and finishes described as matte, natural, satin, or radiant according to the result you want.

    Use the ingredient list as a practical clue rather than laboratory proof. It tells you ingredient order, not the exact recipe.

    Do Primer and Foundation Bases Have to Match?

    Do Primer and Foundation Bases Have to Match


    Matching water with water and silicone with silicone is a useful troubleshooting shortcut, but it is not a strict rule. Note that to stop skincare products from pilling wait between each product.

    A water-dominant primer can perform perfectly under a silicone-rich foundation when both formulas are compatible. Problems usually become noticeable when layers form films differently, too much product is applied, or makeup is rubbed before skincare has settled.

    If your foundation pills or separates, simplify the routine. Apply less skincare, let sunscreen or moisturizer settle, use half your usual primer, and press a thin foundation layer over the skin instead of repeatedly rubbing it.

    Then try the same foundation once without primer. If the problem disappears, the primer-foundation combination was probably contributing. If separation continues, excess oil, dry patches, sunscreen, or application technique may be the real issue.

    Misconceptions Worth Dropping

    Silicone does not automatically mean “bad for skin,” and water does not automatically mean hydrating, clean, gentle, or acne-safe. These terms describe part of the formulation structure rather than the overall quality of the product.

    Likewise, silicone-rich does not always mean matte, while water-rich does not always mean dewy. Modern foundation formulas can combine water, silicones, powders, humectants, emollients, and film-formers in very different proportions.

    The more useful question is not simply “Which base is better?” It is whether the foundation wears evenly on your skin, works with your skincare, produces the finish you want, and remains comfortable after several hours.

    Frequently Asked Questions

    1. Is water-based foundation better for acne-prone skin?

    Not automatically. Look for non-comedogenic or oil-free labeling and monitor your skin response. The complete formula matters more than silicone alone.

    2. How can I tell if my foundation is silicone based?

    Check the first several ingredients for dimethicone, cyclopentasiloxane, cyclohexasiloxane, trimethicone, or siloxane-related names. Water may still appear first.

    3. Can I use silicone foundation with a water-based primer?

    Yes. If pilling occurs, reduce product amounts, allow skincare layers to set, and test the foundation without primer to isolate the problem.

    4. Which foundation base lasts longer on oily skin?

    Silicone-rich formulas often provide strong smoothing and wear, but some oily complexions perform better with lightweight, matte, water-based makeup.

    Final Takeaway

    The most useful lesson about water based vs silicone based foundation is that the front label tells you less than the first few ingredients on the back. Water can lead both types, and silicone is not automatically a pore-clogging villain. Start with your actual skin concern, verify the ingredient pattern, and test the foundation over your normal skincare. 

    Choose water-dominant formulas when lightness and a skin-like finish matter most. Consider silicone-rich formulas when smoothing, grip, and a more perfected surface are priorities. Ultimately, the better foundation is the one that still looks balanced and feels comfortable several hours after application.

  • Hypochlorous Acid Spray Before or After Moisturizer? The Best Order for Calm Skin

    Hypochlorous Acid Spray Before or After Moisturizer? The Best Order for Calm Skin

    The simplest rule is also the most useful: if you are wondering whether to use hypochlorous acid spray before or after moisturizer, use it before moisturizer in a normal skincare routine. Apply it to freshly cleansed skin, let the mist dry, then continue with serum, moisturizer, and sunscreen in the morning.

    That order is mainly about contact. Hypochlorous acid (HOCl) is water-based, while moisturizer leaves a protective layer that slows water loss. Applying the spray first gives it direct access to skin instead of asking it to work through a cream or ointment.

    Why HOCl Has Become a Skincare Staple

    Hypochlorous acid sounds harsh, but the human immune system actually produces it. Neutrophils use HOCl as part of the body’s defense against microbes. Modern facial sprays use stabilized formulations designed for topical use, which are very different from household disinfectants.

    A 2025 clinical review available through the National Library of Medicine evaluated research on HOCl across dermatology and several other medical specialties. The review drew on 61 original clinical studies and described antimicrobial, anti-inflammatory, immunomodulatory, and wound-healing activity. It also emphasized that results are not completely consistent and that formulation, stability, pH, and dosing can influence performance.

    A facial HOCl mist may therefore support irritated or blemish-prone skin, but it is not a cure-all for acne, eczema, rosacea, or infected skin.

    The Best Layering Order

    The American Academy of Dermatology recommends cleansing first, applying medications or treatments next, and following with moisturizer and sunscreen. A facial HOCl spray fits most logically into that treatment stage.

    Morning Routine

    1. Cleanse gently and pat the skin dry.
    2. Mist a skin-labeled HOCl spray evenly over the face.
    3. Let it air-dry completely.
    4. Apply a serum or another leave-on treatment, if used.
    5. Apply moisturizer.
    6. Finish with broad-spectrum SPF 30 or higher.

    Evening Routine

    Cleanse, mist HOCl, allow it to dry, then apply your other leave-on products and moisturizer. If you use a prescription topical medication, follow your prescriber’s directions rather than changing the sequence yourself.

    The often-repeated “30 to 60 seconds” waiting period is a practical estimate rather than a medically established magic number. A simpler rule is to wait until the mist no longer feels wet before applying the next layer.

    What If You Spray It After Moisturizer?

    Using HOCl after moisturizer is not automatically wrong. It is simply less ideal when you are building a deliberate morning or evening routine.

    Moisturizers contain humectants, emollients, and sometimes occlusive ingredients that create a layer over the skin. Spraying a watery product afterward can still feel refreshing, but the HOCl is no longer being applied directly to clean skin.

    Situation Best approach Why
    Regular AM or PM routine HOCl before moisturizer Gives the mist direct skin contact
    Midday heat or irritation Light mist over existing skincare Practical when cleansing is inconvenient
    After sweating Cleanse when possible; otherwise mist temporarily Bridges the gap until a proper wash
    Very dry skin HOCl first, moisturizer after drying Moisturizer helps reduce water loss

    If you mist over sunscreen or makeup, treat it as a refresh rather than a substitute for cleansing, moisturizer, or sun protection. Sunscreen still belongs at the end of the daytime skincare routine.

    What If You Spray It After Moisturizer

    Why Moisturizer Still Matters

    HOCl is not a moisturizer. Even if a spray feels soothing, it does not replace the barrier-supporting role of creams, lotions, and ointments.

    The Mayo Clinic’s dry-skin guidance recommends moisturizing while skin retains some moisture because this helps limit water loss. For dry or reactive skin, ingredients such as ceramides, glycerin, fatty acids, or petrolatum may matter more for lasting comfort than repeatedly adding facial mists.

    Redness can exist alongside barrier damage, so adding antimicrobial products without enough moisturization may not address underlying dryness.

    A Four-Step Test for Using HOCl Well

    1. Check the Label

    Only use an HOCl formula specifically intended for topical or facial skin. Cleveland Clinic dermatology guidance warns that HOCl skincare formulas and products made to disinfect household surfaces are not interchangeable.

    That distinction matters more than choosing a product based on social-media popularity or assuming every bottle containing hypochlorous acid is suitable for your face.

    2. Keep the Formula Simple

    Sensitive skin often does better with fragrance-free formulas and short ingredient lists.

    The National Eczema Association has accepted certain facial HOCl products formulated with ingredients such as water, hypochlorous acid, and sodium chloride. Its guidance also makes an important point: an acceptance seal does not guarantee that every product will suit every person with eczema or sensitive skin.

    3. Let Layers Dry Instead of Mixing Them

    Let Layers Dry Instead of Mixing Them

    Do not pour HOCl into moisturizer or combine it with several serums in your palm.

    Clinical research has not mapped every possible interaction between consumer HOCl sprays and ingredients such as vitamin C, retinoids, niacinamide, or exfoliating acids. Applying products as separate layers makes the routine easier to evaluate and reduces unnecessary experimentation.

    If a dermatologist has prescribed an acne, eczema, rosacea, or other medication, the prescribed treatment schedule should take priority.

    4. Watch Your Skin, Not the Trend

    A product can be popular and still be unnecessary for your routine.

    If your skin becomes tighter, increasingly irritated, or persistently red after introducing HOCl, reduce the frequency or stop using it. Severe pain, spreading redness, pus, crusting, fever, eye involvement, or a rapidly worsening rash deserves medical evaluation rather than another skincare product.

    Common Misconceptions About Hypochlorous Acid

    Common Misconceptions About Hypochlorous Acid

    Stronger does not automatically mean better. HOCl performance depends on formulation chemistry, including pH and stability, so concentration alone does not determine product quality. Research reviews have specifically identified formulation stability as an important factor in topical HOCl performance.

    Likewise, “natural to the body” does not mean irritation is impossible. Well-formulated topical HOCl is generally considered well tolerated, but individual reactions can occur.

    The final misconception is that HOCl can replace acne medication or eczema treatment. Research is promising in several inflammatory skin conditions, but evidence remains uneven. It makes more sense to view HOCl as a supportive skincare tool than as a substitute for dermatologist-directed treatment.

    Frequently Asked Questions

    1. Can I put moisturizer on immediately after hypochlorous acid spray?

    Wait until the mist has dried, then moisturize. A fixed 30- or 60-second interval matters less than avoiding wet-on-wet layering.

    2. Can I use HOCl spray over makeup?

    Yes. A facial HOCl spray can work as a light refresh, but it does not replace cleansing, moisturizer, acne treatment, or sunscreen.

    3. Should I use hypochlorous acid spray before or after moisturizer if I have eczema?

    Usually before, followed by a bland moisturizer once dry. If eczema is cracked, infected, painful, or actively flaring, ask a dermatologist about the safest routine.

    4. Can I use hypochlorous acid every day?

    Many topical products are designed for regular use, but frequency varies by formulation. Follow the label and reduce use if your skin becomes dry or irritated.
    The Takeaway

    For a normal skincare routine, the answer to hypochlorous acid spray before or after moisturizer is straightforward: spray first, moisturize second. Clean skin gives HOCl the clearest opportunity to contact the surface, while moisturizer belongs afterward to support hydration and the skin barrier.

    After-moisturizer use still has a place when you are sweaty, overheated, traveling, or simply need a midday refresh. The more useful lesson is not to overcomplicate the routine. Choose a facial-grade product, let it dry between layers, keep moisturizer and sunscreen doing their own jobs, and treat persistent skin problems as medical issues rather than layering problems.

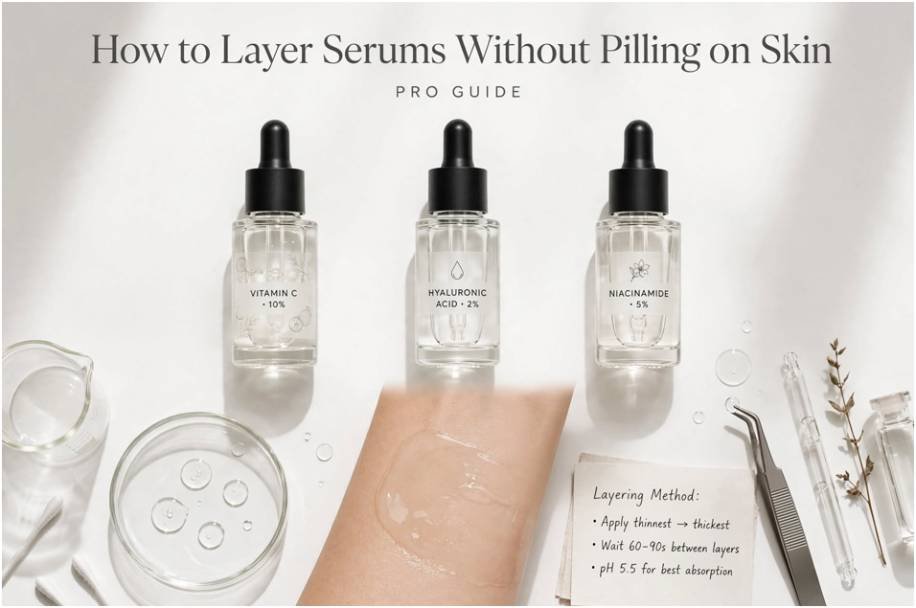
  • How to Layer Serums Without Pilling on Skin: A Cosmetic Formulator’s Guide

    How to Layer Serums Without Pilling on Skin: A Cosmetic Formulator’s Guide

    I spent years ruining expensive morning routines before I understood why my face produced tiny grey rubbery flakes thirty seconds after applying sunscreen. If you want to master how to layer serums without pilling on skin, you must treat your regimen like physical chemistry rather than a casual paint job. Pilling happens when topically applied products fail to penetrate the stratum corneum, coagulate on the surface, and ball up under mechanical friction.

    Understanding molecular weights, carrier bases, and polymer cross-linking changes everything. When I adjusted my application timing and mapped out formula weights, product balling stopped completely.

    The Chemistry Behind Why Your Skincare Rolls Off

    The Chemistry Behind Why Your Skincare Rolls Off

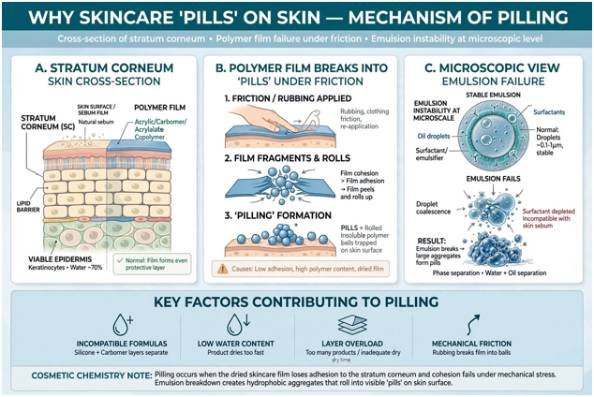
    Pilling is not skin peeling; it is an emulsion failure occurring on the epidermis. Topical formulations rely on specific carrier matrices to stay suspended in a bottle. Once applied to your skin, these vehicles evaporate or absorb, leaving behind active compounds alongside film-forming agents.

    According to research documented by the National Center for Biotechnology Information (NCBI), the stratum corneum regulates transdermal flux based on lipid solubility and molecular size. When incompatible ingredients stack up, absorption halts, and surface tension causes the layers to shear into visible balls.

    The Polymer Trap: Carbomers, Gums, and Cross-Polymers

    The Polymer Trap: Carbomers, Gums, and Cross-Polymers

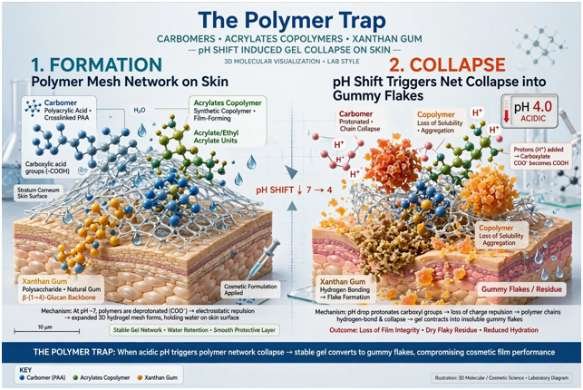
    Silicones usually take all the blame, but synthetic thickeners cause just as many issues. Cosmetic chemists rely heavily on carbomers, acrylates copolymers, and xanthan gum to create rich, silky textures out of inexpensive water. Assessments by the Cosmetic Ingredient Review (CIR) show that these cross-linked polymers create flexible, breathable surface meshes.

    Trouble begins when you layer a low-pH active acid over an acrylates-thickened gel. The sudden shift in pH and electrolyte concentration collapses the polymer net. The gel destabilizes, turns gummy, and flakes off in shreds.

    Silicone Barriers and Incompatible Bases

    Silicone Barriers and Incompatible Bases

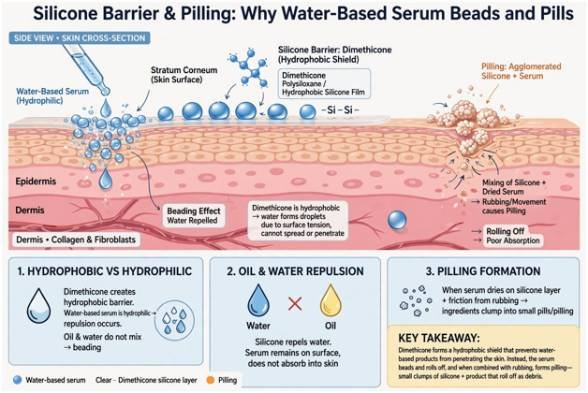
    Silicones like dimethicone, cyclopentasiloxane, and cyclohexasiloxane form a protective, hydrophobic shield over the skin. Clinical reviews in the Journal of Clinical and Aesthetic Dermatology (JCAD) highlight silicones for their exceptional barrier protection and transepidermal water-loss prevention.

    However, water and oil do not mix without rigorous emulsification. When you rub a water-dense humectant over a cured silicone layer, the aqueous solution cannot penetrate the hydrophobic film. Friction sweeps the unabsorbed water layer across the silicone shield, causing it to roll into synthetic debris.

    The Step-by-Step Blueprint for Friction-Free Layering

    The American Academy of Dermatology (AAD) advises applying products from lightest to heaviest consistency. You must refine that rule by looking at water content, volatility, and active molecule delivery.

    Step 1: Low-pH Aqueous Actives (Dry Skin)

           ↓ (Wait 60 seconds)

    Step 2: Viscous Humectants & Hydrators (Pat into place)

           ↓ (Wait 45 seconds)

    Step 3: Emulsions & Lipid Treatments (Light press)

           ↓ (Wait 60 seconds)

    Step 4: Occlusive Creams, Silicones & Sunscreen

    Master the Viscosity Gradient

    Always lead with water-thin active liquids. Pure L-ascorbic acid, salicylic acid, and liquid exfoliating toners require unimpeded access to your lipid mantle. If you are tracking how long does it take for vitamin c serum to work, applying it after a viscous hyaluronic acid gel will delay your progress by impeding cellular delivery. High-viscosity gels should follow low-viscosity solutions.

    Calibrate Skin Moisture: Dry vs. Damp Application

    Calibrate Skin Moisture: Dry vs. Damp Application

    Many skincare enthusiasts follow the blanket advice to apply everything onto damp skin. This single mistake triggers chronic pilling and severe barrier irritation.

    Humectants like glycerin and hyaluronic acid bond with water molecules and thrive on slightly damp skin. Conversely, direct acids, high-strength retinoids, and L-ascorbic acid destabilize on wet skin, increasing irritation risks. If you are managing a skincare routine for broken skin barrier and redness, apply soothing barrier serums only to dry or slightly misted skin without rubbing.

    Decoding Product Clashes: The Compatibility Matrix

    Preventing pilling requires knowing which formulation bases complement each other and which destabilize on contact.

    Active / Vehicle Type Formulation Base Incompatible Partner Layer Why It Destabilizes
    Pure Vitamin C (L-AA) Low-pH Aqueous Carbomer-heavy gel serums pH shift breaks polymer suspension
    High MW Hyaluronic Acid Water-soluble polymer film Water-resistant primers Film sheds under subsequent friction
    Niacinamide (5–10%) Water-gel emulsion Volatile cyclic silicones Emulsifier separation causes clumping
    Retinol Suspensions Squalane / Lipid base Dense aqueous hyaluronic acid Hydrophobic repulsion blocks penetration
    Zinc Oxide Mineral SPF Inorganic physical shield Unabsorbed facial oils Pigment suspends in oil and shears off

    Technique Adjustments That Stop Balling Instantly

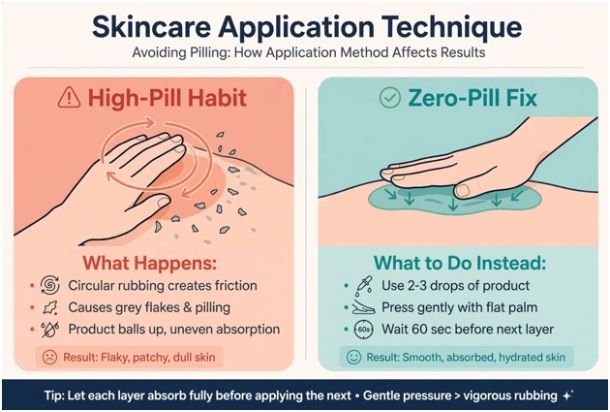
    The mechanical motion you use dictates whether serums settle into pores or tear apart at the surface. Replace circular buffing motions with targeted pressing.

    Application Variable The High-Pill Habit The Zero-Pill Fix
    Application Motion Vigorous circular rubbing Firm, flat-palmed pressing
    Dosing Size Full dropper (6–8 drops) 2–3 concentrated drops total
    Wait Intervals Wet-on-wet stacking (<10s) 45–60 seconds between phases
    Tool Usage Rolling with jade/metal tools Finger pads only for distribution

    Dispense two to three drops across your fingertips, distribute evenly, and press your palms flat against your cheeks, forehead, and chin. Allow the solvent carriers thirty to sixty seconds to evaporate naturally before introducing the next layer.

    Frequently Asked Questions About Serum Pilling

    1. Why does my niacinamide serum always pill under moisturizer?

    High-percentage niacinamide often relies on thick xanthan gum binders that flake when dragged under thick moisturizing creams.

    2. Can I mix two serums in my palms to avoid layering?

    No, blending two finished formulations directly in your hands destabilizes their individual preservative systems and emulsifiers before they reach your face.

    3. Does dead skin cause skincare pilling?

    Desquamating dead skin cells can mix with unabsorbed product residue, but synthetic polymer breakdown causes over 90% of visible skincare pilling.

    4. Why does sunscreen pill over certain morning serums?

    Chemical and mineral sunscreen filters require an undisturbed film to set; heavy humectant gels underneath disrupt this film formation.

    Drop the Rubbing, Keep the Results

    Skincare pilling is an application error, not an inevitability. When you stop overloading thick synthetic gels, respect molecular drying windows, and press formulas instead of rubbing them, your routine glides on cleanly every time. Strip back your stack to two high-performance serums, allow each formula to settle, and let chemistry do the heavy lifting.

  • Difference Between Dry Skin and Dehydrated Skin: How I Fixed Both

    Difference Between Dry Skin and Dehydrated Skin: How I Fixed Both

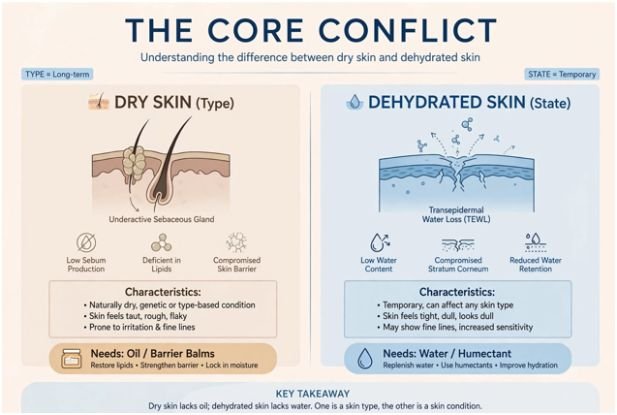
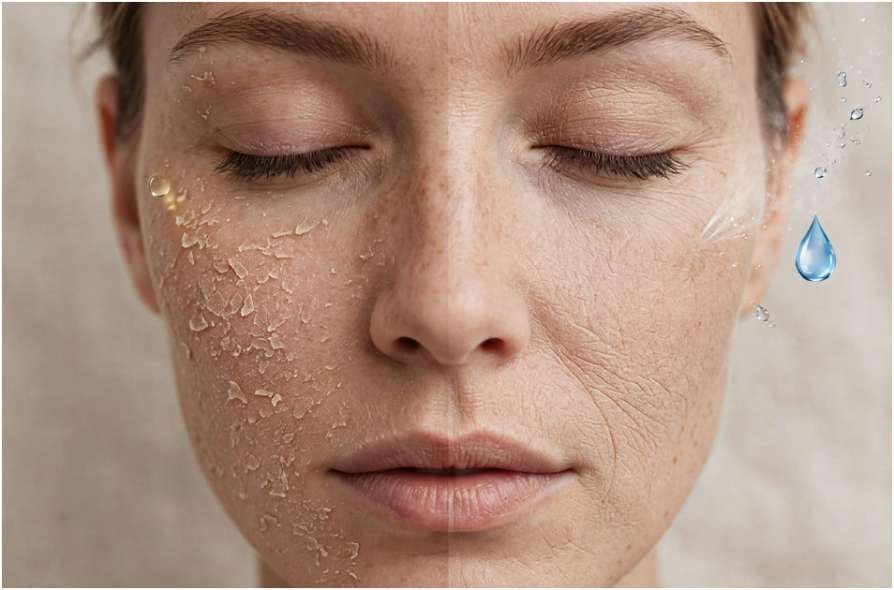
    I spent two years treating my flaky, breakout-prone cheeks with heavy plant butters, only to watch my congestion worsen while the tightness remained. My mistake was simple: I failed to grasp the difference between dry skin and dehydrated skin.

    +————————————————————-+

    |                      THE CORE CONFLICT                      |

    |                                                             |

    |   DRY SKIN (Type)                 DEHYDRATED SKIN (State)   |

    |   Underactive Sebaceous Glands    Compromised Stratum       |

    |   Deficient in sebum & lipids     Corneum water retention   |

    |                                                             |

    |   [Needs: Oil / Barrier Balms]    [Needs: Water / Humectant]|

    +————————————————————-+

    One is an inherent genetic identity requiring oil; the other is a physiological state desperate for water. Once you recognize which deficit your barrier faces, choosing the right formulation shifts from confusing guesswork to predictable science.

    The Fundamental Divide: Oil Deficiency vs. Water Depletion

    The Fundamental Divide: Oil Deficiency vs. Water Depletion

    Skin comfort relies on two distinct elements: lipid integrity and water volume within the stratum corneum. Conflating these elements leads to counterproductive routines.

    Dry Skin: A Biological Skin Type Lacking Lipids

    Dry skin (clinically termed alipidic skin) means your sebaceous glands produce minimal sebum. Sebum waterproofs the skin and keeps cellular tiles glued together. According to the American Academy of Dermatology, individuals with dry skin maintain low lipid production across their entire anatomy, including the scalp, elbows, and hands.

    Pores appear virtually invisible because sebum flow does not dilate follicular walls. Without adequate natural oils, the skin barrier becomes brittle, exhibiting persistent micro-cracking and scaling regardless of climate.

    Dehydrated Skin: A Treatable Condition Driven by TEWL

    Dehydration reflects a depletion of water within the epidermal layers, driven by accelerated transepidermal water loss (TEWL). Clinical research indexed by the National Center for Biotechnology Information highlights that TEWL occurs when environmental or mechanical aggressors disrupt intracellular cohesion, allowing hydration to evaporate into ambient air.

    Dehydration spares no skin type; oily, normal, and combination profiles regularly experience it. When water reserves plunge, your skin often overproduces surface sebum to compensate. This reaction creates an oily surface stretched over a tight, desiccated foundation.

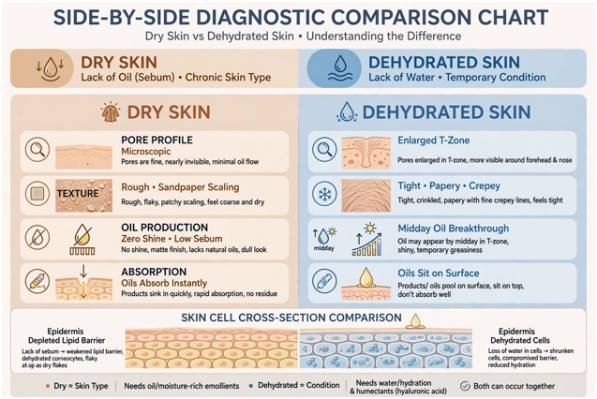
    Side-by-Side Diagnostic Comparison

    Side-by-Side Diagnostic Comparison

    Evaluating visible markers alongside tactile responses clarifies your current barrier status.

    Diagnostic Marker Dry Skin (Alipidic Type) Dehydrated Skin (Water-Deficient Condition)
    Root Deficiency Natural sebum, essential fatty acids, ceramides Intracellular water within the stratum corneum
    Origin Genetic blueprint; lifelong biological profile Environmental, dietary, or behavioral triggers
    Pore Profile Microscopic or invisible over entire face Variable; often enlarged or congested in the T-zone
    Tactile Texture Rough, sandpaper-like, rough scaling Tight, papery, crepey surface tension
    Oil Production Near zero; no afternoon shine Moderate to excessive midday oil breakthrough
    Absorption Speed Absorbs rich facial oils instantly Oils sit atop surface while tightness persists
    Breakout Frequency Rare, except from occlusive-induced dermatitis Common; micro-comedones underneath tight skin

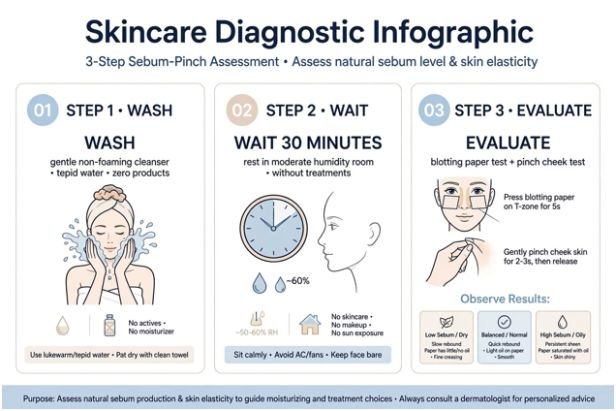
    My At-Home Diagnostic Framework: The Sebum-Pinch Assessment

    My At-Home Diagnostic Framework: The Sebum-Pinch Assessment

    To eliminate trial-and-error routines, I use a diagnostic protocol that pairs tissue blotting with kinetic skin testing.

          STEP 1: WASH                    STEP 2: WAIT                    STEP 3: EVALUATE

    +————————+      +————————+      +——————————-+

    | Gentle, non-foaming    | —> | Wait 30 minutes in an  | —> | Apply blotting paper to nose; |

    | cleansing with tepid   |      | unheated, moderate-    |      | gently pinch cheek skin to    |

    | water. Apply zero      |      | humidity room without  |      | observe tensile response and  |

    | topical products.      |      | applying treatments.   |      | recoil elasticity.            |

    +————————+      +————————+      +——————————-+

    1. Cleanse with a mild, non-foaming wash using lukewarm water. Pat dry and leave the skin bare for thirty minutes.
    2. Press a single sheet of blotting paper firmly against your forehead and the bridge of your nose.
    3. Gently pinch the flesh of your upper cheek between your thumb and forefinger, holding for two seconds before releasing.

    Interpreting Your Results

    • The Dry Profile: The blotting paper shows zero translucent oil marks. The cheek pinch feels soft, yet the surface shows rough flaking without visible recoil lag.
    • The Dehydrated Profile: The blotting paper reveals visible oil, particularly across the T-zone. During the pinch, the surface displays fine horizontal wrinkles like crinkled cellophane before snapping back.
    • The Compounded State: No oil registers on the blotting sheet, and the pinch test reveals fine accordion lines that slowly recover. Here, your barrier lacks both lipids and water.

    Targeted Ingredient Protocols: Lipids vs. Humectants

    Resolving these issues requires distinct biochemical strategies.

    Functional Category Primary Role Ideal Target Candidates Representative Ingredients
    Humectants Draw atmospheric and dermal water into cells Dehydrated complexions, crepey texture Glycerin, Hyaluronic Acid, Sodium PCA, Polyglutamic Acid
    Emollients Fill micro-fissures between desquamating cells Rough, scaling, alipidic dry skin Squalane, Ceramides (NP, AP, EOP), Cholesterol, Jojoba Oil
    Occlusives Form a hydrophobic film to stop TEWL Compromised barriers, overnight moisture sealing Petrolatum, Shea Butter, Lanolin, Dimethicone

    Rebuilding Alipidic Skin with Emollients and Occlusives

    Treating genuine dryness requires supplementing missing sebum. Clinical guidelines from CeraVe Research demonstrate that replenishing physiological lipid ratios—specifically ceramides, cholesterol, and free fatty acids—restores protective resilience.

    I apply facial oils and dense emollient balms morning and night. After washing, I mist my face with the best hydrating toner for sensitive dry skin to soften the stratum corneum, followed immediately by squalane and a lipid-rich cream to lock in the surface.

          DRY SKIN ROUTINE                     DEHYDRATED SKIN ROUTINE

    +—————————–+         +—————————–+

    | Cream Cleanser (Non-Foam)   |         | Micellar Water / Gentle Gel |

    |            |                |         |            |                |

    | Lipid Barrier Toner         |         | Humectant Essence on Wet    |

    |            |                |         | Skin (Glycerin/HA)          |

    | Plant Oil (Squalane/Marula) |         |            |                |

    |            |                |         | Water-Gel Fluid Moisturizer |

    | Rich Ceramide Barrier Balm  |         |            |                |

    |                             |         | Occlusive Sleeping Mask     |

    +—————————–+         +—————————–+

    Quenching Water-Starved Cells with Layered Humectants

    Dehydration requires a different technique. Applying heavy oils directly over dehydrated skin creates a greasy, suffocated surface over tight, parched tissue. Instead, prioritize low-molecular humectants that bind water molecules.

    Educators at Dermalogica recommend misting humectant solutions directly over damp skin to prevent the ingredients from pulling moisture outward from the dermis. I saturate clean skin with glycerin serums, seal with a light gel-cream, and finish twice a week with the best overnight sleeping mask for dehydrated skin to limit night-time TEWL.

    Frequently Asked Questions

    1. Can oily skin be dehydrated?

    Yes; inadequate moisture levels disrupt skin equilibrium, causing excess oil production over tight, water-depleted tissue.

    2. How quickly can skin dehydration be reversed?

    Dehydration often improves within 48 to 72 hours of using targeted humectants and eliminating harsh foaming agents.

    3. Does drinking water cure dry skin?

    Drinking water supports systemic hydration, but it cannot correct dry skin caused by low genetic sebum production.

    4. Can over-exfoliation turn dry skin into dehydrated skin?

    Aggressive acids strip the lipid barrier and damage corneocyte structures, accelerating water loss and triggering severe dehydration.

    Stop Guessing, Start Repairing

    Stop treating your skin based on surface assumptions. If your face feels tight yet shines by midday, replenish water reserves with layered humectants on damp skin. If your skin stays matte, rough, and thirsty for heavy oils, focus on rebuilding lipids with ceramides and plant butters. Listen to what your barrier is missing, feed it the correct nutrient, and balance will follow.

  • Safe Chemical Exfoliants for Rosacea Prone Skin: My Tested Guide

    Safe Chemical Exfoliants for Rosacea Prone Skin: My Tested Guide

    I spent two years avoiding all acids because one glycolic toner left me beet red for three days. If you have rosacea, you know that sting. I learned safe chemical exfoliants for rosacea prone skin are not about strength, they are about penetration control.

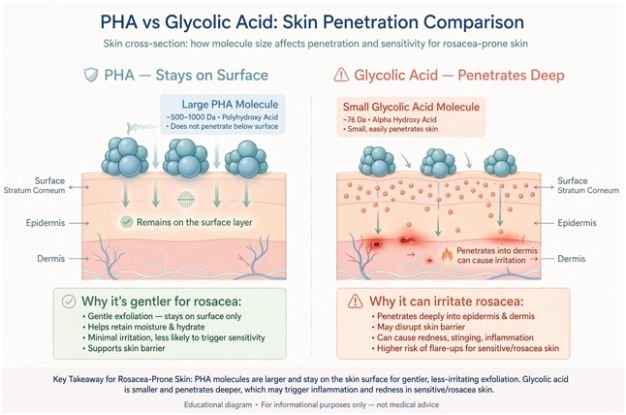
    Traditional physical scrubs and small-molecule AHAs, especially glycolic acid, are high-risk due to their rapid, deep penetration and potential to trigger severe redness. I switched to a molecular-size filter and my barrier finally calmed down.

    Why Most Exfoliants Make Rosacea Worse

    Rosacea skin has a compromised lipid barrier. That means anything sharp or fast-acting creates micro-tears and heat.

    The Molecular Size Rule No One Talks About

    Larger molecules cannot dive deep. They sit on the surface, loosen dead cells slowly, and pull water in. Smaller molecules rush into the dermis and spark inflammation. This single rule changed how I shop for acids.

    For deeper background on rosacea triggers and barrier care, the American Academy of Dermatology offers dermatologist-reviewed guidelines. The National Rosacea Society also breaks down subtypes and why Subtype 2 reacts differently to exfoliation.

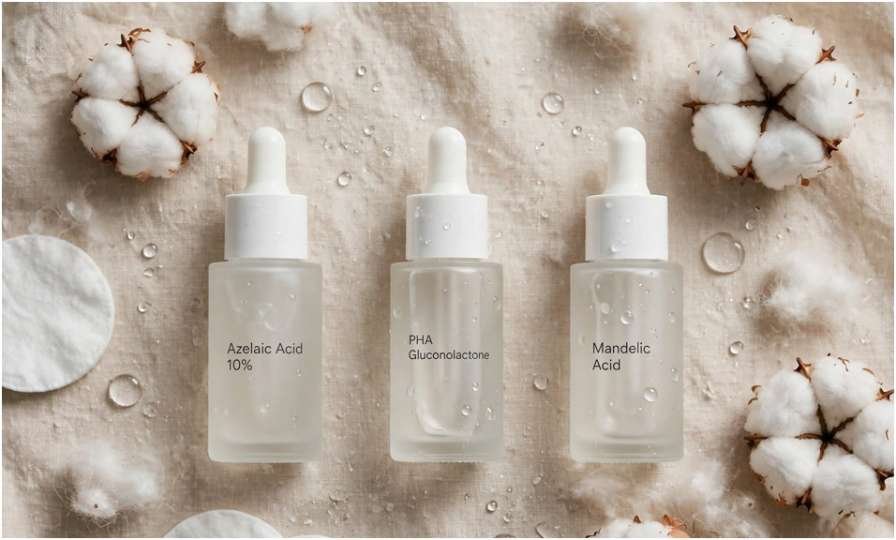
    The Only 3 Chemical Exfoliants I Trust on My Rosacea

    The Only 3 Chemical Exfoliants I Trust on My Rosacea

    1. Azelaic Acid – Lowest Risk Multitasker

    This was my entry point. Azelaic acid acts as an ultra-gentle exfoliant while actively calming heat reactivity, erythema, and the inflammatory bumps of papulopustular rosacea. I used 10% three nights a week. No sting, less morning redness. The Cleveland Clinic notes its anti-inflammatory and keratolytic dual action.

    2. Polyhydroxy Acids (PHAs) – The Surface-Only Exfoliant

    Gluconolactone and lactobionic acid have large molecular structures. That size limits penetration to the very surface, preventing deep irritation. They function as humectants to draw moisture into compromised barriers. An NIH study on gluconolactone showed improved barrier function and hydration with minimal irritation. This is my winter pick.

    3. Mandelic & Lactic Acid – Proceed With Caution

    Mandelic has a larger size than glycolic, and lactic stimulates ceramide production. Both are gentler than glycolic acid but still carry irritation risks. I only use them at 5% or less, once weekly, and never when I am flushed. They require low percentages and low frequency.

    Comparison Table: Risk Profile & Benefits

    Ingredient Risk Profile Primary Mechanism & Skin Benefit
    Azelaic Acid Lowest Risk Ultra-gentle exfoliant + calms heat, erythema, Subtype 2 bumps
    PHAs – Gluconolactone, Lactobionic Acid Low to Moderate Large molecule, surface-only exfoliation + humectant for barrier
    Mandelic & Lactic Acids Proceed with Caution Larger than glycolic, ceramide support, but irritation possible
    Physical Scrubs & Glycolic Acid High Risk – Avoid Rapid deep penetration + mechanical disruption triggers redness

    How I Exfoliate Safely Without Triggering a Flare

    How I Exfoliate Safely Without Triggering a Flare

    I tested an 8-week low and slow protocol. Weeks 1-4: azelaic acid only, 1x per week at night. Weeks 5-8: added PHA 1x per week on a non-azelaic night. Result: texture improved, zero papules, no increased baseline redness. That taught me frequency matters more than percentage.

    If you are building a schedule, learn to introduce chemical peel into weekly routine – it maps out the night-by-night separation I use.

    I also learned not to confuse purging with a true reaction. If you are layering actives, this breakdown of retinol purging vs allergic reaction breakouts helped me identify what was a flare and what was not.

    Rules I Follow Every Time

    Rule How I Apply It
    Avoid Active Flare-ups Never introduce acid when skin is burning, flushing, or peeling. Wait for calm baseline.
    Low and Slow Approach Start 1x per week at night. After 3 weeks with no irritation, scale to 2-3x max.
    Patch Test First Tiny drop behind ear or jawline for 24-48 hours to check for burning.
    Skip Aggressive Actives No coarse scrubs, high-percentage glycolic, alcohol-heavy toners, or layering on retinoid nights.

    Always talk to your dermatologist before changing actives, especially if you use prescription metronidazole or ivermectin.

    FAQ

    1. What is the safest chemical exfoliant for rosacea?

    Azelaic acid 10% and PHAs like gluconolactone are considered the safest due to low penetration and anti-inflammatory effects.

    2. Can I use lactic acid if I have rosacea?

    Yes, but only at low percentages under 5% and once weekly, and only when your skin is not actively flaring.

    3. How often should rosacea prone skin exfoliate?

    Start once a week at night, then slowly build to two or three times if tolerated.
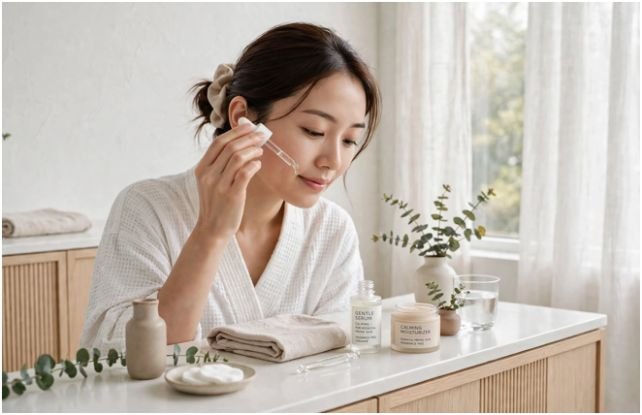
    4. Does exfoliation help rosacea texture?

    Yes, surface-only exfoliation helps smooth rough patches without triggering redness when you choose large-molecule acids.

    My Take: Soft Power Wins

    Stop chasing the tingle. For rosacea, effective exfoliation feels like nothing at all. Pick one multitasker, respect the molecular size rule, and let your barrier lead. Your next step: audit your current toner for glycolic acid or denatured alcohol and swap it for a PHA or azelaic formula this week.