Blog

  • How Long Does It Take for Vitamin C Serum to Work?

    How Long Does It Take for Vitamin C Serum to Work?

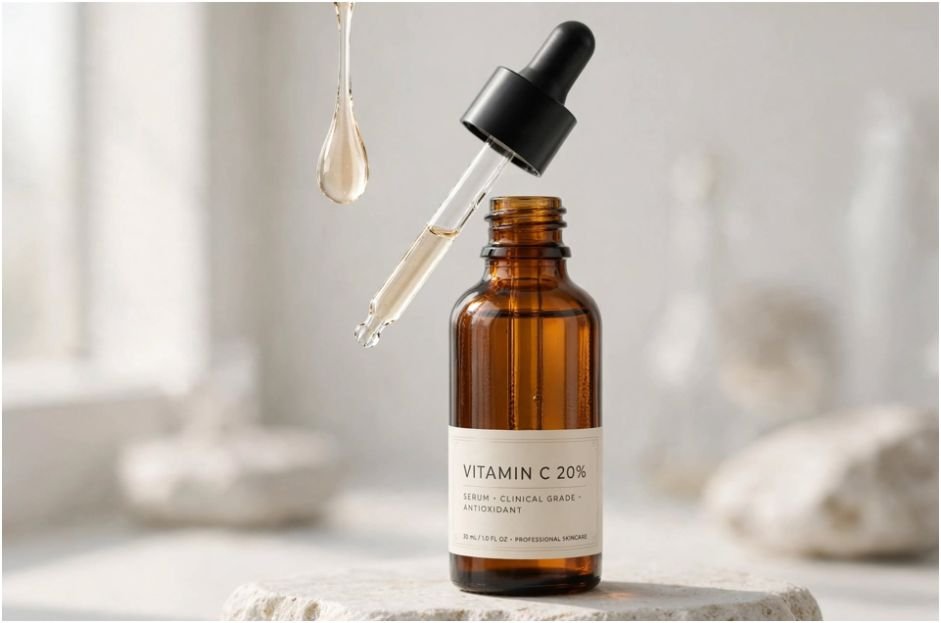
    You bought an expensive amber dropper, patted a few drops into your skin this morning, and now you are staring into the mirror waiting for an overnight transformation. I have been there. If you want to know how long does it take for vitamin c serum to work, the quick answer is two distinct phases: surface radiance appears within 7 to 14 days, while structural pigment clearance and collagen production take 8 to 12 weeks of unbroken daily application.

    Dermal biology moves at its own pace. Topical L-ascorbic acid must saturate your skin cells, neutralize free radicals, and wait out a full natural desquamation cycle before dark spots lift.

    The Honest Clinical Timeline: What I Saw Week by Week

    When I committed to clinical-grade L-ascorbic acid, I documented my skin changes across twelve consecutive weeks. Different skin concerns resolve at vastly different depths. Surface dehydration responds quickly; structural melanin clusters require patience.

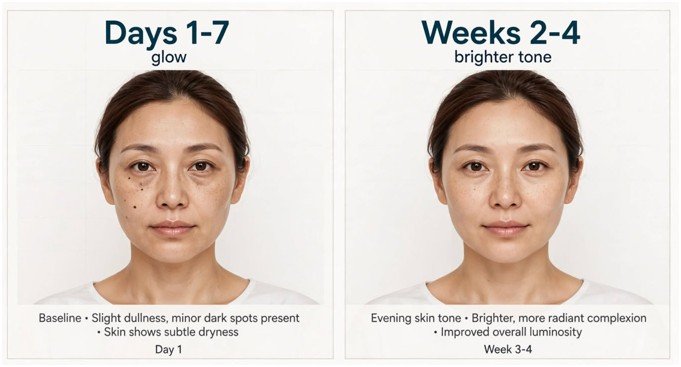
    Phase Visible Skin Response Underlying Biological Mechanism Expected Success Rate
    Days 1–7 Surface hydration, slight glow Scavenging of reactive oxygen species (ROS) ~90% of users
    Weeks 2–4 Brighter tone, refined pores Stratum corneum moisture retention; reduced sebum oxidation ~80% of users
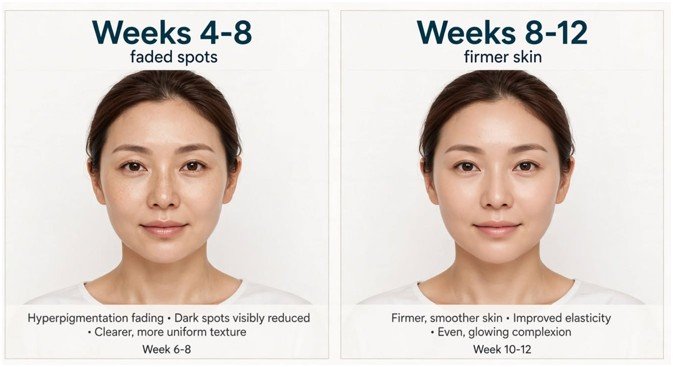
    Weeks 4–8 Visibly lightened acne spots Tyrosinase enzyme inhibition clears trapped melanin deposits ~65% of users
    Weeks 8–12+ Firmer skin, softened lines Proline and lysine hydroxylation stimulate collagen synthesis ~50% of users

    Weeks 1 to 2: The Instant Surface Shift

    Weeks 1 to 2: The Instant Surface Shift

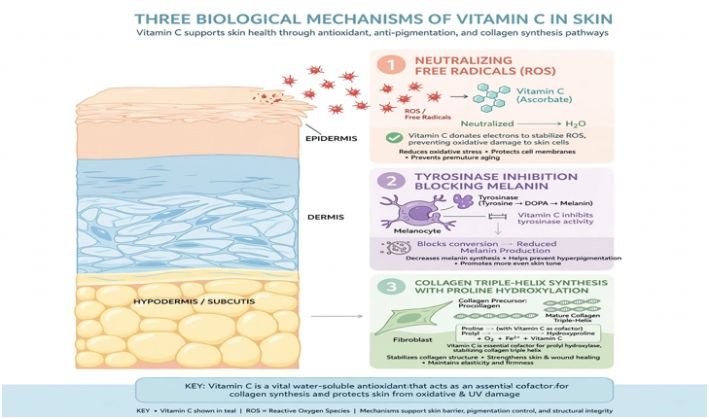
    During the first ten days, the primary benefit is free radical defense. As outlined by researchers on NCBI, topical ascorbic acid rapidly neutralizes reactive oxygen species caused by urban pollution and UV exposure. 

    You will not see pigment disappear yet. Instead, my skin felt smoother, retained moisture better, and showed an unmistakable morning radiance caused by reduced sebum oxidation.

    Weeks 4 to 8: Pigment Disruption and Fading

    Weeks 4 to 8: Pigment Disruption and Fading

    Around week five, deeper changes emerge. L-ascorbic acid directly inhibits tyrosinase, the enzyme responsible for melanin production. If your goal is to fade post acne hyperpigmentation fast, this is the window where stubborn post-inflammatory erythema (PIE) and sun spots begin breaking apart. 

    The peer-reviewed findings in the Journal of Clinical and Aesthetic Dermatology show that consistent tyrosinase blockade requires at least one full cellular turnover cycle (28 to 40 days) to transport fragmented pigment to the surface where it sloughs off naturally.

    Weeks 8 to 12+: Deep Dermal Remodeling

    Structural collagen synthesis takes the longest. Ascorbic acid acts as an essential cofactor for prolyl and lysyl hydroxylase, enzymes that stabilize the collagen triple-helix molecule. By week ten, I noticed softened expression lines around my eyes and a springier feel along my jawline.

    Why Your Results Might Stall: Key Biological Bottlenecks

    Why Your Results Might Stall: Key Biological Bottlenecks

    If you reach week six without noticeable improvement, one of three biological bottlenecks is likely stalling your progress.

    Bottleneck Visible Clue Immediate Fix
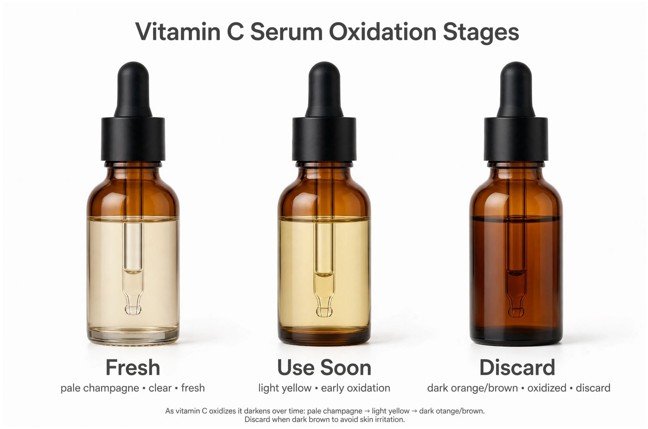
    Oxidized Formulation Serum turns orange, amber, or brown Discard immediately; switch to airtight packaging
    Sub-therapeutic pH Stinging without results, or no absorption Verify formulation pH rests between 2.5 and 3.5
    Skipping Daily SPF Sun spots darken despite serum use Apply broad-spectrum SPF 30+ every morning

    Formula Degradation and the Amber Drop

    Formula Degradation and the Amber Drop

    Pure L-ascorbic acid degrades upon contact with air, light, and warmth. Once oxidized, it transforms into dehydroascorbic acid and eventually erythrulose—the active ingredient in self-tanner. 

    If your serum shifts from pale champagne to dark orange, it will stain pores rather than brighten skin. Look for formulas balanced with Vitamin E and Ferulic acid, which stabilize the molecule and double its photoprotective value.

    The Reservoir Depletion Rule

    Clinical testing indicates that skin reaches maximum ascorbic acid saturation after three consecutive daily applications, creating a protective “reservoir” with a half-life of roughly 48 hours. If you skip three days in a row, your tissue levels drop below therapeutic thresholds. This breaks the tyrosinase inhibition cycle and forces your skin turnover clock to restart from day one.

    Maximizing Absorption Speed Without Irritation

    Maximizing Absorption Speed Without Irritation

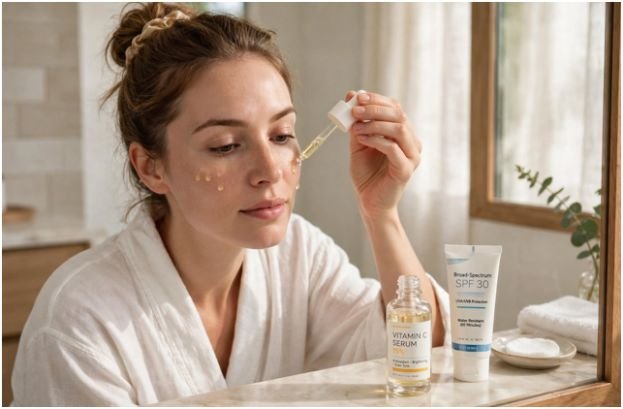
    Applying your serum properly speeds up absorption without compromising your barrier. Apply 4 to 5 drops directly to cleansed, completely dry skin every morning. Water on the skin raises surface pH, hindering L-ascorbic acid from penetrating past the stratum corneum.

    Many readers ask if layering other actives slows progress. As long as you introduce them carefully, you can safely evaluate whether can you use niacinamide with vitamin c together to accelerate barrier recovery while targeting dark spots simultaneously.

    Always complete your morning routine with broad-spectrum sunscreen. As the American Academy of Dermatology emphasizes, UV exposure triggers fresh melanin synthesis and accelerates collagen degradation, instantly canceling out any progress your serum creates.

    Frequently Asked Questions

    1. Can I use vitamin C serum both morning and night to get faster results?

    No, human skin reaches biological vitamin C saturation with once-daily application, so applying it twice daily wastes product and risks contact dermatitis.

    2. Why is my skin purging after starting a new vitamin C serum?

    Pure L-ascorbic acid has a low pH that causes mild irritation or peeling, but it does not accelerate cellular turnover like retinoids, meaning true inflammatory breakouts signal formula incompatibility rather than purging.

    3. What should I do if my vitamin C turns light yellow?

    A faint champagne tint indicates early exposure to air and is still safe to use, but store it in your refrigerator immediately to halt oxidation.

    4. Does a higher percentage of vitamin C deliver faster results?

    Formulas capped between 15% and 20% maximize cellular uptake; concentrations exceeding 20% do not improve absorption and substantially increase the risk of barrier damage.

    Stop Staring in the Mirror: Commit to the 60-Day Mark

    Do not ditch your serum after two weeks because your dark spots look the same. Surface radiance is your preview; deep pigment clearance is the main event. Keep your bottle tightly capped in the fridge, shield your barrier with daily sunscreen, and let cellular turnover complete its natural rhythm. Give it eight solid weeks of unwavering daily commitment, and your skin will reward your patience.

  • Makeup for Hooded Eyes Step by Step: The Open-Eye Method

    Makeup for Hooded Eyes Step by Step: The Open-Eye Method

    For years, I thought better blending was the answer to getting eye makeup to show on hooded lids. What actually changed my results was much simpler: I stopped designing the look around a crease that disappeared when my eyes opened. Instead, I started treating my relaxed, open eye as the real canvas.

    That shift completely changed how I place shadow, liner, and mascara. In this makeup for hooded eyes step by step guide, I’ll use what I call the open-eye method—building the crease where it can actually be seen, lifting the outer corner instead of dragging it down, keeping the lash line slim, and using brightness only where it helps the eyes look more open.

    How Can I Tell If I Have Hooded Eyes?

    Hooded eyes have an extra fold of skin extending from the brow bone toward the lash line. When you look straight ahead, this fold may partially or almost completely cover the natural crease and mobile eyelid.

    I check my eye shape with my face relaxed and my eyes looking directly into a mirror. If most of the crease disappears, I use hooded-eye makeup techniques. Hooding can occur with almond, round, deep-set, or asymmetrical eyes, and it may become more noticeable as the skin changes with age.

    How Should I Prep Hooded Eyes So Makeup Does Not Crease?

    Because the upper fold can touch the mobile eyelid, hooded eyes may experience more eyeshadow and eyeliner transfer.

    I begin with clean, dry lids and smooth a thin layer of eye primer from the lash line toward the brow bone. If my eyelids become oily easily, I lightly press translucent powder over the primer after it settles.

    I avoid applying a thick layer of powder because too much can make shadow difficult to blend. The goal is simply to reduce excess slip and create a smoother base that helps eye makeup stay in place.

    What Is the Best Step-by-Step Eyeshadow Technique for Hooded Eyes?

    What Is the Best Step-by-Step Eyeshadow Technique for Hooded Eyes?

    For a softer overall finish, these eye techniques can also be paired with a no makeup makeup look for beginners approach that keeps the rest of the makeup fresh and understated.

    Step 1: Map Your Eye Makeup While Looking Straight Ahead

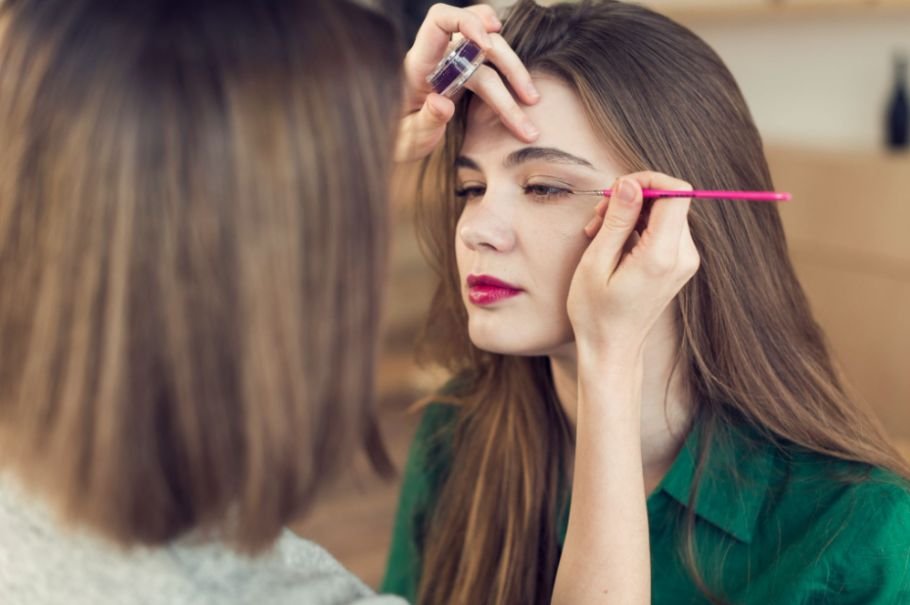
    I keep my eyes open and look directly into the mirror before placing my transition shade.

    This is one of the most important hooded-eye makeup techniques because applying shadow only with closed eyes can hide much of the finished look beneath the fold.

    I keep checking my placement from this relaxed, straight-ahead position as I work.

    Step 2: Create a Faux Crease Above the Natural Fold

    Instead of following the hidden crease, I create a new visible crease slightly above it.

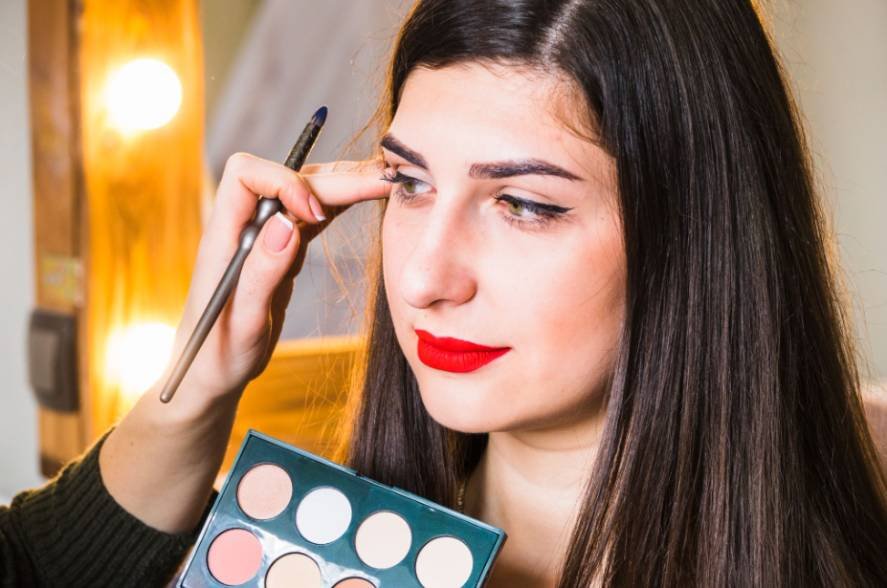
    Using a small blending brush and a matte mid-tone brown or another transition shade, I place a few faint dots or a soft guideline just above the natural fold. I position the color where it remains visible when my eyes are open.

    Then I connect and soften those marks with gentle blending motions.

    This technique creates the illusion of more lid space and gives the eye greater depth without requiring heavy shadow.

    Step 3: Deepen the Outer Corner for a Lifted Shape

    Next, I take a slightly darker matte shade and concentrate it on the outer corner.

    I form a small V-shape or upward-facing angle and blend the shadow outward and slightly toward the temple. I avoid pulling the darkest color downward because that can visually lower the eye.

    I also build pigment gradually. A soft outer corner generally looks more flattering on limited lid space than one dense patch of dark eyeshadow.

    Step 4: Brighten the Mobile Lid and Inner Corner

    I press a light ivory, soft beige, or champagne shade onto the mobile lid and around the inner corner.

    When appropriate, I bring the brighter shade slightly above the natural fold so it remains visible when the eye opens. This contrast between the lighter lid and deeper faux crease can make the center of the eye appear more open.

    I use shimmer selectively. Satin or subtle shimmer can brighten the lid beautifully, but heavy reflective shadow across a textured hood may emphasize the fold. For mature hooded eyes, I usually choose softer finishes and thinner layers.

    Step 5: Blend Everything Upward Instead of Downward

    Step 5: Blend Everything Upward Instead of Downward

    Once the main colors are in place, I soften the edges with a clean blending brush.

    My blending direction stays mostly upward and outward. I imagine an invisible diagonal line running from the outer corner toward the end of the eyebrow.

    That visual guide helps create a lifted eye makeup shape without requiring dramatic color.

    What Eyeliner Technique Works Best for Hooded Eyes?

    Thick eyeliner can consume much of the visible eyelid, so I prefer keeping definition extremely close to the lashes.

    For an easy everyday look, I tightline the upper lash area with a long-wearing waterproof gel pencil. I can then use a small angled brush to stamp dark brown or deep neutral eyeshadow directly into the roots of the upper lashes.

    This creates definition without drawing a thick black line across valuable lid space.

    Can You Wear Winged Eyeliner With Hooded Eyes?

    Yes, but I do not rely on the traditional closed-eye wing technique.

    For beginners, skipping a large wing and concentrating definition at the lash roots is often easier. If I want winged eyeliner, I map the outer shape while looking straight ahead.

    A batwing-style technique can work especially well because it accounts for the eyelid fold. The liner may look slightly different when the eye is closed, but what matters is that the wing appears smooth when the eyes are naturally open.

    How Do I Apply Mascara Without Smudging the Hood?

    I curl the upper lashes thoroughly before applying mascara because lifted lashes help open the eye visually.

    Then I apply a smudge-resistant or smudge-proof mascara, concentrating definition near the lash roots and outer lashes. I avoid repeatedly coating the very tips when they naturally touch the upper hood.

    I allow the mascara to dry before looking down or blinking forcefully. For some eye shapes, adding controlled definition to the lower lashes can further create a wide-awake appearance.

    What Hooded-Eye Makeup Mistakes Should I Avoid?

    What Hooded-Eye Makeup Mistakes Should I Avoid

    The most common mistake I see is applying an entire eye look while the eyelid is closed. The shadow may look beautiful during application but disappear once the eye opens.

    Another mistake is placing the crease color too low. Moving the transition shade slightly above the natural fold makes much more of the makeup visible.

    I also avoid overly thick liner, dark shadow blended downward, and excessive shimmer directly across a pronounced hood. These choices can visually reduce the limited space available around the eye.

    How Should Makeup Change for Mature Hooded Eyes?

    Mature hooded eyes may have additional texture, dryness, or softness around the eyelid, so I focus even more on thin layers.

    I lightly prep the skin for makeup, use soft matte transition shades, blend carefully, and avoid packing large amounts of powder into fine lines.

    Instead of creating an extremely sharp faux crease, I use a diffused shadow slightly above the fold. The result still provides definition but looks softer and more natural.

    For a softer everyday result, you can also follow this natural makeup look step by step approach and adapt the eye makeup to your hooded shape.

    Frequently Asked Questions 

    1. What is the easiest makeup for hooded eyes step-by-step technique for beginners?

    I start with primer, create a soft faux crease above the natural fold, deepen the outer corner in an upward direction, brighten the visible lid, define the lash roots with thin liner or shadow, curl the lashes, and finish with smudge-resistant mascara. Keeping the eyes open during placement makes every step easier to control.

    2. Should hooded eyes use matte or shimmer eyeshadow?

    Both can work. I prefer matte shades for the transition color, faux crease, and outer corner because they create controlled depth. I use satin or subtle shimmer on the visible lid or inner corner to add brightness.

    3. How can I make hooded eyes look bigger?

    I keep the center of the lid bright, raise the crease color slightly, blend the outer shadow upward, use thin lash-line definition, and curl the lashes. Together, these techniques preserve visible lid space and make the eyes appear more open.

    4. Where should eyeshadow go on hooded eyes?

    I place the transition shade above the natural fold where it remains visible with the eyes open. I keep deeper shadow mainly around the outer third and blend it upward rather than extending it heavily downward.

    Final Thoughts

    The biggest lesson I learned was that hooded-eye makeup works best when I stop trying to force conventional crease placement onto an eye shape that behaves differently. The most effective makeup for hooded eyes step-by-step routine starts with the eye open and relaxed, because that is how the finished makeup will actually be seen.

    By raising the faux crease, lifting the outer shadow, controlling shimmer, keeping liner close to the lashes, and defining the lashes without encouraging transfer, I can create anything from understated daytime makeup to a smoky evening look while keeping the eye shape bright and visible. 

    I also pay attention to allergens in cosmetics, especially around the sensitive eye area, and stop using any product that causes irritation or dis

  • Best Overnight Sleeping Mask For Dehydrated Skin

    Best Overnight Sleeping Mask For Dehydrated Skin

    I woke up tight, flaky, and somehow oily at the same time. That was my clue. My skin was not dry. It was dehydrated. The best overnight sleeping mask for dehydrated skin does not add more heavy oil. It floods your cells with water and seals it so you do not lose it to your pillow or AC.

    I have tested gel-creams that vanished by midnight and balms that just sat on top. The ones that worked shared the same formula logic. They treated water loss as the main problem.

    Why Dehydrated Skin Needs a Different Sleeping Mask

    Why Dehydrated Skin Needs a Different Sleeping Mask

    Dehydrated skin lacks water, not oil. Dry skin lacks oil. That difference changes everything you put on at night. Dehydrated skin often looks dull, feels tight after cleansing, and shows fine lines that disappear after you drink water. 

    According to the American Academy of Dermatology, dehydrated skin needs humectants plus barrier support to reduce water loss AAD.

    Traditional heavy occlusives trap dead skin but do not infuse water. They feel greasy without fixing tightness.

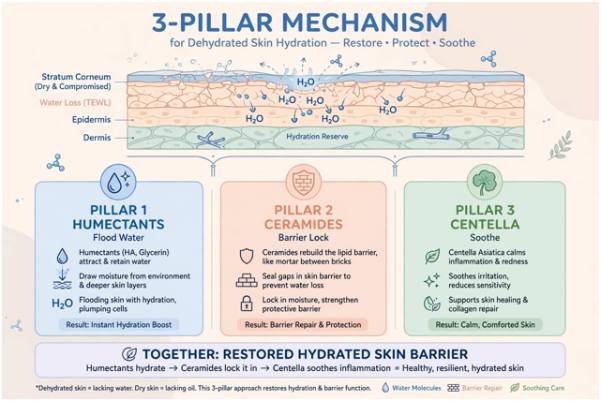
    The 3-Pillar Rule I Use to Judge Any Mask

    The 3-Pillar Rule I Use to Judge Any Mask

    Every mask I keep has to pass this: humectants to pull water in, barrier lipids to lock it, and soothers to calm irritation. Humectants like glycerin and hyaluronic acid bind water deep in the stratum corneum. 

    Research from the National Institutes of Health shows hyaluronic acid can hold up to 1000x its weight in water and reduces transepidermal water loss when paired with occlusives. 

    Barrier protectors like ceramides and squalane repair the lipid matrix so that water does not evaporate. The Cleveland Clinic notes ceramides make up 50% of your skin barrier and are critical for preventing moisture loss. 

    Soothers like centella and panthenol reduce the sting that comes with a compromised barrier. If you are confused about roles, read my breakdown on ceramides vs hyaluronic acid for skin hydration.

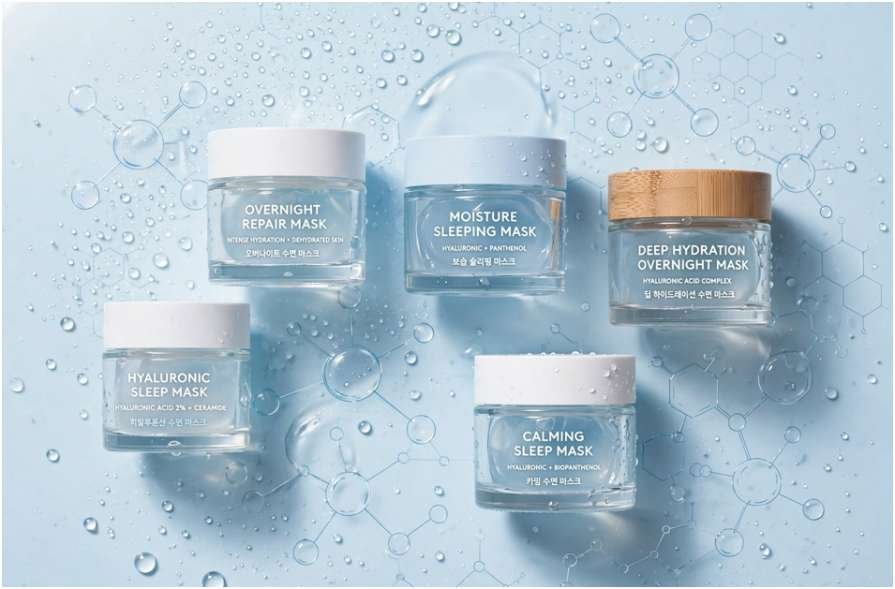
    5 Best Overnight Sleeping Masks for Dehydrated Skin That Actually Hold Water

    I tested these over three weeks in a low-humidity bedroom with AC on all night. That is where pure humectant masks fail.

    1. Laneige Water Sleeping Mask – Best All-Rounder

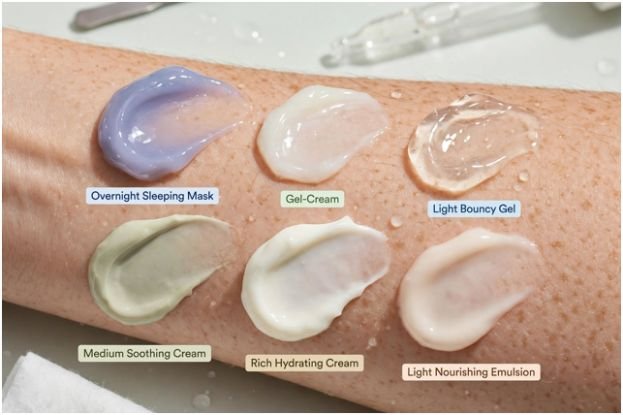
    Texture is a bouncy gel-cream. It sinks in without stickiness. Squalane, probiotic ferment, and multi-weight hyaluronic acid give you both immediate plumpness and an overnight seal. I use this when my combination skin feels dehydrated but not sensitive. It never pilled under my morning cleanse.

    2. SKIN1004 Madagascar Centella Hyalu-Cica Sleeping Pack – Best for Oily-Dehydrated

    This light gel is made for redness-prone, acne-prone dehydration. Centella asiatica calms, while multi-depth hyaluronic acid and niacinamide hydrate without adding oil. In my test, it reduced morning redness by a visible margin and left zero greasy residue. Dermatologists often recommend cica for barrier recovery.

    3. Purito SEOUL Dermide Cica Barrier Sleeping Pack – Best for Damaged Barrier

    Medium cream, not heavy. Five ceramides plus squalane and centella extracts. This is the one I reach for when my barrier stings from over-exfoliation. It feels like a reparative seal, not a mask. Tightness was gone by night two.

    4. Clinique Moisture Surge Overnight Mask – Best for Severely Parched Skin

    Richer than the others. Trehalose, murumuru butter, and sodium hyaluronate. If your skin feels both dry and dehydrated, this bridges the gap. I layer it thin. Thick layers do not work better for water retention.

    5. COSRX Ultimate Nourishing Rice Overnight Spa Mask – Best for Dull + Rough Texture

    Light emulsion with 68% rice extract. Rice bran is rich in amino acids that smooth rough patches while niacinamide adds glow. This gave me the most noticeable morning brightness without irritation.

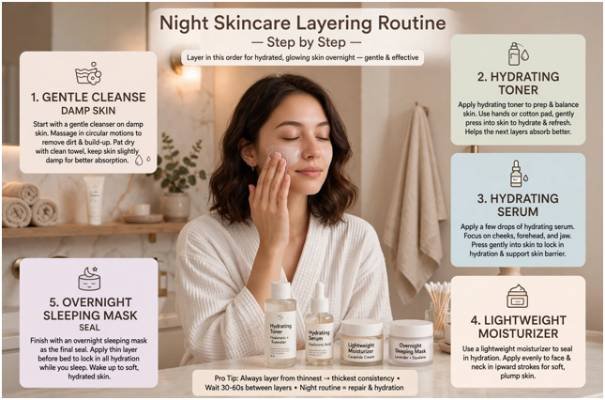
    How I Layer Toner, Serum, and Sleeping Mask to Stop Overnight Water Loss

    Order matters more than quantity. I apply thinnest to thickest and keep skin damp between steps. That dampness gives humectants water to bind immediately.

    I cleanse with a non-foaming gel and pat so skin stays damp. Then I press a hydrating toner with my hands. 

    For severe dehydration I do two thin layers. My full method includes best hydrating toner for sensitive dry skin

    Next I press 3-4 drops of serum with glycerin or hyaluronic acid over that damp base. If my skin is very dry plus dehydrated, I add a pea-size ceramide gel-cream. 

    Finally I smooth the sleeping mask as the seal 20-30 minutes before sleep so it sets and does not transfer to the pillow. A quick mist of thermal water helps if my room is dry.

    I skip AHAs, BHAs, and retinol on recovery nights. Letting the lipid barrier reset for two nights made more difference than any extra product.

    What to Look For and What to Skip in a Dehydration Mask

    What to Look For and What to Skip in a Dehydration Mask

    Look for polyglutamic acid alongside glycerin. It forms a flexible film that holds water longer than hyaluronic acid alone. Panthenol is underrated. It acts as both humectant and barrier repair.

    Skip formulas where denatured alcohol is in the top five ingredients. It strips lipids and cancels ceramides. 

    Avoid heavy synthetic fragrance and pure petrolatum balms. They suffocate without hydrating. 

    And avoid pure humectant gels without any squalane or ceramide. In dry air they pull water from your deeper skin instead of the environment.

    Final Verdict: My Overnight Fix That Saved My Tight Skin

    Dehydration is a water problem, not an oil problem. Stop chasing richer creams. Chase smarter seals. For me, Purito for barrier repair nights and SKIN1004 for oily-dehydrated nights covered 90% of my week. Keep it simple, keep it damp, and let the mask do the locking work.

    Start tonight with damp skin and one of the gel-creams above. Your morning tightness tells you if it worked.

    FAQs

    1. What is the best overnight sleeping mask for dehydrated sensitive skin?

    Purito Dermide Cica Barrier Sleeping Pack, its 5 ceramides and centella calm stinging while sealing water.
    2. Can I use a sleeping mask every night for dehydrated skin?

    Yes, lightweight gel-creams with hyaluronic acid and squalane are safe nightly.

    3. Is hyaluronic acid or ceramide more important for dehydration?

    You need both, hyaluronic acid floods water in, ceramides lock it overnight.

    4. Does sleeping mask replace moisturizer for dehydrated skin?

    If oily-dehydrated yes, if dry plus dehydrated use a light ceramide moisturizer underneath.

  • Best Foundation for Mature Skin: Smooth Coverage After 40

    Best Foundation for Mature Skin: Smooth Coverage After 40

    Foundation should make mature skin look fresher, not heavier. I’ve found that the best foundation for mature skin is usually lightweight, flexible, and easy to build rather than thick or overly matte. The goal is to even out discoloration, soften the look of fine lines, and create a skin-like finish without masking natural texture.

    For women in the US, climate matters too. Whether you live through dry Southwest weather, humid Southeast summers, cold Northeast winters, or constant indoor air conditioning, your environment can affect how foundation wears. Hydration and strategic setting can therefore matter just as much as coverage.

    What Type of Foundation Works Best for Mature Skin?

    Mature skin is not one specific skin type. It can be dry, oily, combination, sensitive, or acne-prone, so I choose a formula based on current skin needs rather than age alone.

    Light-to-medium buildable coverage usually gives the most natural result. A liquid or serum-like texture with a satin, natural, or softly radiant finish can help the complexion look smoother without making wrinkles or pores more obvious. Heavy full coverage may settle into expression lines when overapplied, while extremely matte foundation can exaggerate dry patches.

    For dry mature skin, look for hydrating ingredients such as glycerin, hyaluronic acid, squalane, ceramides, and niacinamide. These ingredients can improve comfort and help makeup sit more smoothly instead of emphasizing texture.

    How Should You Prep Mature Skin Before Foundation?

    How Should You Prep Mature Skin Before Foundation?

    Hydrate Before You Apply Makeup

    Prep is crucial. I start with a hydrating moisturizer and let it absorb before moving to makeup. If visible pores, uneven texture, or fine lines are concerns, a hydrating or smoothing primer can create a more even surface before foundation.

    For daytime makeup, sunscreen should remain part of the morning routine. I also let skincare and sunscreen settle before applying foundation because layering everything immediately can contribute to pilling or separation.

    Good prep should leave skin comfortable and supple rather than coated in multiple heavy layers. When the surface is dry, foundation is more likely to cling to flaky patches and collect around expression lines. Makeup-artist guidance for mature skin similarly emphasizes moisturizer and carefully selected primer before complexion makeup.

    How Much Foundation Should You Use on Mature Skin?

    Less is more. I start with a small amount at the center of the face, where redness, discoloration, and uneven skin tone are often most noticeable. I then blend outward toward the jawline and hairline. A well-planned skincare routine for aging skin can also help create a smoother, more hydrated base before foundation application.

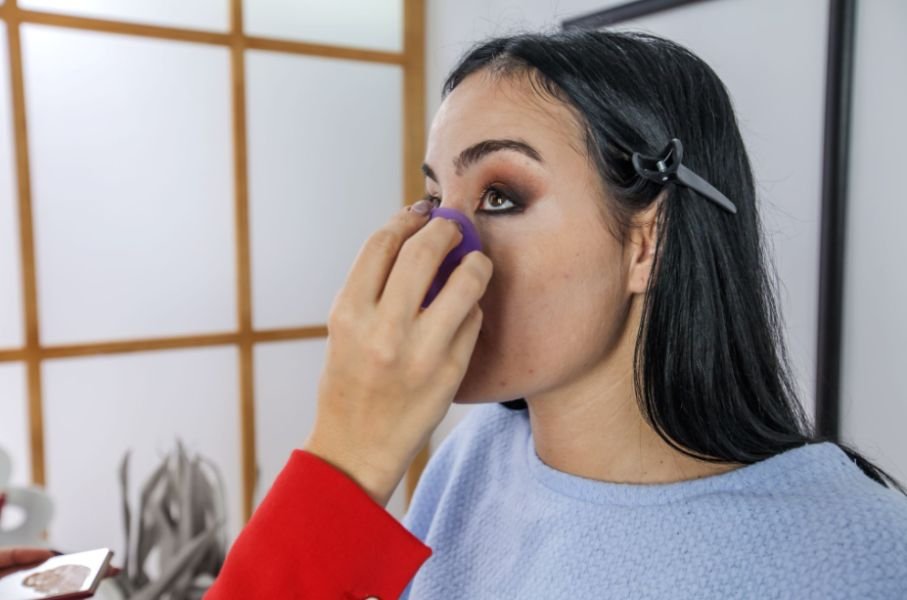
    A damp makeup sponge is especially useful when I want a thin, natural-looking finish. Instead of dragging foundation across the face, I gently press or bounce it into the skin. A soft brush or clean fingers can also work, but I avoid loading too much foundation onto any application tool.

    I build thin layers only where extra coverage is actually needed. A second light layer over dark spots, redness, or pigmentation generally looks smoother than one thick coat covering the entire face. Current mature-skin application guidance also favors small amounts, thin layers, center-to-outward blending, and damp sponges.

    How Do You Stop Foundation From Settling Into Fine Lines?

    How Do You Stop Foundation From Settling Into Fine Lines?

    Too much foundation is one of the biggest reasons makeup collects around wrinkles. I use less around crow’s feet, smile lines, and the folds beside the nose.

    After blending, I check these areas before setting anything. If foundation has gathered in a line, I gently press it out with a clean, damp sponge. This prevents excess makeup from being locked into the crease when powder is applied.

    I also avoid trying to erase every bit of texture. Real skin has pores, lines, and movement. Flexible, buildable coverage usually looks more flattering than a thick layer designed to make the complexion appear perfectly flat.

    Should Mature Skin Use Setting Powder?

    Yes, but strategic powdering matters.

    I would not bake the entire face, particularly when the skin is dry or textured. Heavy powder can absorb moisture and make fine lines, wrinkles, and flaky areas look more noticeable.

    Instead, I apply a very light dusting only where shine or creasing tends to develop. Common areas include the sides of the nose, center of the forehead, and chin.

    I leave dry cheeks and heavily lined areas alone unless they genuinely need setting. This targeted technique also follows makeup-artist recommendations to use powder sparingly and concentrate it primarily on shine-prone areas such as the T-zone.

    Is Matte or Dewy Foundation Better for Mature Skin?

    Neither finish is automatically right for everyone.

    I generally prefer a natural satin or softly radiant finish because it gives the face dimension without making the complexion appear excessively shiny.

    Dry mature skin may look better with a radiant or slightly dewy finish, while oily or combination mature skin may prefer a natural satin finish. Very flat matte formulas can highlight dryness, texture, and wrinkles. On the other hand, extremely glossy finishes can sometimes draw more attention to enlarged pores.

    The goal is to find a finish that still looks natural several hours after application, not simply one that photographs well immediately after makeup is applied.

    How Do You Choose the Right Foundation Shade and Undertone?

    How Do You Choose the Right Foundation Shade and Undertone?

    I prefer testing foundation close to the jawline instead of relying only on a hand or wrist swatch. The correct shade should create a natural transition between the face and neck. This matters even more when foundation is layered over the best makeup primer for oily skin, because a smooth, controlled base can make shade and texture differences easier to notice.

    Undertone also matters. Warm undertones often appear golden or peach, cool undertones tend to lean pink or rosy, and neutral undertones fall somewhere between the two.

    Whenever possible, I check the shade in natural daylight. Artificial store lighting can change the way color appears and may make a foundation look warmer or cooler than it actually is.

    Frequently Asked Questions (FAQs)

    1. What is the best foundation for mature skin with wrinkles?

    For wrinkles, I look for a lightweight, hydrating, flexible formula with buildable coverage. A natural or satin finish combined with thin application can reduce the chance of makeup collecting around fine lines.

    2. Is full-coverage foundation bad for older skin?

    No. Full coverage can work on older skin when it is applied gradually. I recommend adding extra coverage only over dark spots, redness, or uneven pigmentation instead of placing a thick layer across the entire face.

    3. Is liquid foundation better than powder foundation for mature skin?

    Liquid formulas are often easier to work with on dry or textured mature skin because they tend to remain flexible. Powder foundation can still suit oilier mature skin when it is applied lightly over properly moisturized skin.

    4. How Can I Stop Foundation From Looking Cakey?

    Start with hydrated skin, use a small amount of foundation, and build coverage through thin layers. Keep setting powder to a minimum, particularly around wrinkles and dry areas. Adding more powder to already dry-looking makeup usually makes texture more visible instead of correcting it.

    How Can You Make Foundation Look Better on Mature Skin?

    I’ve learned that foundation performs best on mature skin when I focus on preparation instead of coverage alone. Hydrated skin, center-to-outward application, thin layers, a damp sponge, careful shade matching, and strategic powdering can make a bigger difference than simply choosing a heavier formula.

    The best foundation for mature skin should make the complexion look even while still allowing natural texture to show through. When makeup remains flexible, comfortable, and properly hydrated, fine lines, uneven tone, and texture become less distracting without making the skin look overdone.

  • Makeup for Dry, Flaky Skin: The Skin-First Method for a Seamless Glow

    Makeup for Dry, Flaky Skin: The Skin-First Method for a Seamless Glow

    Foundation can look perfect when I first apply it, then suddenly start separating around my nose, catching on rough patches, or making my cheeks look more textured than they did before makeup. When that happens, the foundation itself is not always the real problem. The condition of the skin underneath often determines whether the final result looks smooth or cakey.

    For makeup for dry, flaky skin, I focus on creating a comfortable, hydrated surface before building coverage. Gentle preparation, moisture-rich skincare, flexible base formulas, and light application techniques can help makeup settle more evenly without emphasizing every dry spot. The goal is not to hide natural skin texture, but to prevent unnecessary flaking and create a softer, healthier-looking finish.

    Why Does Foundation Look Patchy on Dry Skin?

    Foundation often looks patchy when it settles around dead skin cells or goes over skincare that has not fully absorbed. Very matte formulas, thick layers, heavy powder, and aggressive buffing can make the problem worse.

    I also watch for pilling. Serum, moisturizer, sunscreen, primer, and foundation can roll into tiny flakes when layered too quickly, so I give each layer time to settle.

    How Should I Prep Dry, Flaky Skin Before Makeup?

    I start with clean skin and avoid harsh scrubs. If flakes are mild and my skin feels calm, I may use a soft, damp washcloth or gentle exfoliating product to loosen dead surface cells. If my skin feels red, sore, burning, or irritated, I skip exfoliation and focus on hydration.

    How Do I Layer Hydration Before Foundation?

    How Do I Layer Hydration Before Foundation

    I like a hydrating serum with humectants such as hyaluronic acid or glycerin, which can help attract and retain water in the outer skin layers. I follow with a nourishing moisturizer, ideally with emollients or barrier-supporting ingredients such as ceramides.

    I let the moisturizer absorb for about five to ten minutes. This softens the skin without leaving an overly slippery surface that can make foundation separate.

    What Primer Works Best for Dry Skin?

    I usually choose a hydrating, smoothing, dewy, or lightly gripping primer instead of a strongly mattifying one. I apply a thin layer where makeup tends to catch, especially around the nose, between the brows, and around the mouth.

    Too much primer can encourage pilling, so I keep the layer light and make sure it works with the skincare underneath.

    What Foundation Formula Is Best for Dry, Flaky Skin?

    I prefer liquid foundation, skin tints, serum-like bases, water-gel textures, and natural, satin, luminous, or dewy finishes. Very matte or powder bases can emphasize rough texture.

    Before application, I sometimes warm a small amount of foundation between clean fingertips. I start in the center of the face and blend outward in a thin layer.

    Is a Damp Sponge Better Than a Brush for Dry Skin?

    A damp makeup sponge works well when flakes are visible because I can press or bounce foundation onto the skin instead of dragging it across the surface. This keeps coverage light.

    A soft brush can also work with gentle stippling, but I avoid aggressive buffing. If I need more coverage, I add a second thin layer only where needed.

    How Should I Apply Concealer, Blush, and Bronzer?

    How Should I Apply Concealer, Blush, and Bronzer

    I use a small amount of creamy or hydrating concealer and tap it into areas that need extra coverage. Thick layers under the eyes can settle into fine lines.

    For the eye area, I use the same light-handed approach described in this techniques to makeup for hooded eyes step by step, especially when layering concealer and other complexion products around the eyes.

    For blush and bronzer, I often favor cream, liquid, or gel textures. I press them over foundation instead of repeatedly swiping so the base underneath stays smooth.

    Should I Use Setting Powder on Dry Skin?

    I avoid powdering my entire face. Instead, I spot-set only where makeup tends to crease or become shiny, such as the sides of the nose, parts of the T-zone, or a small area beneath the eyes.

    I use a tiny amount of finely milled powder with a small fluffy brush. Heavy baking can absorb too much surface moisture and make dry patches stand out.

    How Do I Fix Flaky Foundation Without Starting Over?

    If makeup starts looking tight or powdery, I use a light hydrating or luminous mist, let it settle, and gently press the skin with a damp sponge. This can help cream layers look more unified.

    If the problem keeps happening, I can also follow a more detailed  techniques on how to keep foundation from clinging to dry patches for additional preparation and application techniques.

    If one patch becomes flaky, I do not add another thick layer. I remove a tiny amount of excess product if needed and blend the surrounding foundation back over the spot. Spot correction usually looks more natural than reapplying the entire face.

    What Mistakes Make Dry Makeup Look Cakey?

    What Mistakes Make Dry Makeup Look Cakey

    The biggest problems are over-exfoliating, rushing through skincare, using very matte formulas, applying too much foundation, buffing aggressively, and covering the whole face in powder. I also avoid stacking too many skincare products immediately before makeup because simpler layers often reduce pilling.

    Frequently Asked Questions 

    1. Why does foundation cling to dry patches after moisturizing?

    The moisturizer may not have fully absorbed, loose dead skin cells may still be present, or the foundation may be too matte or heavy. Product pilling can also mimic dryness.

    2. Should I exfoliate right before makeup?

    Only when my skin feels calm, and the exfoliation is gentle. If the skin is irritated, peeling, burning, or sensitive, I skip exfoliation and focus on moisture.

    3. Is dewy foundation always better for dry skin?

    Not always, but liquid and satin-to-dewy formulas often make texture look less obvious than very matte or powder-heavy bases. Application technique matters just as much as finish.

    4. What is the fastest way to smooth flaky makeup?

    I lightly press the area with a damp sponge, remove excess buildup if necessary, and use a small amount of hydrating mist. I avoid adding another heavy layer.

    Final Thoughts

    For me, the best makeup for dry, flaky skin is about improving how each layer sits on the face rather than hiding texture with more coverage. Gentle exfoliation when appropriate, layered hydration, enough moisturizer absorption time, a dewy or gripping primer, flexible base formulas, cream color products, minimal powder, and careful touch-ups all work together.

    Real skin has texture, but a light, hydrated routine can make dry patches less noticeable and leave the complexion looking smoother and more radiant.

  • How to Prevent Fine Lines Under Eyes Naturally: What Actually Worked for Me

    How to Prevent Fine Lines Under Eyes Naturally: What Actually Worked for Me

    I noticed my first fine lines under my eyes at twenty-six, right after a transatlantic flight. Panicked, I spent months slathering on heavy cold-pressed balms, only to wake up with persistent, tiny white bumps known as milia. That frustrating misstep taught me an essential lesson: learning how to prevent fine lines under eyes naturally requires working with the unique biology of orbital skin, not overwhelming it with kitchen remedies.

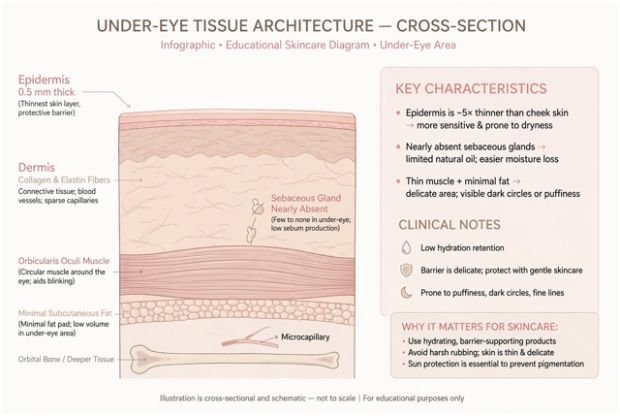
    Under-eye skin is barely 0.5 millimeters thick. It lacks sebaceous glands, meaning it cannot produce its own sebum to retain moisture. If you treat this delicate zone like the rest of your face, you will accelerate crepiness rather than prevent it. Here is the daily, holistic regimen I rely on to keep the under-eye area firm, supple, and healthy.

    The Biological Reason Periorbital Skin Creases First

    The Biological Reason Periorbital Skin Creases First

    Your orbicularis oculi muscles contract thousands of times every single day. Every blink, squint, and smile mechanically compresses the fragile dermal layer sitting right on top of that muscle.

    The National Center for Biotechnology Information documents that extrinsic photoaging accounts for up to 80% of visible facial aging, with the periorbital zone demonstrating the earliest loss of dermal elasticity. Because this area contains virtually no subcutaneous fat cushion, even minor environmental shifts strip away surface moisture immediately.

    +————————————————————-+

    |               Under-Eye Tissue Architecture                 |

    |                                                             |

    |   Epidermis: ~0.5 mm thick (thinnest on human body)         |

    |   Sebaceous Glands: Nearly absent (minimal natural lipids)  |

    |   Underlying Support: Orbicularis oculi muscle + minimal fat|

    |   Result: High vulnerability to micro-shearing & dryness    |

    +————————————————————-+

    Dehydration Lines vs. Structural Elastosis

    Before changing your routine, you must determine what type of lines you have:

    • Dehydration lines present as a crisscross, crepey mesh across the surface. They flare up after poor sleep, dry weather, or high caffeine intake. They vanish the moment you restore your moisture barrier.
    • Structural lines appear as deeper, static grooves etched into the skin even when your face is completely relaxed. They indicate damaged collagen bundles within the extracellular matrix.

    Natural interventions halt dehydration lines almost instantly and dramatically slow down the progression of structural creases.

    The Natural Topical Strategy: Gentle Hydration Without Triggering Milia

    The Natural Topical Strategy: Gentle Hydration Without Triggering Milia

    Most people immediately reach for pure coconut oil or shea butter. In my experience, applying heavy, comedogenic fats to the eye area is a mistake. The eye contour lacks the pore structure to absorb dense lipids. Those heavy fats sit on the surface, trap dead keratin cells, and clog the eyelid margins.

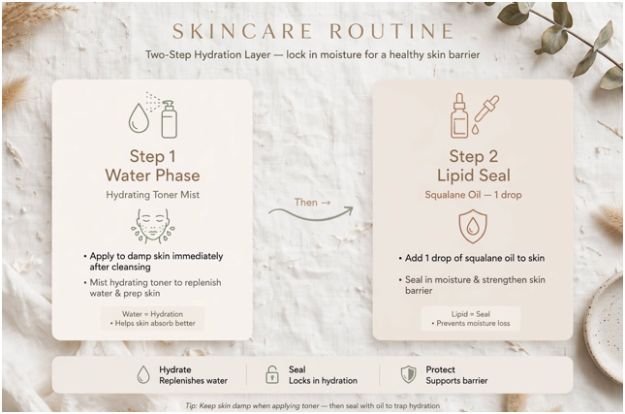
    Instead, I follow a targeted two-step hydration layer. First, I apply water-attracting humectants to damp skin. Sweeping a layer of the best hydrating toner for sensitive dry skin across the orbital bone infuses the stratum corneum with immediate water weight.

            Step 1: Water Phase               Step 2: Lipid Seal

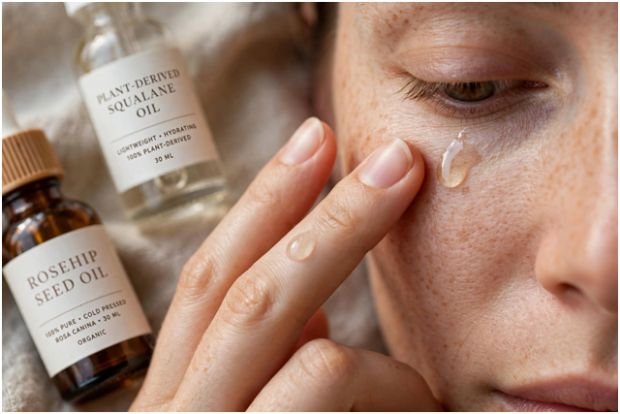
        [ Damp Skin + Hydrating Toner ]  —>  [ 1 Drop Squalane / Rosehip ]

             (Binds moisture deep)                  (Locks water in)

    Next, evaluate your active hydrators. Understanding the functional differences between ceramides vs hyaluronic acid for skin hydration helps you balance water delivery with barrier repair. While hyaluronic acid pulls moisture into surface cells, physiological ceramides reinforce intercellular lipids so that water cannot escape.

    The Lightweight Plant Lipid Approach

    The Lightweight Plant Lipid Approach

    To lock in that moisture naturally without causing puffiness, I use single-origin, low-comedogenic plant oils.

    • Plant-derived squalane: Squalane mimics your skin’s natural squalene, a lipid component that decreases with age. It sinks in immediately with zero greasy residue.
    • Cold-pressed rosehip seed oil: Packed with trans-retinoic acid precursors and linoleic acid, rosehip oil supports natural cellular renewal without causing retinoid dermatitis.

    I place one single drop of oil on my ring finger, tap it against the opposite ring finger, and press it gently along the orbital bone. Never drag the oil up to the bottom lash line. Your blinking motion naturally migrates products upward toward the eye.

    Antioxidants and Plant-Derived Cellular Support

    Environmental free radicals break down delicate collagen scaffolding long before your genetics dictate.

    I apply chilled, damp green tea compresses twice a week. Green tea contains high levels of epigallocatechin gallate (EGCG), a polyphenol that scavenges reactive oxygen species. A 10-minute cold compress constricts superficial blood vessels to relieve puffiness while drenching surface cells in cellular defense.

    Controlling Daily Mechanical Strain and UV Exposure

    Controlling Daily Mechanical Strain and UV Exposure

    You cannot prevent skin aging naturally if you ignore the physical habits breaking down your collagen matrix every afternoon.

    Protecting the Orbital Barrier from Friction

    Friction is the fastest way to thin out your under-eye skin. Aggressive makeup removal shears fragile capillary walls and stretches structural fibers.

    When removing sunscreen or mineral powders, I saturate a soft pad with jojoba oil, press it against my closed eye for fifteen seconds to dissolve the pigment, and wipe away without rubbing. If allergies make your eyes itch, use cold compresses or preservative-free saline rinses rather than knuckling your eyes.

    Shielding Your Eyes from Micro-Squinting

    Squinting is an involuntary mechanical motion that deepens dynamic expression lines into permanent creases.

    The Skin Cancer Foundation warns that the periorbital region represents up to 10% of all skin cancers, highlighting its exceptional vulnerability to UV damage. To protect this area naturally:

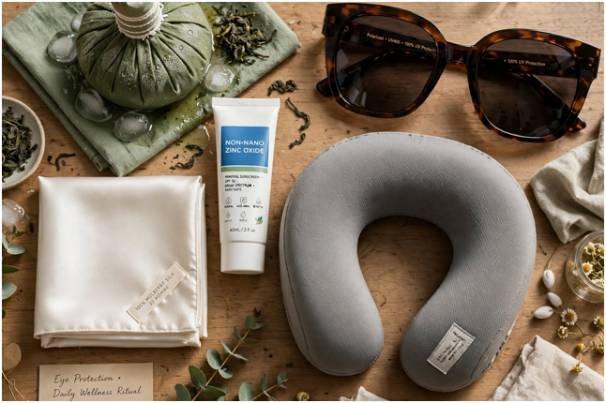
    1. Wear polarized, UV400 sunglasses: Large frames physically block UV rays from degrading your dermal collagen while stopping you from squinting against harsh daylight.
    2. Apply mineral sunscreen daily: Choose non-nano zinc oxide formulas. Mineral filters sit comfortably on the skin surface, do not sting when you sweat, and protect delicate barrier proteins.
    3. Practice the 20-20-20 screen rule: Every 20 minutes, focus on an object 20 feet away for 20 seconds. This simple habit releases built-up tension in the ocular muscles and restores your natural blink rate.

    The American Academy of Ophthalmology also highlights that proper eyelid hygiene and unblocked meibomian glands are essential for a healthy tear film. Keeping heavy cosmetics away from the waterline protects your eyes from chronic dry-eye irritation and compensatory squinting.

    Internal Cellular Support and Sleep Mechanics

    Topical application accounts for only half the battle. Cellular building blocks come from within.

    Collagen synthesis requires specific micronutrients. Vitamin C serves as an essential cofactor for the enzymes prolyl and lysyl hydroxylase, which stabilize the triple-helix structure of new collagen fibers. I focus on whole-food sources: bell peppers, citrus, and dark leafy greens paired with pumpkin seeds for zinc.

    Equally important is nocturnal mechanical compression. If you sleep on your stomach or side, you crush your face into your pillow for eight hours, creating sleep creases that eventually turn into static lines.

    I trained myself to sleep on my back using an ergonomic neck-support pillow. If back sleeping is impossible for you, switch to a pure 100% mulberry silk pillowcase. Silk creates far less friction against delicate facial skin than coarse cotton, allowing your face to glide across the fabric without creasing.

    Frequently Asked Questions

    1. Can natural remedies reverse deep under-eye wrinkles?

    Natural remedies plump superficial dehydration lines and slow new damage, but etched, structural wrinkles require long-term clinical interventions like peptides, low-strength retinoids, or in-office procedures.

    2. Does drinking water reduce under-eye fine lines?

    Yes, consistent hydration restores tissue volume in the skin, which immediately softens crinkly dehydration lines caused by fluid depletion.

    3. Is pure coconut oil safe for under-eye wrinkles?

    No, coconut oil is highly comedogenic and often causes milia or irritates eyelid oil glands; choose lightweight squalane or rosehip oil instead.

    4. At what age should you start under-eye prevention?

    You should begin protective habits like applying mineral sunscreen, wearing UV sunglasses, and using light hydrators in your early twenties before structural collagen decline begins.

    Keep It Simple, Keep It Consistent

    Obsessing over every micro-crease when you smile is an exhausting, losing battle. Dynamic expression lines simply prove that you interact with the world and laugh often.

    Focus on protective habits rather than impossible perfection: hydrate the barrier with lightweight lipids, wear your sunglasses, and treat that fragile 0.5-millimeter zone with patience. Consistency with basic, gentle habits will always outperform an expensive, complicated 10-step routine.

  • How to Choose a Safe Nail Salon: 12 Red Flags to Avoid

    How to Choose a Safe Nail Salon: 12 Red Flags to Avoid

    I used to judge a nail salon by its photographs, prices, and online reviews. Those details can reveal something about the finished manicures, but they say very little about infection control or technician practices. Learning how to choose a safe nail salon means looking beyond attractive décor and examining what happens before, during, and after every service.

    A responsible salon should be licensed, visibly clean, adequately ventilated, and transparent about its hygiene procedures. Reusable tools should be processed correctly, disposable items should not move between clients, and no treatment should leave the skin bleeding or painfully irritated.

    Verify the Salon and Technician Licenses

    A salon should display its current operating license where clients can easily see it. Nail technicians may also need individual licenses or registrations, depending on local regulations.

    Before booking, I can search the appropriate government licensing database to confirm whether a business or technician has an active credential. This extra step is especially valuable when visiting an independent technician, mobile provider, or home-based salon.

    A license does not guarantee a perfect service, but it confirms that the business is operating within a regulated system. Missing, expired, or concealed credentials should be treated cautiously.

    Examine the Salon Before Sitting Down

    Cleanliness should extend beyond the reception area. I look at the manicure table, floor, chairs, towels, sinks, trash containers, and pedicure stations. Nail clippings, used cotton, product spills, dusty surfaces, or dirty towels can indicate that cleaning is being rushed.

    The technician should prepare a clean station for each client. A visually stylish salon is not necessarily hygienic, while a modest salon can be exceptionally well maintained. What matters is the routine I can observe.

    Watch How Reusable Tools Are Handled

    Watch How Reusable Tools Are Handled

    Metal clippers, pushers and nippers can often be reused, but they must be cleaned and disinfected according to applicable regulations and product instructions.

    Tools should not be taken from a cluttered drawer immediately after another appointment. A sealed packet can be reassuring, although packaging alone does not prove that the implements were processed correctly. It is reasonable to ask how tools are cleaned, which disinfectant is used, and how prepared instruments are stored.

    The staff should answer calmly and specifically. Vague claims that everything is “sanitized” do not explain the salon’s actual procedure.

    Check That Disposable Items Are New

    Porous supplies are difficult or impossible to disinfect reliably. Nail files, wooden sticks, toe separators, buffers and certain sanding bands are commonly intended for one client only.

    I want to see a fresh item opened or taken from a clearly separated supply. A file showing dust, discoloration or wear may have been used previously. Some salons allow clients to take disposable files home, while others discard them immediately after the service.

    A plastic pedicure-basin liner can provide an additional barrier, but it does not replace proper cleaning and disinfection of the equipment.

    Inspect the Pedicure Area Carefully

    The pedicure toolkit deserves special attention because moisture and internal plumbing can make cleaning more complicated. The basin should be drained, scrubbed and disinfected between clients according to the equipment manufacturer’s instructions and local rules.

    I would not place my feet in a tub that still contains residue, floating debris or an obviously reused liner. Staff should also have enough time between appointments to complete the required cleaning procedure.

    Anyone with broken skin, an active foot infection or a recent injury should postpone the service instead of placing themselves or others at risk.

    Notice Ventilation and Chemical Odors

    Notice Ventilation and Chemical Odors

    Nail services can release vapors and fine dust, particularly during artificial-nail application, filing and product removal. Effective ventilation helps move contaminated air away from workers and customers.

    A salon may naturally have a mild product odor, but an overpowering chemical smell that causes burning eyes, dizziness, coughing or a headache is a warning sign. Open doors, fragrances and air fresheners are not substitutes for a properly designed ventilation system.

    Product containers should remain closed when they are not being used. Powders, liquids and polishes should also have readable labels rather than being stored in anonymous containers.

    Observe Hand Hygiene and Glove Use

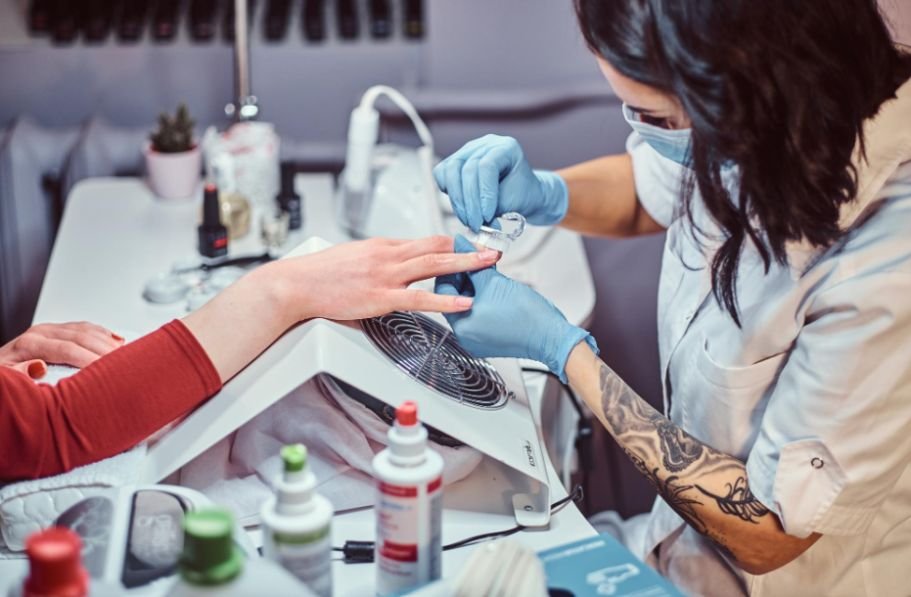
    The technician should begin with clean hands, and clients may be asked to wash or sanitize theirs before the appointment. Gloves can provide useful protection during tasks involving broken skin, chemicals or potentially contaminated materials, but gloves must be changed between clients.

    Wearing the same pair while touching phones, drawers, money and multiple customers defeats their purpose. Gloves also do not replace handwashing or surface cleaning.

    Protect the Cuticles and Surrounding Skin

    Cuticles form part of the nail’s protective barrier. Aggressive cutting can create small wounds that allow microorganisms to enter. Gentle care around dead surface tissue is different from deeply cutting living skin.

    If gel manicures have left your nails or surrounding skin feeling dry, tender, or damaged, following proper nail care after gel manicures can help restore the area and reduce further irritation.

    The service should not involve persistent burning, sharp pain or bleeding. If an electric file feels hot or a tool begins cutting the skin, I should ask the technician to stop immediately. A skilled professional will adjust the technique instead of dismissing the discomfort.

    Aggressive callus removal can create similar problems. Razors or other bladed devices may be prohibited in some locations, and excessive scraping of corns and calluses can leave the feet vulnerable to pain, bleeding, and infection.

    Do Not Shave Immediately Before a Pedicure

    Do Not Shave Immediately Before a Pedicure

    Shaving can produce tiny cuts that are difficult to see. These openings may increase exposure to microorganisms in a foot bath or on improperly handled equipment.

    It is safer to avoid shaving shortly before a pedicure, particularly when the skin becomes irritated easily. I should also disclose cuts, rashes, nail changes or suspected infections before the service begins.

    People with diabetes, reduced circulation, neuropathy or weakened immunity may need medical guidance before receiving a pedicure.

    Read Reviews for Safety Details

    Online ratings can help, but I look beyond comments about colors and nail art. Reviews mentioning recurring infections, painful filing, reused tools, dirty tubs or unprofessional responses deserve attention.

    One complaint does not prove that a salon is unsafe. A repeated pattern across recent reviews is more meaningful. Photographs uploaded by customers may also show whether workstations appear orderly and whether the salon has remained consistent over time.

    Know When to Leave

    I would leave if staff refuse to discuss hygiene, reuse visibly worn supplies, ignore bleeding, hide licensing information, use unmarked products or begin working at a dirty station. A low price or nonrefundable deposit is not worth accepting preventable risk.

    After an appointment, increasing redness, warmth, swelling, pus, severe pain, discoloration or a spreading rash should not be ignored. Persistent or worsening symptoms require advice from an appropriate healthcare professional.

    After a manicure or pedicure, persistent discoloration, swelling, pain, or changes in nail texture can be among the signs of unhealthy fingernails that deserve closer attention rather than another cosmetic treatment.

    Frequently Asked Questions

    1. How can I tell whether nail tools are clean?

    Observe where the tools come from and ask how they were processed. Reusable implements should be cleaned and disinfected appropriately, while porous single-use products should be new.

    2. Why does a nail salon need good ventilation?

    Ventilation helps remove chemical vapors and filing dust from the breathing area. A powerful chemical odor accompanied by irritation may indicate inadequate air control.

    3. Can I bring my own nail tools?

    Some salons permit personal tools, but bringing them does not eliminate every hygiene risk. The station, technician’s hands, pedicure equipment and products must still be handled safely.

    4. What is the fastest way to learn how to choose a safe nail salon?

    Check the licenses, observe tool handling, inspect the workstation, confirm that disposable items are new, assess ventilation, and leave if the technician causes injury or avoids reasonable questions.

    Final Thoughts

    I no longer treat salon safety as something I can judge from a polished website or a five-star rating. I pay attention to credentials, tool processing, disposable supplies, ventilation, pedicure equipment and the technician’s willingness to explain each procedure.

    A good salon does not make hygiene feel secretive or inconvenient. Its staff follow consistent routines, respect the skin’s protective barrier and respond immediately when a client experiences discomfort. Those habits matter far more to me than elaborate décor or a discounted service.

  • How to Keep Your Nails Healthy, Strong, and Smooth

    How to Keep Your Nails Healthy, Strong, and Smooth

    I used to think attractive nails depended mainly on polish, professional manicures, or expensive strengthening treatments. I eventually learned that everyday habits have a much greater effect. Repeated water exposure, harsh removers, careless filing, and picking at the cuticles can quietly weaken even naturally strong nails.

    Following practical nail care tips for healthy nails can help protect the nail plate, reduce splitting, and keep the surrounding skin comfortable. The best routine is not complicated. It relies on gentle grooming, moisture, protection, and knowing when a nail change needs professional attention.

    Understand What Healthy Nails Look Like

    Healthy fingernails are generally smooth, firm, and consistent in color. They should remain attached to the nail bed without persistent pain or swelling. Thin vertical ridges can become more noticeable with age and are often harmless. Small white spots commonly develop after minor injuries and usually disappear as the nail grows.

    Nails grow from the matrix underneath the skin at their base. Because visible nails consist primarily of hardened keratin, products cannot repair severe damage instantly. The damaged portion must grow out while new growth is protected.

    Sudden discoloration, deep horizontal grooves, separation, bleeding, significant thickening, or a dark streak should not be dismissed as cosmetic concerns. These changes may require evaluation by a dermatologist or another qualified healthcare professional.

    Keep Nails Clean Without Scrubbing Aggressively

    Keep Nails Clean Without Scrubbing Aggressively

    Clean nails can reduce the accumulation of dirt and microorganisms, but aggressive cleaning may cause damage. To help grow nails faster and stronger, I recommend washing around the fingertips with mild soap and using a soft nail brush only when necessary.

    Avoid digging beneath the nails with sharp metal instruments. This can separate the nail plate from the underlying skin and create an opening for irritation or infection. After washing, dry the fingers carefully, including the areas around and beneath the nail tips.

    Personal clippers and files should not be shared. Reusable tools should be cleaned and dried after use, particularly if they have come into contact with damaged skin.

    Protect Your Hands From Excessive Water

    Repeated cycles of soaking and drying can cause the nail plate to expand and contract. Over time, this may contribute to peeling, splitting, and brittleness.

    Wear cotton-lined rubber gloves while washing dishes or working with household cleaners. Gloves are also helpful during gardening, painting, or other activities that expose the hands to chemicals and physical damage.

    Normal handwashing remains essential. The goal is not to avoid water completely but to limit unnecessary soaking and apply moisturizer afterward.

    Moisturize Nails and Cuticles Daily

    Hand lotion should be massaged over the nails and surrounding skin rather than applied only to the palms. Creams containing ingredients such as glycerin, petrolatum, ceramides, lanolin, or urea can help reduce moisture loss.

    Cuticle oil may soften dry skin and reduce the temptation to pick at rough edges. It does not make nails grow dramatically faster, but well-moisturized nails are more flexible and may be less likely to crack.

    People who frequently wash their hands can keep a small fragrance-free cream near the sink. Applying it after washing makes moisturizing easier to maintain consistently.

    Trim and File Nails Correctly

    Trim and File Nails Correctly

    Use clean, sharp clippers instead of tearing or biting an uneven nail. Fingernails can be trimmed almost straight across and then gently rounded at the corners. Toenails should generally be cut straight across to lower the risk of ingrown edges.

    A file can smooth snags before they catch on clothing and develop into larger tears. File gently without thinning the sides excessively. Very long nails are more vulnerable to leverage, impact, and accidental breakage, so keeping weak nails moderately short can provide protection.

    These basic nail care tips for healthy nails are especially valuable when nails are recovering from extensions, repeated gel removal, or environmental damage.

    Leave the Cuticles Alone

    The cuticle helps seal the space between the nail plate and surrounding skin. Cutting, biting, or aggressively pushing it back may damage this protective barrier.

    If the cuticles appear dry, apply moisturizer or oil and gently manage only loose, dead skin. Never pull a hangnail because it can tear living tissue. Instead, wash the area and carefully clip the loose portion with sanitized nippers.

    Redness, warmth, swelling, pus, or worsening pain around a nail can indicate an infection and should receive appropriate medical attention.

    Use Polish, Gel, and Acrylic Products Carefully

    Nails do not need to “breathe,” but taking a break from manicures may still reduce exposure to removers, adhesives, filing, and scraping. Damage often occurs during application or removal rather than from color alone.

    Do not peel off regular polish, gel, dip powder, or acrylic enhancements. Peeling can remove superficial layers of the natural nail. Follow the product’s removal directions or use a qualified nail technician who avoids excessive drilling and scraping.

    Acetone is effective but can temporarily dry the nail and surrounding skin. Use it only as needed, minimize contact time, and moisturize afterward. Before using a UV-curing lamp, consider applying broad-spectrum sunscreen to the hands or wearing UV-protective fingerless gloves.

    Support Nail Growth Through Nutrition

    Support Nail Growth Through Nutrition

    Nails need adequate protein because keratin is a protein. A varied diet containing eggs, fish, poultry, beans, lentils, nuts, vegetables, fruits, and whole grains normally supplies the nutrients involved in nail growth.

    Iron, zinc, vitamin B12, and other deficiencies can sometimes affect nail appearance. However, brittle nails do not automatically prove that a deficiency exists. Taking iron without medical guidance can be harmful.

    Evidence for biotin is limited and mainly concerns certain people with brittle nails. High-dose biotin may also interfere with laboratory test results. Discuss supplements with a healthcare professional, especially before blood tests or when taking medication.

    Stop Using Your Nails as Tools

    Opening cans, scraping labels, loosening key rings, and pressing stiff buttons with the nail tip can cause chips or separation. Use an appropriate tool or the pads of the fingers instead.

    Nail biting also damages the nail and surrounding skin while transferring microorganisms between the hands and mouth. Keeping nails short, identifying triggers, and using behavioral strategies can help break the habit.

    Frequently Asked Questions

    1. What are the most important nail care tips for healthy nails?

    Keep nails clean and dry, moisturize them daily, trim them correctly, protect them from prolonged water exposure, and avoid biting, peeling, or cutting the cuticles.

    2. Should I cut my cuticles during a manicure?

    No. Cuticles provide a protective seal against irritants and microorganisms. Moisturize them and avoid aggressive cutting or pushing.

    3. How long does nail damage take to grow out?

    Fingernails usually require several months to replace themselves completely. Toenails grow more slowly and may need a year or longer, depending on the person and the affected nail.

    4. When should I see a dermatologist?

    Seek professional advice for persistent pain, swelling, bleeding, nail separation, major color or shape changes, a new dark streak, or problems that do not improve with gentle care.

    Final Thoughts for Stronger Nails

    I have found that consistency matters more than complicated treatments. When I moisturize after washing, wear gloves during wet chores, smooth snags promptly, and stop treating my nails like tools, they remain noticeably stronger.

    Healthy nails develop gradually, so I do not expect overnight results. I focus on protecting new growth and responding early to unusual changes. A simple routine practiced every day can do far more than an occasional intensive treatment.

  • Smart Beauty Mirrors With Skin Analysis Technology: Are They Worth It?

    Smart Beauty Mirrors With Skin Analysis Technology: Are They Worth It?

    I used to think a beauty mirror had one job: give me a clear reflection while I fixed my hair, applied makeup, or checked whether my skin looked tired. Once I started seeing smart mirrors with built-in cameras and AI analysis, that simple idea changed. The promise is tempting because the mirror is already part of a daily routine, so adding skin tracking feels less intrusive than pulling out a phone for another task.

    I also noticed how quickly these devices turn ordinary concerns into numbers. Pores, redness, pigmentation, texture, fine lines, and acne can become scores, followed by ingredient suggestions and routine ideas. That sounds useful, but are smart beauty mirrors with skin analysis technology giving you information worth paying hundreds of dollars for, or simply making a familiar routine feel futuristic?

    What Makes a Beauty Mirror Smart?

    A smart beauty mirror combines a reflective surface with a camera, display, software, and sensors or lighting controls. The camera captures your face, while computer vision and machine learning examine visible features. Depending on the product, the system may also offer facial mapping, augmented reality makeup, routine tracking, product recommendations, or progress reports.

    That combination separates a smart mirror from a lighted vanity mirror. The software turns captured information into an interactive experience. Research has explored smart mirrors for computer vision and personalized monitoring, although many healthcare applications remain technically challenging.

    How Skin Analysis Technology Works

    How Skin Analysis Technology Works

    The basic process is simpler than the marketing suggests. You position your face in front of the camera, answer some questions about your skin, and take a scan. The system then analyzes the image for visible characteristics such as pigmentation, redness, texture, oiliness, fine lines, acne, or UV-related spots.

    The useful part is not necessarily the single score. It is the ability to repeat scans and compare them over time. If you photograph your skin under similar conditions, a trend can be more informative than one result. Some smart mirrors also connect observations with skincare ingredients and routine suggestions, making the technology more practical than a simple score.

    For someone interested in AI-powered skincare devices for personalized routines, ongoing feedback can be the most appealing feature. Instead of changing several products at once and guessing what helped, you can keep a routine consistent and watch for changes.

    Where These Mirrors Can Actually Help

    Progress tracking is probably the strongest argument for the technology. A dedicated user may enjoy seeing whether a routine appears to be improving texture, redness, pigmentation, or fine lines over several weeks. The process can also encourage consistency, especially for people who tend to forget what they used or when they changed products.

    The Accuracy Problem Matters

    This is where the excitement needs some restraint. Facial analysis depends on the quality and consistency of the image. Lighting, camera angle, distance, makeup, facial expression, and even the position of your hair can influence what the software sees. If one scan happens in bright natural light and another happens under a warm bathroom bulb, comparing their scores may not tell you much.

    Real-world testing of current consumer products has exposed inconsistencies. Reviewers have reported score changes between scans and occasional results that did not match visible changes. That does not make the technology useless. It means the output should be treated as an estimate and tracking aid, not an unquestionable measurement.

    Skin tone also deserves attention. AI systems need representative training and rigorous validation across different skin tones and real-world conditions. The American Academy of Dermatology has warned that digital tools can produce inaccurate information when their underlying systems have not been sufficiently tested across diverse populations.

    Are Smart Beauty Mirrors Worth the Money?

    Are Smart Beauty Mirrors Worth the Money?

    For casual users, probably not. If your main need is a good reflection, consistent lighting, and a place to apply makeup, a quality traditional mirror can do that for far less money.

    The calculation changes for someone who genuinely enjoys skincare tracking and will use the analysis repeatedly. A device priced around $795, plus subscription costs, is easier to justify when you value progress logs, recommendations, AR makeup tools, and everything in one place. Otherwise, the novelty may fade. Current reviews of high-end AI mirrors show that subscription access can be an additional consideration alongside the hardware price.

    Privacy should be part of that calculation. A mirror with a camera collects images of your face, and connected devices may involve apps or cloud services. Before buying, check what information is stored, where it goes, how long it is retained, whether it is shared, and what controls you have. Privacy matters when a product observes you repeatedly.

    For people who prefer practical beauty technology, makeup tools that simplify everyday routines may offer more everyday value than a feature-heavy smart mirror.

    Why the Mirror Matters Less Than the Habit

    The most valuable part of smart beauty mirrors with skin analysis technology may ultimately be the habit they encourage rather than the hardware itself. A person who follows a simple routine consistently, changes one variable at a time, protects their skin from sun exposure, and pays attention to real changes may learn more than someone who collects endless scores without changing anything. The technology can organize observations, but it cannot make sensible skincare decisions for you.

    For dedicated beauty-tech users, that distinction makes these mirrors easier to judge. They are intriguing tools with real convenience and personalization, but they are still tools. At a luxury price, they make the most sense when their information becomes part of a routine rather than the reason for one.

    Frequently Asked Questions 

    1. Are smart beauty mirrors accurate?

    They can be useful for tracking visible changes, but readings can vary with lighting, angle, distance, makeup, and image quality. Treat scores as estimates rather than medical measurements when comparing scans taken under different conditions.

    2. Can a smart mirror diagnose skin conditions?

    No. Consumer beauty mirrors are designed for cosmetic analysis. They should not replace a dermatologist, particularly when you have a persistent, changing, painful, or concerning skin issue. A scan can describe an image, but it cannot provide clinical context for a diagnosis.

    3. Are smart beauty mirrors worth the price?

    They can be for dedicated skincare users who value progress tracking, personalized recommendations, and beauty tools. For casual users, a quality mirror and simple routine may offer better value.

    4. What should I check before buying one?

    Look at the subscription cost, privacy policy, camera and lighting requirements, features, data controls, and how the company validates its skin analysis. Also consider whether you will actually use the tracking features regularly. It has little value if it becomes another gadget sitting unused on your vanity.

  • How to Grow Nails Faster and Stronger: 10 Practical Tips

    How to Grow Nails Faster and Stronger: 10 Practical Tips

    I used to assume that slow nail growth was the reason my nails never became noticeably long. In reality, they were growing, but peeling edges, small cracks, and everyday damage kept removing the new length. Once I focused on protecting the nail plate rather than searching for overnight growth tricks, maintaining longer nails became much easier.

    Fingernails normally grow about 3 to 3.5 millimeters per month. Genetics, age, health, nutrition, hormones, and daily habits can influence that rate. No oil, polish, or home remedy can instantly change the biological process occurring inside the nail matrix. However, the right routine can reduce breakage and help more of that natural growth remain intact.

    Understand Why Nails Break Before They Grow Long

    The visible nail plate consists primarily of hardened keratin cells. Although it feels solid, it can absorb water. Repeated cycles of soaking and drying cause the layers to expand and contract, eventually encouraging peeling and splitting.

    Frequent handwashing, household cleaners, dry weather, nail biting, aggressive filing, and improper removal of gel or acrylic products can weaken nails further. Some people also naturally produce thinner or less durable nails.

    The practical goal is therefore not simply to stimulate growth. It is to keep each nail flexible, hydrated, and protected long enough for new length to become visible.

    1. Moisturize Nails and Cuticles Every Day

    Apply hand cream after washing your hands and massage it over the nails and surrounding skin. At night, use a richer cream, ointment, or cuticle oil to seal in moisture.

    Cuticle oils containing jojoba, sunflower, almond, or similar conditioning oils may improve flexibility and reduce brittle edges. They do not feed the dead nail plate or activate faster growth, but they can help prevent the splitting that makes nails appear to stop growing.

    2. Protect Your Hands From Water

    Protect Your Hands From Water

    Brief handwashing is not the main problem. Long or repeated exposure to water is more likely to weaken nails. Wear cotton-lined rubber gloves when washing dishes, cleaning bathrooms, gardening, or handling detergents.

    After washing, dry your hands carefully, including the skin around the nails. Follow with moisturizer while the skin is still slightly damp.

    3. Stop Cutting or Picking at Cuticles

    The cuticle forms a protective seal between the nail plate and surrounding skin. Cutting it too deeply or repeatedly pushing it back can cause inflammation and create an opening through which microorganisms may enter.

    Avoid biting hangnails or pulling loose skin. Trim a hangnail carefully with clean clippers and apply moisturizer. If biting or picking is habitual, bitter-tasting polish, small bandages, or identifying emotional triggers may help interrupt the behavior.

    4. File Nails Before Small Snags Become Breaks

    A tiny rough edge can catch on clothing and develop into a deeper split. Use a fine-grit or glass file to smooth snags as soon as they appear. File gently and avoid sawing aggressively across thin nails.

    A rounded or squoval shape is often easier to maintain because it has fewer sharp corners. Keeping nails moderately short while damaged sections grow out also reduces leverage and accidental bending.

    5. Eat a Balanced, Protein-Rich Diet

    Nails are made mainly from keratin, a structural protein. Include appropriate amounts of eggs, fish, poultry, dairy products, beans, lentils, nuts, seeds, or other protein sources in regular meals.

    Iron, zinc, folate, vitamin B12, vitamin C, and vitamin D also support normal body functions related to healthy tissue. More of a nutrient is not automatically better, however. Supplements are most useful when they correct an actual deficiency rather than compensate for an inconsistent diet.

    6. Be Careful With Biotin Supplements

    Be Careful With Biotin Supplements

    Biotin is heavily promoted for hair and nails, but evidence supporting faster growth in people without a deficiency remains limited. Small studies suggest that it may improve thickness or firmness in some people with brittle nails, but that is different from accelerating normal growth.

    High-dose biotin can interfere with laboratory tests, including certain thyroid, hormone, and cardiac tests. Speak with a healthcare professional before taking it, and tell medical staff about every supplement you use when undergoing blood tests.

    7. Use Nail Strengtheners Selectively

    A nail strengthener or protective base coat may temporarily reinforce soft, flexible nails and reduce surface wear. Nevertheless, excessive use of very hard formulas can sometimes leave nails rigid and more likely to snap.

    Follow the product directions and observe how your nails respond. If they become unusually dry, stiff, discolored, or irritated, discontinue the treatment. Nail strengtheners protect existing material; they do not permanently transform how the nail is produced.

    8. Reduce Damage From Polish, Gel, and Acrylics

    Ordinary polish is not automatically harmful, but frequent removal may dry the nail plate. Limit unnecessary remover contact and moisturize afterward. Acetone works quickly but may be particularly drying for already brittle nails.

    Never peel gel polish or acrylic material from the nail. Peeling can remove superficial nail layers and leave a thin, rough surface. Have enhancements removed correctly or follow the manufacturer’s complete removal process. Giving visibly damaged nails time to grow out can prevent repeated trauma.

    9. Never Use Fingernails as Tools

    Opening cans, scraping labels, loosening knots, and pressing stiff buttons place concentrated force on the free edge. Using an actual tool instead is one of the best ways to treat brittle nails because it prevents unnecessary bending, splitting, and breakage.

    This small behavioral change can prevent sudden breaks below the desired length. It is particularly useful for people whose nails tend to bend at the sides or split where the nail extends beyond the fingertip.

    10. Follow a Consistent Routine

    Follow a Consistent Routine

    Apply moisturizer after handwashing, use cuticle oil before bed, and wear gloves for wet household work. Check the edges every few days and gently file any rough areas. Consistency matters more than purchasing a large collection of treatments.

    Visible improvement requires patience. It can take several months to replace an entire fingernail, so damage near the base will not disappear after a few applications of oil.

    Common Nail-Growth Myths

    Garlic, lemon juice, toothpaste, and similar home remedies are frequently promoted as growth treatments, but convincing evidence is lacking. Acidic ingredients may also irritate surrounding skin.

    Nails do not need to breathe because the visible plate consists of dead keratin cells. Taking breaks from enhancements can still be helpful—not to provide air, but to reduce repeated removal damage and make changes easier to monitor.

    When to Consult a Healthcare Professional

    Seek professional advice if nail changes appear suddenly, affect several nails, or occur with pain, swelling, bleeding, separation, thickening, or persistent discoloration. Deep horizontal grooves may follow illness or significant physical stress. Brittle nails can occasionally be associated with iron deficiency, thyroid problems, skin conditions, or infection.

    Avoid diagnosing a deficiency from nail appearance alone. A clinician can examine the nails, review other symptoms, and decide whether testing is appropriate.

    Frequently Asked Questions

    1. How can I learn how to grow nails faster and stronger naturally?

    Support normal growth with balanced nutrition, then protect the length through daily moisturizing, careful filing, gloves during wet work, and reduced picking or biting. These habits are more realistic than expecting a home remedy to change the natural growth rate dramatically.

    2. Does cuticle oil make nails grow faster?

    Cuticle oil does not directly stimulate the nail matrix. It hydrates the nail plate and surrounding skin, which may reduce peeling, cracking, and breakage.

    3. How long does it take damaged nails to recover?

    Minor dryness may improve within weeks, but damaged nail material must grow outward. Replacing an entire fingernail commonly takes approximately four to six months.

    4. Should I stop getting gel manicures?

    Not everyone must stop completely. Gentle application, correct removal, appropriate spacing between services, and attention to irritation or thinning can reduce damage. Never peel gel polish off.

    Final Thoughts

    I have found that nail growth becomes less frustrating when I measure progress by reduced peeling and fewer broken edges rather than expecting rapid changes. My most dependable routine is simple: moisturize consistently, protect my hands from prolonged water exposure, file snags early, eat balanced meals, and avoid unnecessary trauma.

    Learning how to grow nails faster and stronger ultimately means working with the natural growth cycle. When I protect the length I already produce and remain patient while damaged areas grow out, healthier-looking nails become a realistic result rather than an overnight promise.