Author: Bianca Foster

  • Sunscreen For Acne Prone Skin That Won’t Clog Pores

    Sunscreen For Acne Prone Skin That Won’t Clog Pores

    Finding a daily SPF when your skin rebels against everything feels like an impossible compromise between UV protection and cystic breakouts. For years, I avoided daily sun protection because every cream-heavy formula turned my face into an oil slick by noon. The secret isn’t skipping SPF; it is understanding how specific textures and active filters interact with your pores. 

    A “non-comedogenic” label on a bottle is largely an unregulated marketing claim rather than a medical guarantee. Real pore safety comes down to choosing the right vehicle, avoiding heavy occlusives, and mastering application techniques.

    Understanding What Actually Clogs Your Pores

    The Truth About Non-Comedogenic Labels

    Marketing terms give a false sense of security. Individual sebum composition varies wildly, meaning a formula that works for someone else might trigger micro-comedones on your skin. Instead of trusting front-label claims, look directly at the ingredient deck. 

    Heavy plant oils like coconut or wheat germ, rich butters like shea or cocoa, and heavy synthetic emollients like isopropyl myristate are common culprits that trap sebum in the follicles.

    Mineral Versus Chemical Filters for Breakouts
    Mineral Versus Chemical Filters for Breakouts

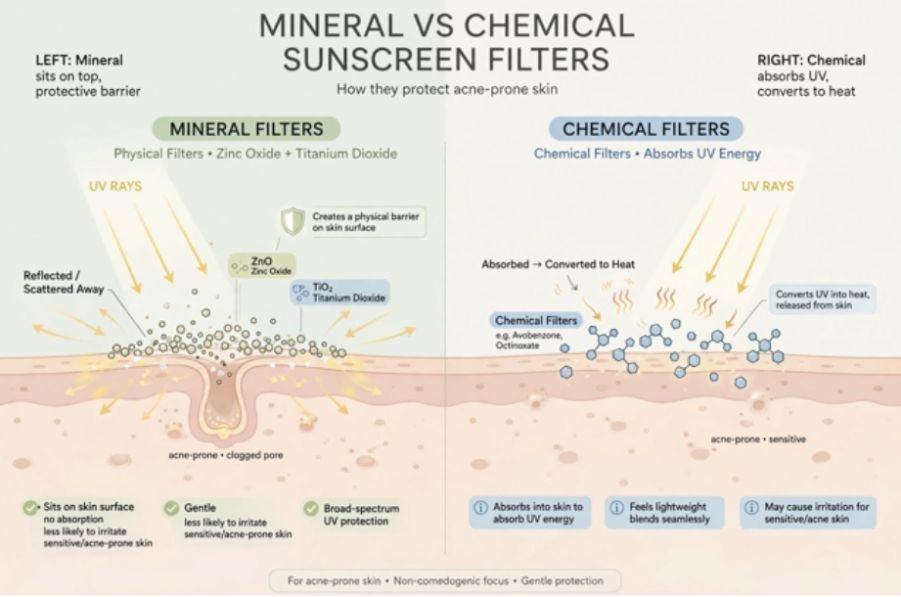
    Mineral filters like zinc oxide and titanium dioxide sit on top of the skin to reflect UV rays. Zinc oxide offers mild anti-inflammatory properties that calm active, angry acne. Chemical filters like avobenzone and octisalate absorb UV rays and dissipate them as heat. 

    They enable much lighter fluid and water-gel textures, though specific organic filters can cause stinging or contact redness on sensitive, compromised skin barriers. If you are dealing with angry breakouts, you might also want to check out retinol purging vs allergic reaction breakouts to ensure your skin issues stem from your SPF rather than active treatments.

    The Best Texture Types to Keep Pores Clear
    The Best Texture Types to Keep Pores Clear

    Water-Gels and Lightweight Fluids

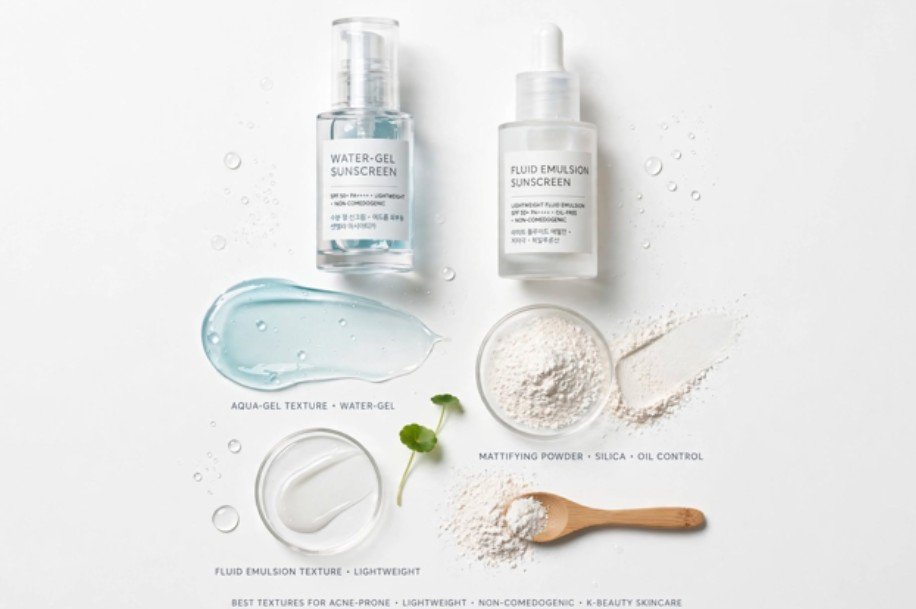
    Rich creams trap sweat and dead skin cells inside the pore lining. Transitioning to lightweight aqua-gels or fluid emulsions changes everything. These formulas use high water content and volatile silicones that evaporate quickly, leaving a weightless protective film behind. They control excess sebum production throughout the day without stripping the moisture barrier.

    Mattifying Powders and Silica Additions

    If midday shine is your primary nemesis, look for formulations boosted with silica or starch-based powders. These ingredients act like microscopic sponges, absorbing excess sebum before it can mix with your sunscreen and form a pore-clogging plug. 

    Pairing your lightweight SPF with a best hydrating toner for sensitive dry skin ensures your baseline hydration remains high so your skin does not overproduce oil in defense.

    Application Habits That Prevent Breakouts
    Application Habits That Prevent Breakouts

    The Two-Finger Rule Done Right

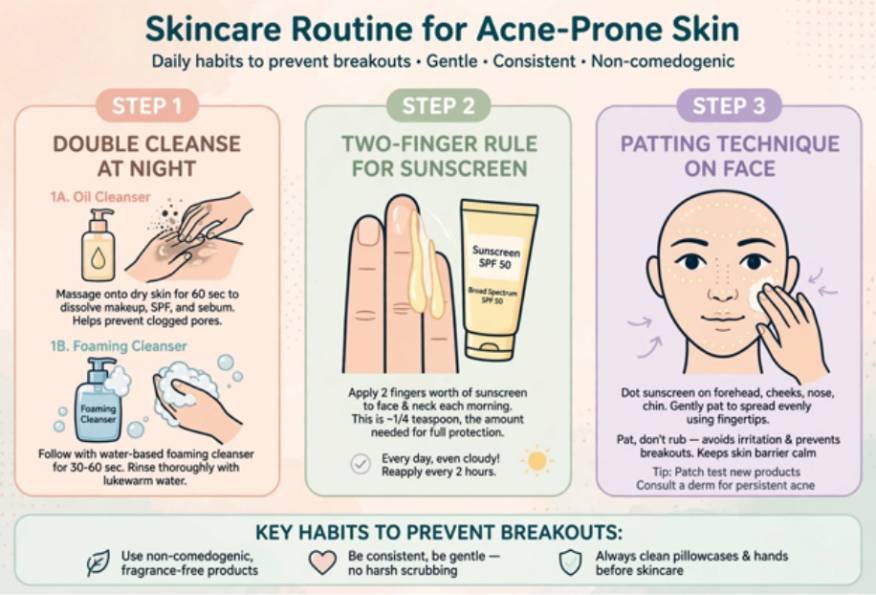
    Using too little sunscreen leaves your skin vulnerable to sun damage, but slathering on heavy layers causes congestion. Apply two full finger lengths of product for your face alone to meet the clinically tested density of $2\text{ mg/cm}^2$. 

    Spreading this exact amount across your face and neck dilutes coverage drastically. Use a separate finger length for your neck and ears to ensure proper protection.

    Layering and Patting Techniques

    Allow your morning moisturizer two to three minutes to set before layering your sunscreen on top. Applying SPF over wet skincare disrupts the film-forming agents and leads to uneven protection and product pilling. 

    Avoid aggressively rubbing fluid sunscreens into the skin. Excessive friction drives emulsifiers straight into vulnerable pores and inflames active lesions. Instead, dot the product evenly across your face and pat or gently smooth outward in a single uniform direction.

    The Non-Negotiable Double Cleanse

    Even the lightest non-comedogenic sunscreens require a thorough breakdown at the end of the day. UV filters, silicones, and waterproof polymers cling stubbornly to skin lipids. 

    Use an oil-based cleanser, cleansing balm, or micellar water as your first step to dissolve stubborn filters. Follow immediately with a gentle water-based foaming or gel wash to completely rinse away all solubilized residue before you sleep.

    Frequently Asked Questions

    1. Can I skip moisturizer if I use a gel sunscreen?

    Yes, if your skin feels adequately hydrated by a lightweight gel sunscreen, you can skip your morning moisturizer entirely to prevent heavy product layering.

    2. Why does my sunscreen pill on my face?

    Pilling usually happens when you layer sunscreen over unabsorbed moisturizer or apply too much friction during application.

    3. Are physical sunscreens always better for acne?

    Not necessarily; while zinc oxide has anti-inflammatory benefits, poorly formulated mineral sunscreens can feel heavy and occlusive.

    4. How do I remove water-resistant sunscreen properly?

    Always use a two-step cleansing routine starting with an oil cleanser or micellar water, followed by a gentle water-based cleanser.


  • Portable Beauty Tools for Frequent Travelers That Save Space and Time

    Portable Beauty Tools for Frequent Travelers That Save Space and Time

    I noticed how quickly a normal beauty routine can take over a suitcase once a trip stretches beyond a weekend. A hair tool here, a facial device there, then brushes, mirrors, chargers, and little accessories somehow fill an entire pouch. After a few trips, I started looking at beauty gear differently: if a tool could handle more than one job without becoming another bulky item, it had a reason to come along.

    I also realized that saving space is only half the appeal. The best travel tools make getting ready faster when a hotel bathroom is tiny, a flight has left my skin looking tired, or the day’s schedule starts before I feel fully awake. That is where compact, multifunctional devices become genuinely useful. They can simplify a routine without requiring travelers to give up every part of the routine they enjoy. That distinction matters when every item in a carry-on must justify its space and weight.

    What Makes a Beauty Tool Worth Packing?

    The smallest tool is not automatically the smartest choice. A useful travel beauty device should earn its space through a combination of size, versatility, durability, and convenience. Cordless operation can eliminate one more cable, while USB-C charging can make it easier to share a charger with other electronics.

    It is also worth checking charging requirements before an international trip. Voltage compatibility, battery type, charging time, and included adapters can matter more than a sleek design once you are standing in a hotel room with a dead device.

    Facial Tools for a Faster Skincare Routine

    Facial Tools for a Faster Skincare Routine

    Facial tools are especially interesting for travelers because tired-looking skin can show up after disrupted sleep, dehydration, long flights, or changes in climate. Compact massage, cooling, LED, and microcurrent devices can add a short treatment to a routine without requiring a full collection of products.

    A small microcurrent device can be attractive when space is tight because one handheld unit can replace a larger facial setup. Microcurrent tools are often designed around lifting or toning routines, although results and recommended use vary by device.

    Emerging technology is making this category more interesting. Beauty patches with smart sensors point toward a future where wearable beauty technology can collect information about skin conditions and potentially make routines more personalized. For travelers, that idea is useful because personalization could eventually mean carrying fewer products and relying on more targeted care.

    Hair Tools That Pull More Than One Job

    Hair tools can be the biggest luggage problem because traditional dryers, straighteners, curling irons, brushes, and accessories quickly add weight. A compact multi-styler can make more sense when one base unit accepts attachments or performs several styling functions.

    Travel-friendly straighteners and curling tools are also useful when they heat quickly and include features such as automatic shutoff. A protective pouch or heat-resistant case can be just as valuable because it reduces the need to wait for a tool to cool before packing.

    For international travel, check whether a hot tool supports the voltage used at your destination. A plug adapter only changes the plug shape; it does not automatically make a device compatible with another electrical system. That small distinction can prevent an expensive mistake.

    The New Generation of Compact Beauty Devices

    Beauty technology is moving toward devices that combine several functions instead of asking travelers to carry a separate tool for every concern. A single device might offer warming and cooling, massage and vibration, or multiple styling attachments.

    That is where next-generation facial sculpting devices fit into the broader travel conversation. Newer compact facial tools increasingly focus on combining treatment modes in one handheld format. The appeal is obvious: fewer objects in the toiletry bag and a shorter routine at the hotel.

    The practical question is whether those extra functions will actually be used. A multifunctional device only saves space when it replaces something else. If its additional modes sit untouched, a simpler tool may be the better packing choice.

    Pack the Routine, Not the Entire Bathroom

    Pack the Routine, Not the Entire Bathroom

    Smart packing starts before the devices go into the bag. Solid makeup and skincare formats can reduce the number of liquids that need to be organized for airport screening. TSA’s carry-on rules also make it worth checking current requirements before departure, especially when a beauty routine includes liquids, batteries, or larger electronics.

    Keep chargers together in a small pouch and protect delicate tools from being crushed under clothing. For rechargeable devices, follow the manufacturer’s battery and transport instructions rather than assuming every electronic beauty tool has identical requirements.

    Choosing Tools Around Your Travel Style

    A frequent business traveler may value a fast facial tool, compact hair styler, and small illuminated mirror because the routine has to fit between meetings. Someone taking long vacations may prioritize a versatile skincare device and a hair tool that can handle changing humidity.

    The best test is simple: before packing a device, name the specific problem it solves. If the answer is vague, leave it home. If it saves meaningful time, replaces another item, or makes a recurring travel annoyance easier, it has earned its place.

    FAQs: Portable Beauty Tools for Frequent Travelers That Save Space and Time

    1. Are portable beauty tools allowed in carry-on luggage?

    Many are, but rules depend on the device and its battery or electrical components. Check current TSA guidance and the airline’s requirements before flying.

    2. Are cordless beauty tools better for travel?

    Often, yes. Cordless designs reduce cable clutter and make hotel-room use easier, but battery life and charging time should be considered.

    3. What beauty tool saves the most luggage space?

    Multifunctional tools generally have the biggest advantage because one device can replace several single-purpose items.

    4. Should I pack electronic or manual beauty tools?

    It depends on your routine. Manual tools are lighter and simpler, while electronic devices can save time when you actually use their added functions.

    Why a Smaller Routine Can Feel Better

    The real advantage of compact beauty tools is not owning clever technology. It is removing friction from a routine that has to work outside the comfort of home. A lightweight device that performs reliably, charges easily, and replaces another item can make a hotel stay feel surprisingly normal. The right choices also leave more room for clothes, souvenirs, and the everyday things that matter once the beauty routine is finished.

    A good travel beauty kit should feel intentional, not crowded. Pack the tools you will genuinely use, and let everything else stay home.

  • Nail Care Tips for Frequent Hand Washing

    Nail Care Tips for Frequent Hand Washing

    Washing my hands regularly helps me maintain good hygiene, but I have noticed that repeated exposure to water and soap can leave my fingernails dry, soft, and vulnerable to splitting. 

    The problem can become worse when I also use hand sanitizer, wash dishes, or handle cleaning products throughout the day. I follow these nail care tips for frequent hand washing to protect my nails without compromising necessary hygiene.

    Why Frequent Hand Washing Can Weaken Nails

    Fingernails are formed from compact layers of keratin. Although the nail plate appears solid, it can absorb water. Nails temporarily swell when they become wet and contract again as they dry. Repeating this cycle many times during the day can place stress on the nail’s layered structure.

    Soap can also remove some of the natural oils that help keep the nail plate and surrounding skin flexible. Over time, nails may become brittle, develop rough edges, or start peeling into thin layers. The cuticles can become dry and cracked as well, increasing the risk of painful hangnails.

    Hand washing should not be reduced when it is necessary for hygiene. Instead, the washing and aftercare routine can be adjusted to limit avoidable damage.

    Understanding what weakens the nail plate is the first step toward following effective nail care tips for healthy nails and preventing avoidable damage.

    Use Lukewarm Water Instead of Hot Water

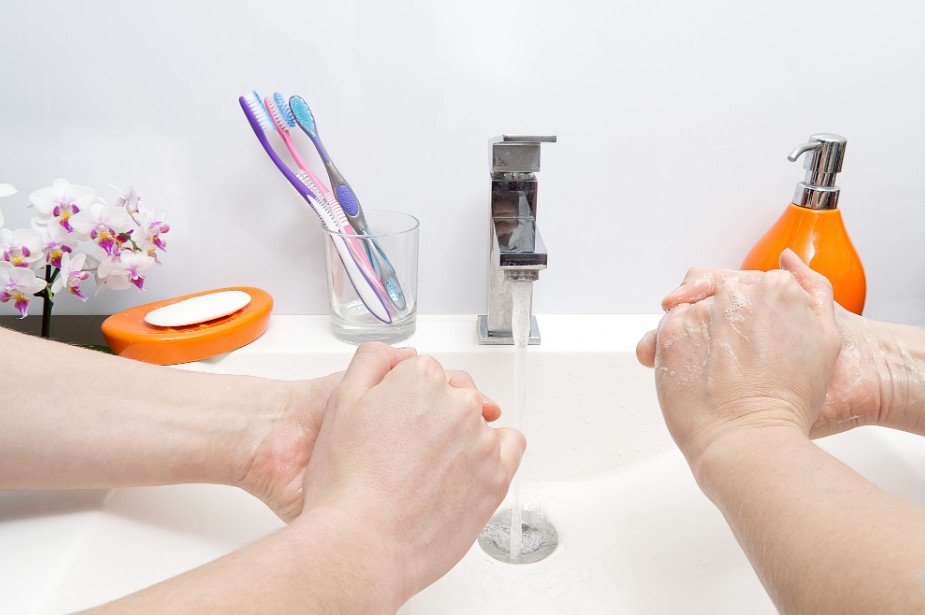
    Hot water is not necessary for ordinary hand washing and may remove protective oils more aggressively, potentially contributing to dry cuticles. Lukewarm or comfortably cool running water can clean the hands effectively when combined with soap and proper washing technique.

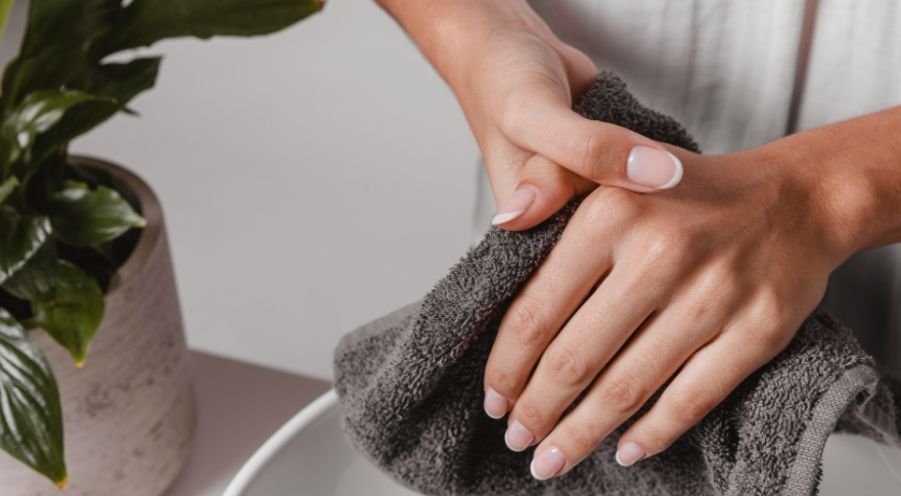
    Hands should be rinsed thoroughly so that soap residue does not remain around the cuticles or underneath the free edges of the nails. After washing, they should be gently patted dry with a clean towel rather than rubbed vigorously. Special attention should be given to the spaces between the fingers and around the nails, where lingering moisture can irritate sensitive skin.

    Choose a Gentle Hand Cleanser

    Choose a Gentle Hand Cleanser

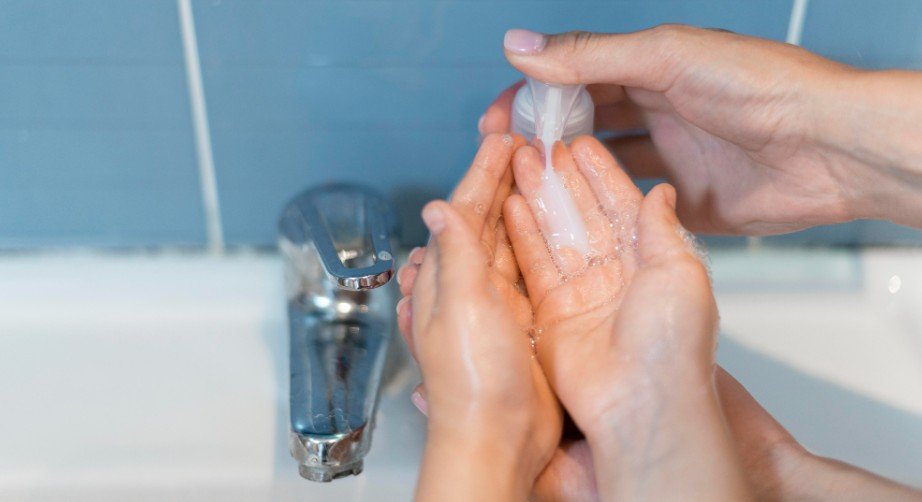
    Strong fragrances, harsh detergents, and unnecessarily aggressive cleansing ingredients may contribute to dryness. A mild cleanser is generally a better everyday option for someone who washes repeatedly.

    Changing to a gentler cleanser does not mean sacrificing cleanliness. The washing technique, duration, and situations in which hands are washed remain important. People who work in healthcare, food preparation, childcare, or other regulated environments should continue following the hygiene products and procedures required by their workplace.

    Moisturize Immediately After Washing

    Moisturizing after each wash is one of the most useful habits for dry nails and cuticles. It is best to apply the product while the skin is completely dry but still slightly hydrated from washing.

    The moisturizer should be massaged over the hands, nail plates, cuticles, and skin surrounding each nail. A thin application is often enough during the day. Creams and ointments usually provide a more substantial protective layer than lightweight, water-based lotions.

    Ingredients such as petrolatum, glycerin, ceramides, lanolin, shea butter, and dimethicone may help reduce moisture loss. Anyone with sensitive skin should consider fragrance-free options and stop using a product that causes burning, itching, or redness.

    Add Overnight Moisture

    A thicker cream or ointment can be applied before bed when daytime applications are not enough. Covering the hands with clean cotton gloves may help keep the product in place overnight.

    Cuticle oil can complement this routine, particularly when the skin around the nails feels stiff or flaky. However, oil should support a complete moisturizing routine rather than replace hand cream entirely.

    Wear Gloves for Prolonged Wet Work

    Ordinary hand washing is brief, but dishwashing, bathroom cleaning, gardening, and similar tasks can keep nails wet for much longer. Protective gloves help reduce prolonged exposure to water, detergents, and household chemicals.

    Gloves should fit comfortably and remain dry inside. Keeping damp gloves on for an extended period can trap moisture against the skin and cause irritation. Cotton-lined household gloves may be more comfortable for longer cleaning tasks. Gloves should be removed periodically if the hands become sweaty.

    Keep Vulnerable Nails Short and Smooth

    Keep Vulnerable Nails Short and Smooth

    Long nails are more likely to catch, bend, or break when they have already been weakened by repeated water exposure. Keeping them at a practical length reduces mechanical stress.

    Nails are easier to trim after they have softened slightly, but filing is generally better when they are dry. A fine-grit file can smooth rough edges before a small split grows larger. Gentle strokes are preferable to aggressive back-and-forth sawing.

    Nails should not be used to open containers, scrape labels, or pry objects apart. These everyday actions can worsen splitting even when the washing routine is carefully managed.

    Protect the Cuticle Barrier

    Cuticles help seal the area where the nail emerges from the skin. Cutting them deeply, picking them, or pushing them back aggressively can damage that natural barrier.

    A hangnail should never be pulled or bitten. It can be carefully clipped with a clean tool without cutting living skin. Redness, swelling, increasing pain, warmth, or pus around a nail may indicate an infection and should receive appropriate medical attention.

    Reduce Additional Nail Stress

    Repeated washing may not be the only cause of brittle nails. Acetone-based remover, frequent polish changes, aggressive buffing, gel removal, acrylic enhancements, and picking off polish can add further stress.

    When nails are peeling or splitting, temporarily simplifying the manicure routine may help. Existing damage will not disappear immediately because the affected section must grow forward before it can be trimmed away. Consistent protection is more valuable than expecting a strengthening product to repair a split instantly.

    During warmer months, simplifying your manicure routine and following seasonal summer nail care tips can also help reduce additional stress on nails that are already prone to peeling or splitting.

    Frequently Asked Questions

    1. What are the best nail care tips for frequent hand washing?

    Use lukewarm water, choose a gentle cleanser, dry the hands thoroughly, and apply moisturizer over the hands, nails, and cuticles after washing. Wear protective gloves during prolonged wet work and keep fragile nails short.

    2. Does hand sanitizer damage fingernails?

    Repeated sanitizer use may contribute to dryness, but its effect depends on the formulation, frequency of use, and condition of the nails and surrounding skin. Follow hygiene requirements and moisturize after the sanitizer has dried.

    3. How long do damaged fingernails take to recover?

    Visible improvement takes time because damaged nail material must grow out. Fingernails commonly require several months to replace most of the visible nail plate. New growth should be protected consistently.

    4. When should brittle nails be examined?

    Professional advice is appropriate when nail changes are sudden, painful, severe, or persistent. Swelling, pus, substantial lifting, unusual discoloration, deep grooves, or a changing dark streak should not be treated as routine dryness.

    Final Thoughts

    I do not try to avoid necessary hand washing just to protect my nails. Instead, I make the moments immediately after washing count. I dry carefully, apply moisturizer, protect my hands during longer wet tasks, and avoid treating my fingernails like tools.

    I also remember that improvement happens gradually. By reducing repeated water stress and protecting new nail growth, I can maintain clean hands while giving my nails and cuticles the support they need to remain smooth, flexible, and healthy.

  • Nail Glue vs Adhesive Tabs Which Is Better for Press-Ons?

    Nail Glue vs Adhesive Tabs Which Is Better for Press-Ons?

    The strongest press-on manicure is not automatically the best one. A bond that survives showers, workouts, and a weekend trip can also make removal harder and reduce your chance of reusing the set. That is why nail glue vs adhesive tabs which is better has no universal answer: glue usually wins for durability, while tabs win for easier removal, lower commitment, and preserving reusable press-ons.

    I would choose based on one question first: do you care more about wear time or flexibility?

    The Real Difference Is Bond Strength and Removal

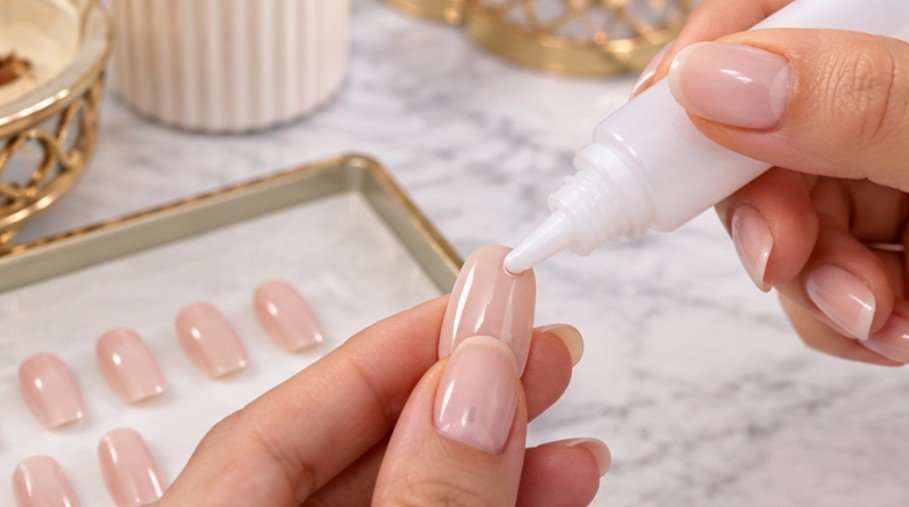
    Nail glue commonly uses a fast-setting cyanoacrylate-type adhesive. It creates a firm bond between the artificial nail and natural nail plate, making it useful for vacations, busy workweeks, or anyone wanting extended wear.

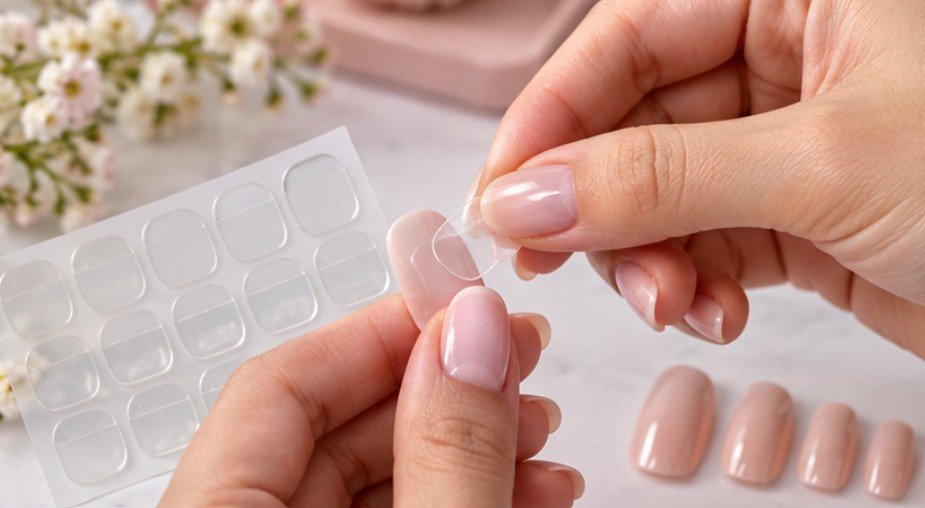
    Adhesive tabs behave more like pressure-sensitive stickers. They are slightly flexible and designed to release more easily, which makes them practical for weddings, photo shoots, weekends, or frequent style changes.

    Because water exposure can affect both the natural nail and the adhesive bond, it is also useful to understand how to protect nails from water damage when choosing between glue and adhesive tabs.

    The U.S. FDA nail-care product guidance advises consumers to follow nail-product labels and warnings carefully and notes that infections and allergic reactions can occur with some nail products.

    Nail Glue vs Adhesive Tabs Which Is Better? A Fast Comparison

    Factor Nail Glue Adhesive Tabs
    Typical wear goal About 1–3+ weeks A few days to roughly a week
    Best use Travel, longer wear Events, weekends, frequent swaps
    Water resistance Usually stronger Usually weaker
    Removal Slower and more involved Faster and easier
    Press-on reuse Less predictable Usually better
    Beginner friendliness Moderate High

    These are practical ranges rather than guarantees. A carefully applied tab can outlast poorly applied glue, while even strong glue may fail early if oil, lotion, moisture, or poor sizing prevents full contact.

    Why Nail Glue Usually Lasts Longer

    Why Nail Glue Usually Lasts Longer

    Cyanoacrylate nail adhesives cure quickly and create a strong bond. Less movement between the press-on and natural nail generally means fewer lifted edges, particularly during daily chores or extended wear.

    The drawback often appears during removal. Pulling or prying at a firmly attached nail can strip superficial layers from the natural nail plate, leaving it rough, thin, or tender.

    The American Academy of Dermatology artificial-nail advice on application and removal can weaken natural nails, particularly when aggressive filing or repeated treatments are involved. 

    Glue can also irritate or sensitize some users. Medical reports have documented allergic contact dermatitis, inflammation, and nail separation associated with cyanoacrylate nail adhesives. Itching, swelling, redness, blistering, or persistent nail lifting therefore deserves more attention than simply covering the problem with another press-on.

    Why Adhesive Tabs Work Better for Reusable Sets

    Tabs become particularly attractive when the press-on nails themselves are worth protecting. Because tab residue is generally easier to remove from the underside, a good-quality set can often be cleaned and worn again.

    That can make tabs more economical for custom, hand-painted, seasonal, or premium press-ons. Beginners may also appreciate being able to correct placement without dealing with quickly setting liquid glue.

    The compromise is durability. Long showers, washing dishes, cleaning, lifting weights, gardening, or repeatedly putting pressure on long tips can loosen tabs sooner.

    There is another overlooked issue: moisture. Cleveland Clinic dermatologist Taryn Murray, MD, has warned that press-ons can trap moisture, potentially creating an environment where bacteria or fungus can grow. A nail that lifts after getting wet should therefore be removed and dried rather than simply pushed back into place. 

    Use This Four-Question Test Before Applying Press-Ons

    Use This Four-Question Test Before Applying Press-Ons

    1. How Long Do You Need Them?

    For one evening, a weekend celebration, or a photo shoot, tabs are usually sufficient. For a weeklong vacation or extended everyday wear, glue is generally more dependable.

    2. Do You Want to Reuse the Set?

    If your press-ons are expensive, custom-designed, or difficult to replace, tabs make more sense. If reuse is unimportant, glue becomes easier to justify.

    3. What Will Your Hands Be Doing?

    Regular swimming, cleaning, gardening, lifting, or other hands-on activities favor the stronger bond of glue. Light office work and short events make tabs more realistic.

    4. Are Your Nails Already Irritated?

    Do not hide painful, inflamed, separating, or infected-looking nails beneath another artificial nail.

    Harvard Health explains that contact dermatitis can occur after exposure to cosmetics and other chemicals. When an allergen is unclear, dermatologists may use patch testing to identify it. 

    Better Nail Prep Beats Using More Adhesive

    Start with press-ons that fit from sidewall to sidewall without pressing into the surrounding skin. Wash your hands and dry them thoroughly. Gently clear excess cuticle from the nail plate and remove surface oil if the product instructions recommend it.

    Avoid applying hand cream immediately beforehand.

    With glue, more is not automatically better. Excess adhesive can squeeze onto surrounding skin and make removal messier without guaranteeing additional wear time.

    With tabs, choose a size covering most of the nail plate without touching the skin. Press the tab down firmly before attaching the artificial nail.

    After either method, follow the manufacturer’s directions concerning water exposure and bonding time rather than relying on a universal rule from social media.

    Proper nail preparation also includes keeping the surrounding skin comfortable and hydrated, so learning how to moisturize nails and cuticles can be useful before starting a press-on application.

    Safe Removal Matters as Much as Application

    Safe Removal Matters as Much as Application

    Never turn removal into a strength test. Popping, peeling, or prying off a firmly attached press-on can damage layers of the natural nail.

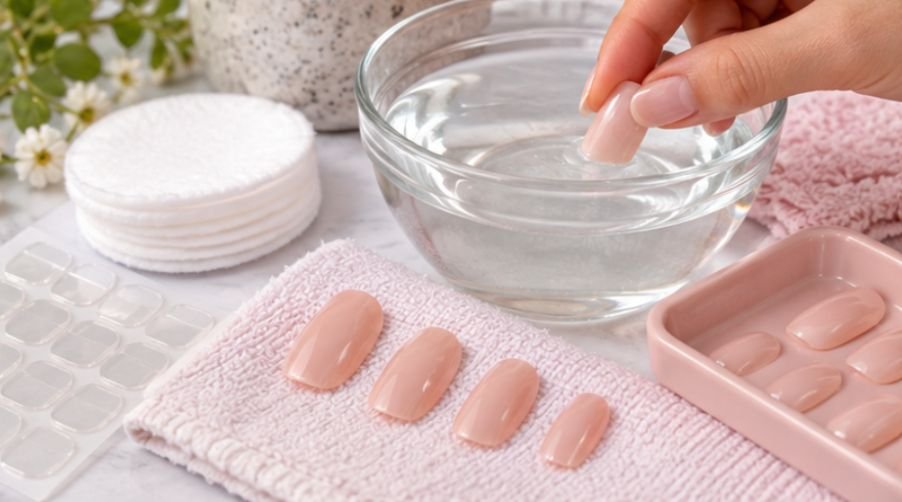
    Adhesive tabs may release after soaking in warm soapy water or using oil, depending on the product. Nail glue may require longer soaking or acetone. Because press-on materials and adhesives differ, always check the manufacturer’s directions before using solvents.

    Removers and primers should also be kept securely away from children. Poison Control warns that some artificial-nail removers and primers can cause serious poisoning or injury if swallowed. 

    Common Misconceptions About Press-On Adhesives

    Tabs are often described as completely damage-free, but that promise is too broad. Their easier removal usually makes them gentler, yet ripping a tabbed press-on away can still traumatize the nail.

    Likewise, glue does not automatically destroy every reusable set. Some press-ons can be cleaned and worn again, although dried glue, filing, and solvent exposure can make reuse less predictable.

    The bigger mistake is assuming stronger adhesion always equals a better manicure. Your ideal adhesive depends on how long you need the nails, what your hands will encounter, and how you plan to remove them.

    Frequently Asked Questions

    1. Is nail glue stronger than adhesive tabs?

    Generally, yes. Nail glue creates a firmer bond and is better suited to longer wear, regular water exposure, and more demanding daily activities.

    2. Which option is better for weak or peeling nails?

    Tabs are usually the lower-commitment choice. However, painful, splitting, inflamed, or separating nails should be allowed to recover and may require evaluation by a dermatologist.

    3. Nail glue vs adhesive tabs which is better for a vacation?

    Glue generally works better for a multi-day vacation because it handles water and physical activity more reliably. Tabs are useful if you want to change styles during the trip.

    4. Can I use nail glue and adhesive tabs together?

    Some users combine them, but layering adhesives can alter fit and complicate removal. Following the press-on manufacturer’s recommended attachment method is safer than improvising a stronger bond.

    The Better Choice Depends on What You Want to Protect

    If I needed my manicure to survive travel, errands, and several days of everyday activity, I would choose glue. If I cared more about reusing a favorite set, changing designs quickly, or simplifying removal, adhesive tabs would be the smarter option.

    The best adhesive is not necessarily the one with the strongest hold. It is the one whose trade-offs match your plans. Tabs may lift sooner; glue may demand more patience during removal. Decide based on your schedule, natural nail condition, expected activities, and whether those press-ons are disposable or worth saving.

  • Makeup Routine for Oily Skin That Won’t Melt by Noon

    Makeup Routine for Oily Skin That Won’t Melt by Noon

    By midday, I used to notice the same frustrating pattern: extra shine across my forehead, foundation disappearing around my nose, and powder starting to look heavier every time I touched up. 

    I eventually realized that lasting makeup on oily skin is less about piling on matte products and more about controlling each layer from the start. My makeup routine for oily skin now focuses on lightweight hydration, strategic priming, thin complexion layers, targeted powder, and smarter touch-ups so my base stays fresh without looking dry, flat, or cakey.

    How Should I Prep Oily Skin Before Makeup?

    I start with a gentle foaming or gel cleanser to remove oil, sweat, and residue without scrubbing. Dermatologists recommend gentle cleansing and note that oily skin still needs moisture. Oil-free and non-comedogenic products can also suit acne-prone skin.

    If my skin tolerates it, I may use a lightweight BHA or pore-refining toner, but I treat toner as optional. Next, I apply a thin layer of lightweight moisturizer. For daytime wear in the US, I finish with broad-spectrum SPF 30 or higher and let my skincare settle before makeup.

    Does the Setting-Spray Sandwich Method Work for Oily Skin?

    On long workdays, humid summer days, or special occasions, I sometimes use the “sandwich” technique. Once skincare has settled, I mist a light layer of setting spray over the face and let it dry.

    Then I press mattifying or pore-blurring primer mainly into my T-zone—the forehead, nose, sides of the nose, and chin. I do not automatically cover my whole face because targeted shine control helps me avoid an excessively matte finish.

    How Do I Apply Foundation Without Making Oily Skin Cakey?

    How Do I Apply Foundation Without Making Oily Skin Cakey?

    I choose a water-based, natural-matte, matte, or long-wear foundation and apply it in thin, buildable layers.

    For a lighter, more understated finish, I can also follow a natural makeup look step-by-step approach while keeping foundation layers thin and targeted.

    I start near the center of my face and blend outward with a damp sponge or stippling brush. Pressing and tapping gives me a smoother result than repeatedly dragging a tool across the skin.

    I add lightweight liquid concealer only where I need it, such as under my eyes or over blemishes. If I am using the sandwich method, I follow the liquid and cream products with another fine mist of setting spray and let it dry before applying powder.

    How Much Powder Should I Use on an Oily T-Zone?

    I press loose translucent setting powder into my forehead, nose, chin, and other high-shine areas with a powder puff. I may lightly bake extremely oily areas for a special occasion, but I keep baking optional because too much powder can emphasize pores and skin texture.

    For blush, bronzer, and highlighter, powder formulas are easy for me to manage on very oily skin. I can still use cream formulas, but I apply them sparingly and set strategically instead of assuming every cream product will automatically slide off.

    How Do I Stop Eye Makeup and Lip Color From Smudging?

    How Do I Stop Eye Makeup and Lip Color From Smudging?

    I keep heavy skincare away from my eyelids, use a small amount of matte eye primer, and lightly set it when necessary. Eye primer can help reduce creasing and movement when my eyelids become oily. This lighter approach can also suit skincare for aging skin, where excessive product around the eyes may emphasize texture.

    In heat and humidity, I prefer long-wearing gel or waterproof eyeliner and tubing or waterproof mascara if smudging is a recurring problem.

    For my lips, I apply thin layers of long-wear or transfer-resistant color and allow them to set. A very light dusting of translucent powder around the lip edge can also help limit transfer.

    I finish my entire face with an even mist of oil-control or long-wear setting spray. An X-and-T spraying pattern can help distribute the mist, but I avoid soaking my skin with more spray than I need.

    What Should I Do When My Face Gets Oily During the Day?

    My most important touch-up rule is simple: blot before adding more powder. Applying powder directly over a visible layer of oil can make foundation look thick, uneven, and cakey.

    I gently press blotting paper onto my forehead, nose, and chin without rubbing. After blotting, I add only a small amount of powder wherever shine remains.

    This technique is especially useful during humid US summers, outdoor events, long commutes, and days spent moving repeatedly between heat and air conditioning.

    Why Does Foundation Separate Around My Nose?

    My nose is often the first place where my makeup breaks down because the area combines natural oil, visible pores, facial movement, and frequent touching.

    I use less moisturizer, primer, foundation, and powder there than I might instinctively apply. If my makeup separates later, I blot the oil first, gently press the remaining foundation back into place, and add a trace of powder only when necessary.

    Adding another thick coat of foundation usually makes the separation more noticeable rather than fixing it.

    What Mistakes Make Oily-Skin Makeup Wear Off Faster?

    What Mistakes Make Oily-Skin Makeup Wear Off Faster

    The biggest mistake I avoid is using too much of everything. Thick moisturizer followed by heavy primer, full-coverage foundation, and lots of powder can create a bulky surface that starts looking textured once natural oils emerge.

    I also do not skip moisturizer solely because my skin is oily. Instead, I choose a lightweight formula and give it time to absorb before moving on to makeup.

    Even when my skin is oily, I still pay attention to areas that may become dehydrated or flaky, since the right makeup for dry flaky skin techniques can help me adjust my base when my skin needs more moisture.

    At night, I remove my makeup completely before going to bed, particularly when I am prone to breakouts.

    Frequently Asked Questions 

    1. How Long Should a Makeup Routine for Oily Skin Last?

    There is no universal number of hours because wear depends on natural oil production, climate, activity, formulas, and application. I concentrate on thin layers, strategic setting, and blot-first touch-ups rather than expecting completely matte skin from morning until night.

    2. Should I Put Powder on Before Foundation?

    A very light dusting of loose powder over the T-zone can work as an optional oil-control technique. Some makeup artists use it to absorb surface oil before foundation, but too much powder underneath the base can create patchiness.

    3. Is Matte Foundation Always Best for Oily Skin?

    Not necessarily. Matte and natural-matte formulas can reduce visible shine, but technique matters just as much. I would rather wear a thin layer of a compatible foundation than a thick layer chosen solely because the label says matte.

    4. How Can I Keep Oily-Skin Makeup From Looking Flat?

    I set my T-zone more thoroughly while using less powder on calmer areas such as my outer cheeks. That targeted technique controls unwanted shine without removing every bit of dimension from my complexion.

    Final Takeaway

    When I want my makeup to survive a long US workday, hot summer weather, or an evening out, I rely on balance rather than excessive mattifying. I cleanse gently, hydrate lightly, let sunscreen settle, prime strategically, build foundation and concealer in thin layers, set my T-zone, and finish with setting spray.

    Blotting before repowdering, using less product around my nose, and controlling oil only where necessary have made the biggest difference in my makeup routine for oily skin. The result looks smoother and fresher without the heavy, cakey finish that often comes from trying to cover every sign of natural shine.

  • How to Fade Post Acne Hyperpigmentation Fast

    How to Fade Post Acne Hyperpigmentation Fast

    I spent years worsening my dark spots before I learned the biological mechanism behind them. To master how to fade post acne hyperpigmentation fast, you must tackle two fronts simultaneously: halt tyrosinase-driven melanin production and speed up epidermal shedding. Throwing random drugstore serums at your face disrupts your stratum corneum, creating fresh micro-inflammation that makes your dark marks darker.

    According to clinical research published by the American Academy of Dermatology, post-inflammatory hyperpigmentation (PIH) occurs when cutaneous injury or inflammation prompts melanocytes to dump excess melanin into surrounding keratinocytes. Getting rid of that pigment requires surgical precision, not aggressive scrub sessions.

    The Critical First Step: Diagnose PIH vs. PIE (The Glass Test)

    The Critical First Step: Diagnose PIH vs. PIE (The Glass Test)

    Before touching a single active ingredient, verify whether your spots are actually hyperpigmentation. Many people treat red or purple marks with pigment lighteners, only to see zero progress.

    Take a clear drinking glass and press it firmly against the discoloration for three seconds while looking in the mirror.

    Test Result Underlying Condition Biological Cause Primary Target
    Turns white (blanches) Post-Inflammatory Erythema (PIE) Dilated, damaged micro-capillaries Vascular calming, barrier repair
    Stays brown/dark (no change) Post-Inflammatory Hyperpigmentation (PIH) Excess melanin pools in epidermal/dermal layers Tyrosinase inhibition, accelerated cell turnover

    If the mark stays visibly brown or charcoal through the glass, it is PIH. If it temporarily disappears, you are dealing with vascular pooling. Treating erythema with heavy exfoliating acids keeps the tissue chronically inflamed, worsening the discoloration.

    The AM Strategy: Arresting Melanin Synthesis

    The AM Strategy: Arresting Melanin Synthesis

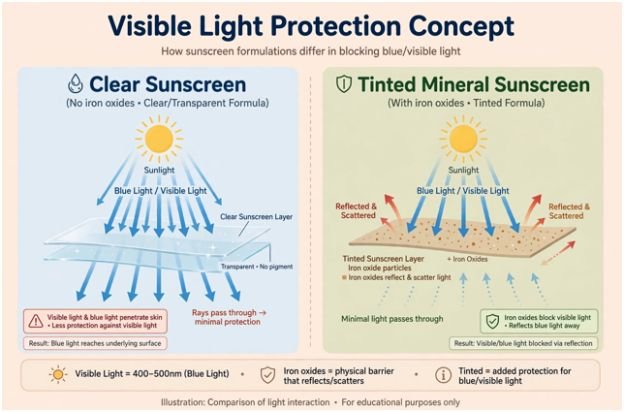
    Your morning routine serves one primary goal: defend against melanocyte stimulation. Sunlight and high-energy visible (HEV) light signal your pigment cells to pump out melanin, undoing every bit of nighttime repair.

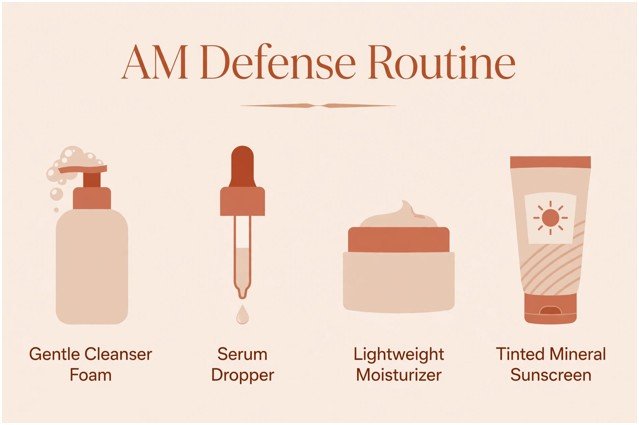
    AM Flow: Gentle Cleanse ➔ Tyrosinase Inhibitor (Azelaic/Vitamin C) ➔ Barrier Hydration ➔ Broad-Spectrum Tinted SPF 50

    Morning Actives: Tyrosinase Inhibitors Over Redundant Acids

    Never layer multiple high-percentage acids in the morning. Pick one targeted tyrosinase inhibitor to suppress the enzyme responsible for pigment creation:

    Active Ingredient Optimal Concentration Mechanism of Action Best Paired With
    Azelaic Acid 10%–15% Selectively inhibits overactive melanocytes; calms residual inflammation Niacinamide (2%–4%)
    L-Ascorbic Acid (Vit C) 10%–15% Neutralizes free radicals; downregulates tyrosinase activity Vitamin E + Ferulic Acid
    Tranexamic Acid 3%–5% Slows melanocyte-keratinocyte chemical signaling Alpha Arbutin (1%–2%)

    I stick with 15% prescription azelaic acid. It selectively targets abnormal pigment cells without bleaching the surrounding healthy tissue, making it exceptionally safe for deeper complexions.

    Visible Light Defense: Iron Oxides Are Non-Negotiable

    Visible Light Defense: Iron Oxides Are Non-Negotiable

    Standard chemical sunscreens absorb ultraviolet radiation, but they fail to block the visible light spectrum. A controlled trial in the Journal of Clinical and Aesthetic Dermatology revealed that high-energy visible (HEV/blue) light stimulates stubborn, long-lasting hyperpigmentation, particularly in Fitzpatrick skin types III through VI.

    To counter this, choose a tinted mineral formula featuring iron oxides over clear sunscreens. Look for sunscreen for acne prone skin that won’t clog pores to find mineral formulas that shield against visible light without triggering fresh breakouts.

    The PM Strategy: Accelerating Cellular Turnover

    The PM Strategy: Accelerating Cellular Turnover

    Nighttime is when you actively shed melanin-saturated skin cells and stimulate collagen matrix renewal. Establishing an uncompromising morning vs night skincare routine steps order ensures your actives perform without triggering barrier failure.

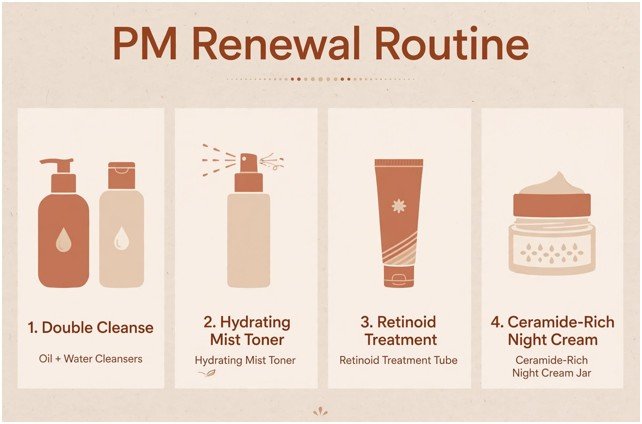
    PM Flow: Double Cleanse (Oil + Water) ➔ Hydrating Toner/Mist ➔ Retinoid (Wait 10 min) ➔ Ceramide Lipid Cream

    Retinoid Cycling Without Barrier Destruction

    Topical retinoids represent the clinical gold standard for cell turnover. A study indexed in PubMed confirms that topical retinoids dramatically shorten keratinocyte transit time, lifting trapped melanin deposits weeks faster than unassisted desquamation.

    Retinoid Derivative Strength Level Speed of Conversion Irritation Risk
    Tretinoin 0.025%–0.05% Immediate (Pure Retinoic Acid) High
    Adapalene 0.1% High (Selective RAR-beta/gamma agonist) Moderate
    Retinaldehyde 0.05%–0.1% Fast (Single metabolic conversion step) Low to Moderate
    Encapsulated Retinol 0.3%–1.0% Moderate (Two conversion steps) Low

    Start with Adapalene 0.1% or low-dose Tretinoin three nights per week. Apply your retinoid over completely dry skin, followed by a ceramide-rich moisturizer. Rushing into nightly application causes micro-tears, provoking secondary PIH.

    Weekly Acid Resurfacing (When to Pause)

    On one designated evening each week, bench your retinoid and use a chemical exfoliant. Alpha-hydroxy acids (AHAs) break the desmosome bonds binding pigmented dead cells to the stratum corneum:

    • Glycolic Acid (7%–10%): Smallest molecular size; penetrates deeply for fast surface brightening on resilient skin.
    • Lactic Acid (5%–10%): Larger molecular size; hydrates while loosening surface pigment.
    • Mandelic Acid (10%): Lipid-soluble AHA; safe choice for darker skin tones prone to rebound hyperpigmentation.

    Never combine your AHA toner and your retinoid in the same session. Doing so creates acute barrier inflammation, which triggers melanocytes to produce more pigment.

    In-Office Escalation: When Topical Actives Plateau

    Dermal hyperpigmentation sits deeper in the skin, where topical skincare cannot easily reach. If home care shows no measurable lightening after 12 weeks of strict compliance, professional intervention becomes necessary.

    Clinical Procedure Target Depth Expected Downtime Best Suited For
    Modified Jessner’s Peel Superficial to Medium 3–5 days flaking Stubborn epidermal PIH
    Q-Switched Nd:YAG Laser Deep Dermis 24–48 hours mild erythema Safe pigment targeting in darker skin types
    Medical Microneedling Epidermal-Dermal Junction 1–2 days redness Mixed texture and post-inflammatory marks

    Always confirm your practitioner has direct experience treating your specific Fitzpatrick skin phototype. Heat generated by improper laser selection can induce severe, permanent post-inflammatory marks.

    Stop Stacking Actives Like Skincare Candy

    Fast results do not come from dumping ten brighteners on your face at once. Speed comes from keeping your skin barrier calm enough that melanocytes stop firing emergency pigment packets. 

    Pick one tyrosinase inhibitor for daylight protection, commit to one retinoid for nighttime cell turnover, and use a tinted mineral shield every single morning. Consistency beats product overload every time.

    Frequently Asked Questions

    1. How long does post-acne hyperpigmentation take to fade completely?

    With strict broad-spectrum sun protection and daily targeted actives, epidermal PIH typically fades within 8 to 12 weeks, whereas untreated spots can persist for up to a year.

    2. Can Vitamin C and Azelaic Acid be used together to speed up results?

    Yes, but alternating them (Vitamin C in the morning, Azelaic Acid in the evening) works better than layering them simultaneously to prevent barrier irritation.

    3. Does drinking water help fade hyperpigmentation faster?

    Drinking water supports general skin turgor and cellular function, but it cannot dissolve or shed existing localized melanin deposits.

    4. Why do my dark spots get darker even though I wear sunscreen?

    Your sunscreen likely lacks iron oxides, meaning high-energy visible (blue) light continues to penetrate the skin and trigger melanocyte pigment production.

  • Retinol Purging vs Allergic Reaction Breakouts: How to Tell

    Retinol Purging vs Allergic Reaction Breakouts: How to Tell

    I spent weeks mistaking an inflamed contact allergy for a stubborn retinoid adjustment. That mistake left my stratum corneum stripped, raw, and reactive to basic tap water.

    Understanding retinol purging vs allergic reaction breakouts comes down to distinct cellular mechanics. One represents accelerated clearance of pre-existing microcomedones. The other signals an adverse immunological or inflammatory defense. 

    Misdiagnosing the two leads either to abandoning a working active prematurely or compounding serious dermal barrier damage.

    The Biological Difference: Turnover Acceleration vs Immune Defense

    The Biological Difference: Turnover Acceleration vs Immune Defense

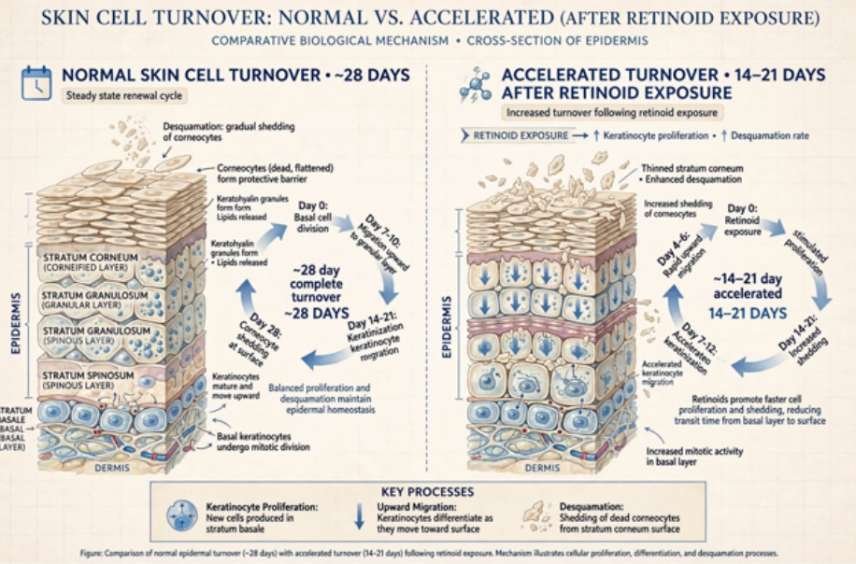
    Retinoids act directly on cellular gene expression. They bind to retinoic acid receptors (RARs) in the skin, speeding up cellular turnover from the standard 28-day cycle to roughly 14 to 21 days.

    [Normal Skin Turnover: ~28 Days]

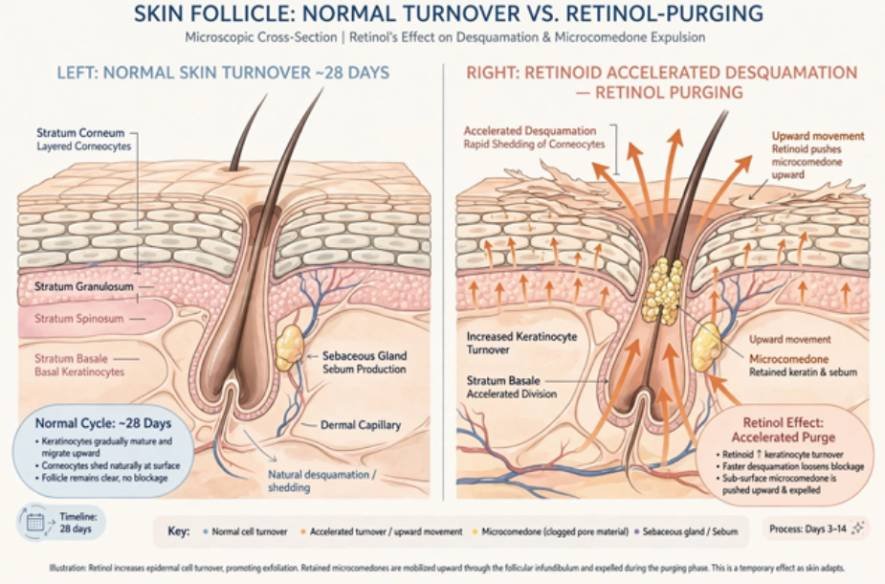
    Retinoid Binding (RARs) ──> Accelerated Desquamation ──> Underlying Microcomedones Erupt Early (Purge)

    [Allergic Reaction / Contact Dermatitis]

    Topical Allergen/Irritant ──> Dendritic / T-Cell Activation ──> Histamine & Cytokine Surge (Inflammation)

    The biological responses branch into two distinct paths:

    What Retinol Purging Actually Does Under the Microscope

    What Retinol Purging Actually Does Under the Microscope

    Purging cannot generate novel blemishes from clean tissue. According to clinical data published in the National Center for Biotechnology Information, retinoids accelerate desquamation—the shedding of top-layer corneocytes.

    If sub-surface microcomedones already exist inside the follicular infundibulum, the accelerated cycle pushes them upward all at once. If you frequently try to get rid of closed comedones on forehead contours, this is the exact region where your purge will cluster.

    What an Allergic Reaction or Contact Dermatitis Looks Like

    An allergic response does not require a clogged pore. It is driven by type IV cell-mediated hypersensitivity or acute chemical irritation. As documented by the American Academy of Dermatology, severe sensitization presents as sudden mast-cell and T-cell activation.

    The skin releases histamines and inflammatory cytokines. Instead of classic whiteheads or blackheads, you experience widespread vascular dilation, intense heat, pruritus (itching), and superficial edema.

    Quick Diagnostic Matrix: Purge vs Allergy vs Formula Breakout

    When my clients evaluate new reactions, I point them to physical location, morphology, and sensation before looking at timing.

    Diagnostic Marker Retinol Purging  Allergic Reaction  Formula Breakout (Pore-Clogging) 
    Primary Location Usual congestion zones (chin, nose, jawline) Diffuse; covers entire application surface Random; often new areas like cheeks or neck
    Lesion Morphology Classic papules, pustules, open comedones Erythematous hives, rash, uniform pinhead bumps Inflamed follicular bumps, deep painful cysts
    Dominant Sensation Mild tenderness localized to active spots Pruritus (sharp itching), stinging, burning heat Soreness upon direct pressure
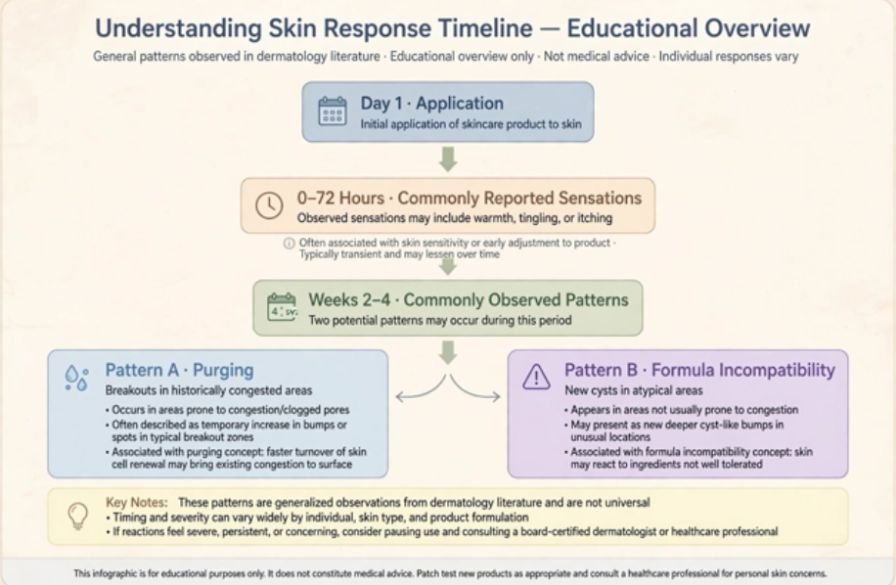
    Onset Timing Weeks 2 to 4 after initiating treatment Within 12 to 72 hours of first contact Weeks 1 to 3 of continuous use
    Resolution Horizon Resolves fully in 4 to 8 weeks Worsens until product removal; settles in days Continues indefinitely while formula is used
    Surrounding Tissue Dry or peeling, but calm Tight, raw, hot, visibly erythematous Normal oiliness without systemic redness

    The 72-Hour Rule: How I Track My Skin’s Response

    The 72-Hour Rule How I Track My Skins Response

    I use a clinical self-audit protocol whenever a client introduces a new retinoid formula:

    [Day 1: Baseline Application]

             │

             ▼

    [First 72 Hours] ─── Heat, intense itching, swelling? ───► YES: Allergic Contact Dermatitis (Halt Immediately)

             │

             ▼ NO

    [Weeks 2 to 4]   ─── Breakouts exclusively in historical zones? ──► YES: Retinoid Purge (Buffer & Proceed)

             │

             ▼ NO

    [New, random cyst formation across dry zones] ──────────► Formula Vehicle Incompatibility (Switch Formula)

    The distinction lies in physical sensations. A true retinoid purge does not itch. Purging lesions may be tender when touched, but they never prickle or crawl with histamine irritation.

    If washing with lukewarm water burns, or your jawline feels prickly within 72 hours, you are not purging. You are experiencing an adverse reaction.

    Corrective Protocols: How to Pivot Without Wrecking Your Skin

    Once you distinguish the trigger, adjust your routine immediately to prevent scarring or prolonged trans-epidermal water loss (TEWL).

    Protocol A: Weathering the Purge Safely

    1. Reduce Application Frequency: Cut back to twice weekly. Spacing treatments preserves cellular momentum without overwhelming the stratum corneum.
    2. Deploy the Sandwich Technique: Apply a bland lipid layer first, let it dry for ten minutes, layer your pea-sized retinoid, and seal with a second light layer of moisturizer.
    3. Protect the Moisture Barrier: Never pair chemical exfoliants (glycolic, salicylic, or lactic acids) with your retinoid during the first eight weeks.
    4. Shield with Broad-Spectrum SPF: Use a non-nano zinc oxide sunscreen daily. Retinoid-accelerated skin cells lack mature melanin defense, leaving fresh post-purge marks prone to hyperpigmentation.

    Protocol B: Immediate Relief for Allergic Flare-ups

    1. Cease Product Use Immediately: Wash off any residual film using cool water and an inert, non-foaming cleansing lotion.
    2. Apply Cold Compresses: Cool, damp cloths suppress localized histamine response and capillary dilation.
    3. Rebuild the Lipid Layer: Look for physiological lipid ratios containing ceramides, cholesterol, and free fatty acids to repair damaged skin barrier from retinol and soothe reactive irritation.
    4. Seek Clinical Guidance: If facial swelling, wheals, or persistent periorbital edema occur, consult a board-certified dermatologist via the Mayo Clinic health directory or visit an urgent care clinic for topical hydrocortisone or antihistamine support.

    Recovery Timelines Compared

    Healing follows an established biological schedule.

    Phase Purging Recovery Path Allergic Reaction Recovery Path
    Days 1–3 Microcomedones start surfacing along oily zones Sudden red patches, swelling, or prickly rash appear
    Week 1–2 Peak blemish turnover; localized peeling appears Active inflammation clears after discontinuing product
    Week 3–4 Lesions subside; skin begins to smooth out Stratum corneum desquamation stabilizes with barrier balms
    Week 6–8 Retinization completes; clearer baseline emerges Full recovery achieved; skin tolerates basic hydrators

    Frequently Asked Questions

    1. Can an allergic reaction mimic tiny acne bumps?

    Yes, contact dermatitis presents as uniform, itchy, erythematous papulovesicles that look identical to micro-breakouts.

    2. Does retinol purging cause facial itching?

    No, pure purging does not itch; sensations of sharp itching, burning, or tingling point to allergic sensitization or barrier failure.

    3. How long should a genuine retinol purge last?

    A standard purge lasts four to six weeks, resolving within eight weeks as cellular turnover stabilizes.

    4. Should I pop retinol purge pimples?

    Never extract purging lesions, as accelerated skin turnover leaves vulnerable tissue prone to severe post-inflammatory hyperpigmentation.

    Drop the Active, Save the Barrier

    Skin transformation demands patience, not punishment. If your face itches, burns, or erupts in patches where you never normally break out, put down the retinoid tube.

    Strip your routine down to a gentle cleanser, a simple ceramide cream, and mineral sunscreen for two full weeks. Let your skin rest, let the barrier rebuild, and return to actives only when your moisture matrix can handle the work.

  • Makeup Routine for Beginners Step by Step: Easy Everyday Guide

    Makeup Routine for Beginners Step by Step: Easy Everyday Guide

    Learning makeup should not feel complicated. I find it easier to think in four phases: prepare the skin, create an even base, define the eyes and brows, then finish with cheeks and lips. This makeup routine for beginners step by step, keeps each stage simple while explaining why it matters.

    For a US audience dealing with dry winters, humid summers, indoor heating, and air-conditioning, flexibility matters. Your skin type, climate, and preferred finish should guide how much makeup you use.

    How Should Beginners Prepare Their Skin Before Makeup?

    Step 1: Cleanse and Moisturize

    Start with clean skin, then moisturize. Hydrated skin usually helps makeup spread evenly and reduces dry or patchy areas. Let skincare settle for a few minutes before continuing so the next layers are less likely to pill or slide.

    Step 2: Apply Sunscreen During the Day

    For daytime makeup, apply broad-spectrum sunscreen before makeup and give it time to set. This helps create a stable base while keeping sun protection part of your daily routine.

    Step 3: Use Primer Only Where You Need It

    Primer is optional. I would use it only when it addresses visible pores, excess shine, dryness, or short wear time. A small amount through the T-zone or other problem areas is often enough.

    What Is the Correct Order for a Smooth Makeup Base?

    What Is the Correct Order for a Smooth Makeup Base?

    Step 4: Apply a Light, Even Base

    Start with a small amount of foundation, BB cream, or another light base and blend from the center of the face outward. A damp sponge, clean fingers, or a brush can all work. Build coverage gradually instead of applying a thick layer at once.

    For a natural-looking shade, compare it against your jawline and neck in natural light. Check both depth and undertone so the face does not look noticeably different from the neck.

    Step 5: Apply Concealer After the Base

    I generally apply concealer after foundation because the base may already cover some redness, dark circles, or blemishes. Dab a small amount only where extra coverage remains and tap it into the skin.

    Step 6: Set Only the Areas That Need Powder

    Use a small amount of powder under the eyes or through the T-zone if those areas crease or become shiny. Dry skin may need very little, while oily skin may benefit from slightly more. Too much can make the finish look heavy.

    Step 7: Add Bronzer and Blush Gradually

    Sweep bronzer lightly where you want warmth, then add blush for fresh color. I prefer building both slowly because excess pigment is harder to correct. Soft blending matters more than strong color.

    How Can Beginners Make Eye Makeup Look Natural?

    How Can Beginners Make Eye Makeup Look Natural?

    Step 8: Fill Brows With Light Strokes

    Brush the brows into place and fill only sparse areas. Use short, hair-like strokes rather than creating one solid block of color. Keeping the inner portion softer usually looks more natural.

    Step 9: Keep Eyeshadow Simple

    For everyday makeup, one or two neutral shades are enough. Sweep a soft neutral shade across the lid and blend a slightly deeper shade through the crease if you want more dimension. Blend until there are no obvious lines.

    Step 10: Add Eyeliner and Mascara

    Eyeliner is optional. If you use it, keep it close to the upper lash line. Finish with mascara from the roots toward the tips. One or two light coats usually look cleaner than several heavy layers.

    How Should Beginners Finish the Look?

    Step 11: Keep the Lips Simple

    Choose a comfortable lip finish that suits the look, whether that means sheer color, gloss, or a more defined neutral shade. Softer finishes are usually easier for beginners to apply and maintain.

    Step 12: Use Setting Spray If Needed

    Setting spray is optional. Hold it away from the face, mist lightly, and let it dry naturally. It can help the layers look more blended and may improve wear during long days or warmer weather.

    What Beginner Makeup Mistakes Should You Avoid?

    The biggest mistake I see is applying too much too soon. Thick foundation, heavy concealer, excessive powder, dark brows, and strong blush make blending harder.

    Another mistake is copying someone else’s routine without considering skin type or climate. Makeup that works during a humid Florida summer may need different preparation from makeup worn during a dry Colorado winter.

    Do not rush blending either. Soft edges make complexion makeup, eyeshadow, bronzer, and blush look more polished.

    How Can Beginners Do Makeup in Five Minutes?

    How Can Beginners Do Makeup in Five Minutes?

    When I am short on time, I even out only the areas that need coverage, lightly define the brows and lashes, add a little cheek color, and finish the lips. Choosing the best drugstore makeup products makes this routine affordable, simple, and easy to complete without sacrificing a polished look. This quick routine works well for busy workdays, college mornings, school runs, or casual weekends.

    Frequently Asked Questions (FAQs)

    1. What is the easiest makeup routine for beginners step by step?

    Start with clean, moisturized, sun-protected skin, create a light base, add concealer where needed, set areas that crease, define the brows and eyes, add cheek color, finish the lips, and use setting spray only when useful.

    2. Should concealer go before or after foundation?

    For most beginners, foundation first is easier because it may already cover some discoloration. You can then use less concealer and apply it only where extra coverage is needed.

    3. Do beginners need primer and setting spray?

    No. Both are optional. Use them when they address a real concern such as shine, texture, dryness, or makeup longevity.

    4. Should makeup always be layered from lightest to heaviest?

    Not necessarily. Formula matters. Cream, liquid, and powder textures behave differently, and some people prefer doing eye makeup before their complexion. Think of the standard order as a beginner-friendly framework rather than an unbreakable rule.

    Final Thoughts

    A good beginner routine should make makeup easier, not more intimidating. I recommend learning one technique at a time, keeping layers thin, and adjusting the routine to your skin and environment. Once the basics feel natural, you can experiment with different finishes and levels of definition.

  • Professional Nail Tools for Home Use: What You Actually Need

    Professional Nail Tools for Home Use: What You Actually Need

    I used to think a better manicure mostly came down to polish. After a few rushed attempts at home, I realized the tools were doing much of the work. A sharp clipper, a dependable file, and a simple cuticle tool could make an ordinary manicure feel cleaner and more controlled without filling an entire drawer.

    I also noticed that buying every tool labeled professional was not the answer. Some pieces rarely earned their space, while a few well-made basics made shaping, prep, and cleanup noticeably easier. The goal is not to recreate a salon station at home. It is to build a small kit that matches the kind of nail care you actually do.

    What Makes a Nail Tool Professional?

    Professional does not automatically mean expensive, complicated, or electric. A useful professional-grade tool should be precise, comfortable to hold, durable, and easy to clean. Stainless steel is common for reusable implements because it is sturdy and practical for repeated cleaning. That balance keeps the routine practical, consistent, and easier to maintain daily.

    The Essential Professional Nail Tools for Home Use

    The Essential Professional Nail Tools for Home Use

    Start with nail clippers for controlled length reduction. Fingernail clippers should let you make clean cuts without crushing the edge. After trimming, use a file to refine the shape rather than trying to create the final outline with the clippers alone.

    A double-sided nail file is one of the most useful pieces in the kit. Different grits let you handle shaping and finishing with more control. For natural nails, gentle filing is preferable to aggressive back-and-forth sawing, which can weaken the edge.

    A buffer can smooth minor surface irregularities and create a cleaner finish, but it should not become a routine way to thin the nail plate. Light pressure is enough for most home manicures.

    A cuticle pusher can help tidy the nail area, but technique matters more than appearance. The cuticle helps protect the nail from infection, so it should not be aggressively cut or forced backward. If a hangnail needs attention, a precise cuticle nipper can remove the loose piece without digging into healthy skin.

    Prep and Finishing Tools Worth Keeping Nearby

    Clean preparation often separates a neat manicure from one that starts lifting or looking uneven quickly. Lint-free wipes are useful for removing dust and residue, while the appropriate nail cleanser or alcohol can help prepare the nail surface when a product system calls for it.

    If you regularly wear gel polish, an LED curing lamp becomes an important piece of equipment. The lamp needs to be compatible with the gel products being used, because curing is not simply a matter of choosing the brightest light. Follow the product manufacturer’s curing time and lamp recommendations rather than guessing.

    Cuticle oil belongs in the finishing routine, especially after filing, washing, or polish removal. Hydrated surrounding skin makes the manicure look more finished and helps reduce dry, rough skin around the nail.

    For people who like efficient routines, time-saving beauty tools for everyday use can also make sense when the same few tasks are repeated regularly. The point is convenience without turning a simple manicure into an equipment-heavy project.

    When an Electric Nail Drill Makes Sense

    An electric nail file can be useful for people who regularly maintain gel or acrylic enhancements, remove product, or perform detailed shaping. It offers speed and consistent results when the user understands pressure, bit selection, and movement.

    For someone who mainly trims and shapes natural nails, however, an e-file is not essential. A quality hand file provides plenty of control and has a smaller learning curve. Beginners should avoid treating a nail drill like a shortcut. Holding it in one spot too long or applying excessive pressure can generate heat and damage the natural nail.

    Match the Kit to Your Nail Routine

    A natural-nail routine can stay simple: clippers, a file, buffer, gentle cuticle-care tool, nail brush, and cuticle oil cover most needs. Gel users can add lint-free wipes, appropriate prep products, a compatible LED lamp, and removal supplies.

    A compact setup is useful for people who move between home, work, and travel. Portable beauty tools for frequent travelers can keep the essentials organized without taking over a toiletry bag, especially when choosing multipurpose tools and compact files.

    Hygiene Is Part of Tool Quality

    Hygiene Is Part of Tool Quality

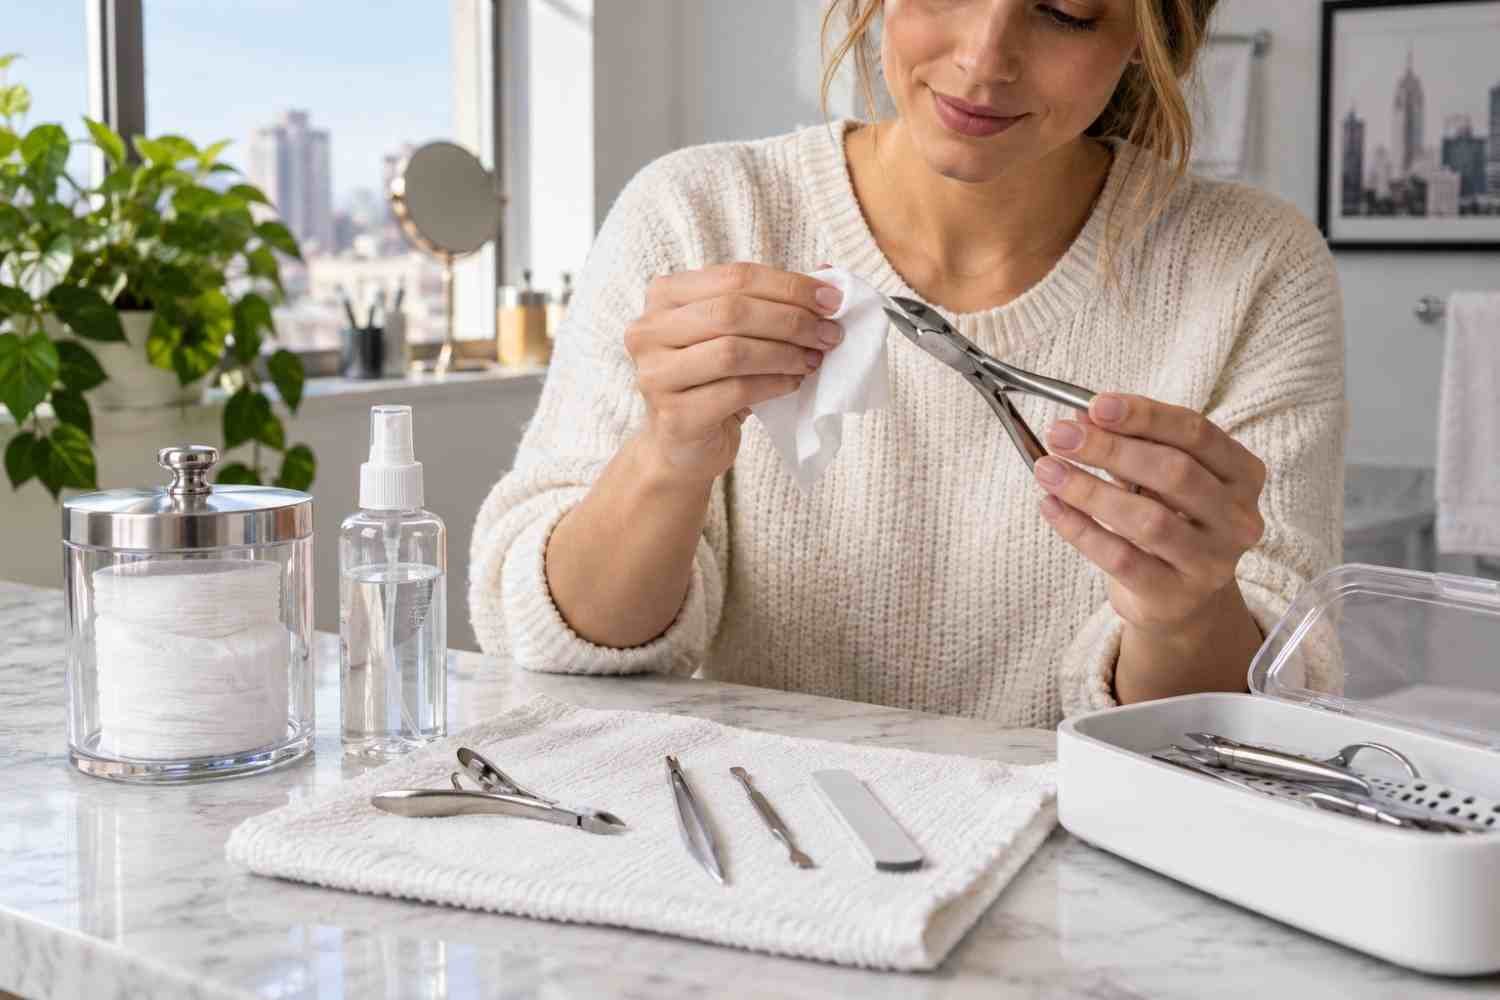
    Clean tools are not an optional extra. Wash reusable implements according to their material and the manufacturer’s instructions, then disinfect them appropriately and allow them to dry completely before storage. Keep personal tools separate from other people’s supplies.

    The safest approach is simple: clean your hands and workspace, avoid cutting living cuticle tissue, and stop if a tool causes pain. If a nail changes color, texture, or shape unexpectedly, professional medical advice is more appropriate than trying to correct the problem with stronger tools.

    Spend More Where Precision Matters

    You do not need premium versions of everything. Put more of your budget toward tools that directly affect control and repeated use, such as a good file, well-made clippers, precise nippers, or a reliable curing lamp if you use gel.

    FAQs: Professional Nail Tools for Home Use: What You Actually Need

    1. What are the most important professional nail tools for home use?

    Start with clippers, a quality file, buffer, cuticle-care tool, nail brush, and cuticle oil. Add gel-specific equipment only if your routine requires it.

    2. Do I need a nail drill for home manicures?

    Not usually. A hand file is enough for basic natural-nail care. Drills become more useful for regular gel or acrylic maintenance.

    3. Are stainless steel nail tools worth buying?

    Yes, especially for reusable implements. Durable stainless steel can offer good control and is practical for proper cleaning and maintenance.

    4. How often should nail tools be cleaned?

    Clean tools after use and disinfect reusable implements appropriately. They should be completely dry before being stored to reduce contamination and corrosion risks.

    Build a Kit That Earns Its Space

    The best home manicure setup is rarely the biggest one. It is the collection of tools you can reach for confidently, maintain properly, and use without fighting the equipment. Good clippers, a reliable file, sensible cuticle care, and clean finishing tools can cover an impressive amount of nail work.

    Professional results at home come less from owning everything and more from knowing what each tool is meant to do. Choose carefully, work gently, and let a smaller kit do more.

  • Makeup That Lasts All Day: A Long-Wear Routine That Works

    Makeup That Lasts All Day: A Long-Wear Routine That Works

    A fresh makeup look should not disappear before lunch. Heat, humidity, commuting, office air conditioning, facial oil, and everyday touching can make foundation fade, crease, or separate. I have found that how to make makeup last all day is less about piling on more product and more about preparing the skin well, applying thin layers, and setting only where extra hold is needed.

    Why Does Makeup Fade, Separate, or Crease?

    Makeup usually breaks down because oil, sweat, movement, or excess product weakens its grip. Heavy moisturizer can leave skin too slick, while dry patches can make foundation cling unevenly. Hot, humid weather can speed up fading during US summers.

    Formula compatibility matters too. If primer and foundation pill, separate, or slide when layered, I simplify the routine or change one formula.

    How Should I Prep My Skin Before Makeup?

    I start with clean skin and a lightweight moisturizer suited to my skin type. During the day, I apply sunscreen and give my skincare time to absorb before starting makeup. Applying foundation while the surface still feels wet or greasy can make later layers move.

    Primer should solve a specific problem. On an oily T-zone, I may use a gripping or mattifying primer. On dry skin, I prefer a smoother, more hydrating base. I keep the layer thin before foundation.

    How Do I Apply Foundation So It Lasts Longer?

    How Do I Apply Foundation So It Lasts Longer?

    Thin, buildable layers usually wear better than one thick coat. I apply a small amount where I need coverage most and blend outward.

    Instead of swiping repeatedly, I press and push foundation into the skin with a damp sponge or dense brush. If I need extra coverage, I build another light layer only over redness or discoloration.

    I also avoid loading unnecessary product onto high-movement areas such as the sides of the nose and upper lip. If those spots look even, less product often means less separation later.

    What Is the Sandwich Setting Method?

    The sandwich-setting technique adds hold without relying on a heavy final layer of powder. After liquid and cream complexion products, I lightly mist setting spray and let it settle. Then I press a small amount of translucent loose powder into areas that crease or become oily, such as the T-zone, around the nose, and under the eyes when needed. This lighter approach can be especially useful when wearing the best concealer for mature skin, since too much powder may emphasize fine lines or dryness.

    After blush, bronzer, eye makeup, and lips are finished, I use another light mist of setting spray. Some makeup artists also mist between selected steps for very long days, but I avoid soaking the skin.

    How Can I Keep Blush, Bronzer, Eyes, and Lips From Fading?

    For extra staying power, I layer a light cream or liquid blush or bronzer under a small amount of powder in a similar shade. The first layer gives color and grip, while the powder helps set it.

    For eye makeup, I keep excess skincare away from the lids and use eye primer if creasing is common. Waterproof eyeliner and tubing or water-resistant mascara can help reduce smudging in sweat and humidity.

    For lips, longer-wear or transfer-resistant formulas generally hold up better than very creamy textures.

    How Do I Make Makeup Last on Oily or Dry Skin?

    How Do I Make Makeup Last on Oily or Dry Skin?

    For oily skin, I concentrate oil control where I need it most. A mattifying or gripping primer through the T-zone, thin foundation, and pressed powder can improve wear without making the entire face look flat.

    For dry skin, I prioritize hydration and use powder sparingly. Too much powder can exaggerate flakes and texture. Combination skin often benefits from more setting around the forehead, nose, and chin, with lighter powder elsewhere.

    How Do I Keep Makeup On in Heat and Humidity?

    When temperatures rise, I simplify. Heavy skincare and thick complexion layers are more likely to move once sweat appears.

    I use lighter layers and give each step time to set. Long-wear, transfer-resistant, smudge-resistant, and waterproof formulas can be useful when I expect an outdoor event, humid commute, or long summer day.

    Most importantly, I do not powder directly over sweat. I blot moisture first and then touch up only where necessary.

    How Should I Touch Up Makeup Without Making It Cakey?

    How Should I Touch Up Makeup Without Making It Cakey?

    When shine appears, I blot instead of immediately adding powder. Blotting papers or a clean tissue can remove excess oil without building extra texture.

    If foundation has shifted, I gently press the existing makeup back into place before adding anything. Only then do I use a tiny amount of concealer, foundation, or powder if coverage is still needed. I also keep my hands off my face because oils from the fingers can break down base makeup.

    For me, how to make makeup last all day comes down to controlled layering rather than maximum layering.

    FAQs About Long-Lasting Makeup

    1. Should I Use Both Setting Powder and Setting Spray?

    Yes, when used strategically. Powder helps control oil and stabilize cream or liquid makeup, while setting spray can help the finished layers meld together and improve wear.

    2. Does Primer Really Make Makeup Last Longer?

    It can, especially when it targets oiliness, texture, or poor foundation grip. I do not consider primer mandatory for every skin type, so I use it only where it improves wear or finish.

    3. How Can I Stop Makeup From Melting by Midday?

    Use lightweight skincare, let layers set, apply foundation sparingly, press instead of swipe, set oily areas, and blot before touching up. In hot weather, lighter layers usually wear better than thick ones.

    4. What Is the Best Way to Keep Makeup Fresh From Morning to Night?

    The most reliable answer to how to make makeup last all day is balanced skin prep, thin application, targeted powder, setting spray, durable eye and lip formulas, and minimal midday touch-ups.

    Final Thoughts

    Long-lasting makeup should still look like skin. I get better wear when I build coverage gradually, press products into place, and set strategically. A consistent skin care routine can also create a smoother, more balanced base for makeup, especially when it supports the skin’s hydration needs.

    The exact routine can change with oiliness, dryness, temperature, and humidity, but the core approach stays the same: prep carefully, layer lightly, set intelligently, and touch up only when needed.