Blog

  • How to Protect Nails From Water Damage: Tips That Work!

    How to Protect Nails From Water Damage: Tips That Work!

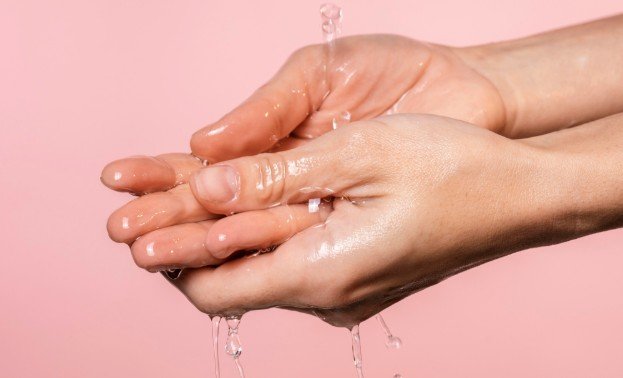
    I used to think water made nails healthier because hydration is usually associated with softness and flexibility. However, I learned that repeatedly soaking and drying the nail plate can have the opposite effect. Nails may become soft immediately after exposure, then feel dry, brittle, or layered once the moisture evaporates. 

    Understanding how to protect nails from water damage makes it easier to prevent peeling and splitting without avoiding normal handwashing, bathing, or swimming. Water itself is not automatically harmful. The greater concern is frequent or prolonged exposure, particularly when it is combined with detergent, cleaning chemicals, physical pressure, or improper nail care. A few practical changes can considerably reduce this everyday damage.

    Why Does Water Weaken Your Nails?

    Natural nails are made of thin layers of keratin. Although the nail plate looks solid, it can absorb some water. The plate temporarily expands as it absorbs moisture and contracts again while drying.

    Occasional exposure is unlikely to create a noticeable problem. However, repeated wet-and-dry cycles can place stress on the bonds between the keratin layers. Over time, the tips may begin to peel, split, bend, or break.

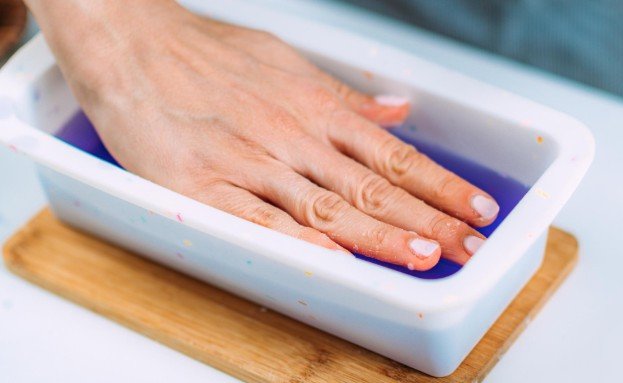
    Dishwashing is especially troublesome because it combines prolonged soaking with detergent and friction. Cleaning products may remove oils from the surrounding skin and nails, while scrubbing places additional pressure on softened nail tips. Similar problems can affect cleaners, healthcare workers, food-service employees, hairdressers, swimmers, and anyone who washes their hands frequently.

    Recognize the Signs of Water-Related Nail Damage

    Recognize the Signs of Water-Related Nail Damage

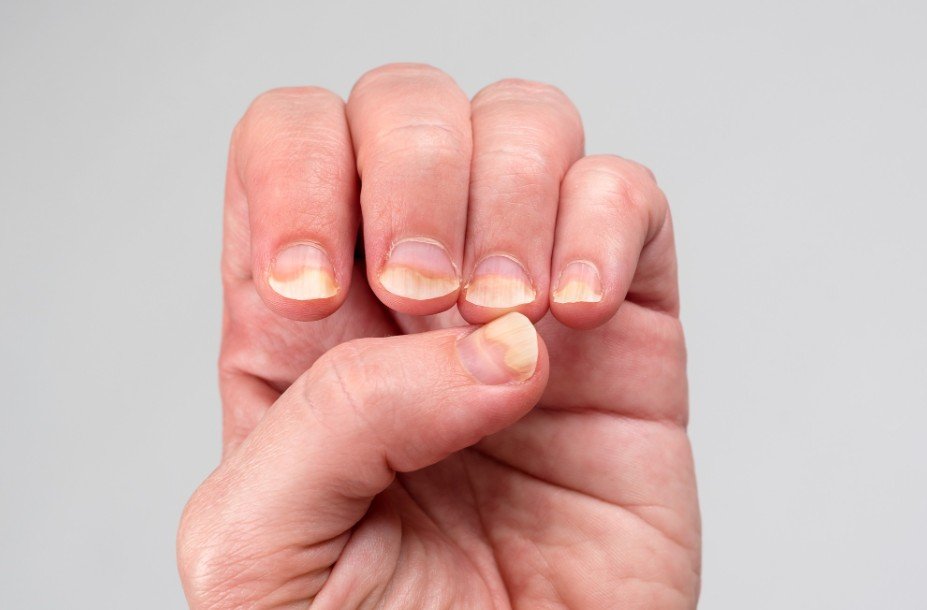
    Water-related damage generally appears gradually. The free edges may separate into thin layers, or the nail may bend more easily after bathing. Other common signs include rough tips, recurring splits, surface flaking, and breakage along the sides.

    Location can provide useful clues. Damage concentrated at the tips is often associated with repeated soaking, friction, or using nails as tools. Changes that begin near the cuticle, affect only one nail, or include pain and discoloration may have another cause.

    Water damage should not be confused with fungal infections, psoriasis, eczema, or injuries. Yellowing, thickening, swelling, bleeding, soreness, or separation from the nail bed deserves professional evaluation.

    Wear Gloves During Wet Household Tasks

    Waterproof gloves create the most effective physical barrier during dishwashing, bathroom cleaning, handwashing clothes, and other wet chores. Cotton-lined rubber or reusable household gloves are generally more comfortable because the lining helps absorb perspiration.

    Choose gloves that fit securely without squeezing the fingertips. Replace them when they develop holes, become damp inside, or retain an unpleasant smell. Wearing wet gloves can trap moisture against the nails and defeat their purpose.

    Remove gloves as soon as the task is complete. If your hands become sweaty, wash them when necessary, dry them thoroughly, and allow both your hands and gloves to air out.

    Reduce Unnecessary Soaking

    Normal handwashing remains essential, so nail protection should never interfere with proper hygiene. Instead, reduce avoidable exposure. Do not leave your fingers submerged while dishes soak, and avoid using your nails to scrape food from cookware or labels from wet containers.

    During a bath, keep your hands out of the water when possible. After swimming, rinse away chlorine or salt, dry your hands, and apply moisturizer. Although some people search for information about soaking nail fungus in chlorine, chlorine is not a recommended treatment and may irritate the skin or further dry the nails. These protective steps are more realistic than trying to keep nails permanently dry.

    Use lukewarm rather than very hot water when practical. Hot water and strong cleansers may remove more protective oils from the hands and cuticle area.

    Dry Your Hands and Nails Properly

    Dry Your Hands and Nails Properly

    After washing, dry the fingertips, nail surfaces, sidewalls, and spaces beneath the free edges using a clean towel. Patting is gentler than aggressive rubbing, especially when nails are soft.

    Avoid immediately filing, clipping, opening containers, or performing forceful tasks after a long shower or swim. Temporarily softened nails can bend or tear more easily. Give them time to dry before performing detailed grooming.

    Do not insert sharp tools deeply beneath wet nails. This can irritate the tissue, lift the nail plate, and create spaces where debris and microorganisms may collect.

    Moisturize After Water Exposure

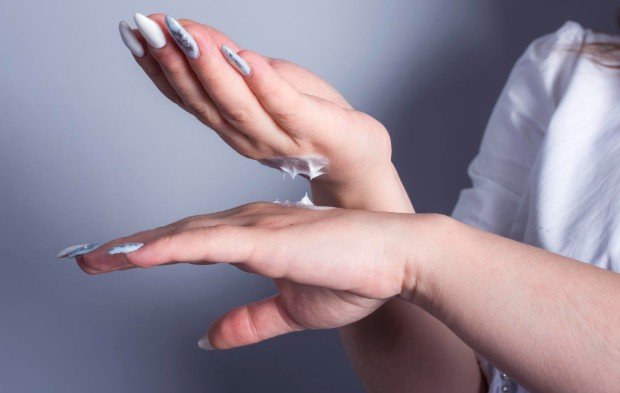
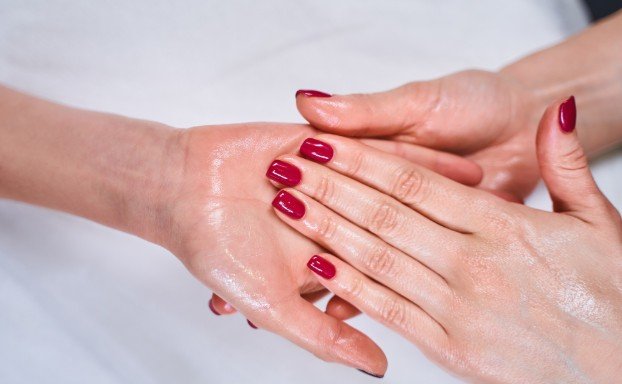
    For effective nail care after gel manicures, apply hand cream after washing and drying your hands. Massage it over the nail plates, fingertips, cuticles, and surrounding skin rather than treating only the palms.

    Creams and ointments are often more protective than very light lotions because they reduce moisture loss. Ingredients such as glycerin, petrolatum, lanolin, ceramides, and urea can support dry skin and brittle nails. Anyone with sensitive skin should select a fragrance-free formula and stop using products that cause irritation.

    Cuticle oil can supplement hand cream, particularly around dry nail folds. Apply a small amount and massage it gently into the nail and surrounding skin. Oil cannot repair nail layers that have already separated, but it may improve flexibility and reduce further cracking.

    Keep Vulnerable Nails Short

    Long nails experience greater leverage when they strike a surface or become caught on an object. If the tips are peeling, temporarily keeping them short can prevent small splits from traveling farther down the nail.

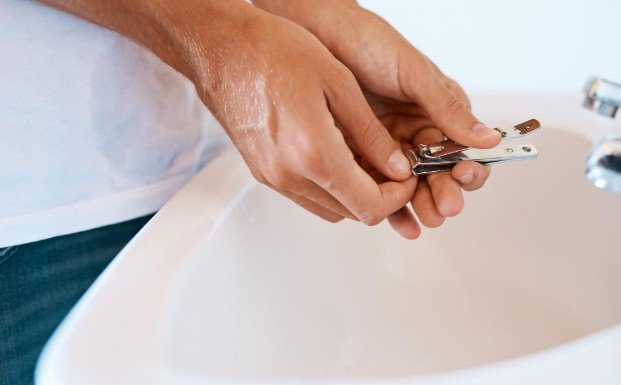
    Use clean, sharp clippers and a fine-grit file. Smooth rough edges carefully instead of pulling away peeling layers. Avoid excessive buffing because thinning the surface can make an already flexible nail weaker.

    Nails grow slowly, so existing damage must gradually grow out. Consistent protection is more valuable than an aggressive treatment promising immediate repair.

    Use Polish and Strengtheners Carefully

    Use Polish and Strengtheners Carefully

    Regular polish may reduce direct contact between water and part of the nail surface, but it does not make nails completely waterproof. Water can still reach the underside and edges. Chipped polish may also encourage picking, which can remove superficial keratin layers.

    A gentle base coat or formaldehyde-free strengthener may provide temporary reinforcement. However, repeatedly applying and removing products can increase dryness, especially when strong solvents are used.

    Never peel off gel polish, dip powder, acrylic material, or press-on adhesive. Forced removal can take layers of the natural nail with it. Follow the correct removal method or ask a trained nail professional for assistance.

    Build a Simple Protection Routine

    In the morning, apply hand cream and keep reusable gloves near the sink. During the day, protect your hands during lengthy wet tasks, dry them completely, and reapply moisturizer after washing when needed.

    At bedtime, massage a thicker cream or ointment into the fingertips and cuticle area. People with severely dry hands may wear clean cotton gloves overnight, provided the skin is not irritated or infected.

    Consistency matters more than the number of products. Gloves, careful drying, moisturizer, shorter nails, and gentle grooming form a practical routine for most people.

    Frequently Asked Questions

    1. What is the easiest way to learn how to protect nails from water damage?

    Begin by wearing cotton-lined waterproof gloves for wet chores and applying hand cream after washing. These two habits address prolonged exposure and moisture loss without making a routine complicated.

    2. Does drinking more water strengthen damaged nails?

    Adequate hydration supports general health, but drinking additional water does not directly repair peeling nail layers. External protection, gentle care, and time for healthy growth are still necessary.

    3. Can I use cuticle oil on polished nails?

    Yes. Apply it around the cuticle, sidewalls, and exposed underside of the nail. It will not penetrate polish in the same way it reaches bare nails, but it can condition the surrounding skin.

    4. When should I consult a dermatologist?

    Seek professional advice if nail changes persist despite careful protection or involve pain, swelling, redness, bleeding, thickening, unusual discoloration, deep grooves, or separation from the nail bed.

    A Healthier Way Forward

    I have found that protecting nails from water is less about avoiding water and more about controlling prolonged exposure. Wearing dependable gloves, drying carefully, moisturizing consistently, and treating softened nails gently can prevent much of the damage associated with everyday chores.

    I would also avoid blaming water for every nail change. When damage continues, spreads, or causes discomfort, professional assessment is more useful than adding another cosmetic treatment. With steady protection and enough time for new growth, nails can gradually become smoother, stronger, and less prone to peeling.

  • Makeup Tools That Simplify Everyday Routines and Keep Your Kit Organized

    Makeup Tools That Simplify Everyday Routines and Keep Your Kit Organized

    I used to think a better makeup routine meant having a bigger collection. My drawer filled with brushes, sponges, sharpeners, tweezers, and little gadgets, yet I still wasted time searching for the one tool I wanted. Once I paid attention to what I actually used each morning, I noticed something obvious: a smaller group of dependable tools made getting ready much easier.

    I also realized that organization matters almost as much as the tools. When my everyday brushes were buried beneath products I rarely touched, even a five-minute routine became frustrating. Keeping useful tools visible, clean, and easy to grab changed the rhythm of getting ready, and it made my kit feel more intentional without making it feel bare.

    Why the Right Makeup Tools Make Daily Routines Easier

    The best everyday makeup tools solve small problems repeatedly. A brush with the right shape can spread foundation evenly without repeated blending. A soft sponge can quickly soften concealer edges. A dual-ended brush can handle two jobs while taking up the space of one.

    Choose tools around your actual routine. The goal is not perfection. It is removing the little pauses that add up when you are getting ready before work, school, errands, or a night out. Someone who wears tinted moisturizer, cream blush, mascara, and brow gel does not need the same collection as someone who regularly creates full glam eye looks. Your daily products should determine your daily tools. That is where simplicity helps.

    Makeup Tools Worth Keeping Within Reach

    Makeup Tools Worth Keeping Within Reach

    A versatile complexion brush is one of the most useful pieces in a compact kit. Look for a shape that can blend foundation, skin tint, cream bronzer, or blush without requiring a separate brush for every formula. Medium-density synthetic bristles are practical for liquid and cream products because they distribute product smoothly and clean relatively easily.

    A makeup sponge earns its place when you want fast, controlled blending. A damp sponge can soften foundation or concealer around areas where a brush may leave visible edges. It can also sheer out heavier coverage, which is useful when your morning routine needs to move quickly.

    An eyelash curler and a spoolie are similarly compact additions. The curler can open up the eyes before mascara, while the spoolie can shape brows, soften excess brow product, or separate lashes. These tools take seconds to use and are easy to keep together.

    A dual-ended brush can go further. One end might handle complexion work while the other is designed for smaller areas, giving you two functions without doubling storage space. For people who travel or keep a small vanity, that flexibility is genuinely useful.

    Make Organization Part of the Routine

    A good organization system should make the next use easier. Separate everyday tools from occasional ones. Keep brushes and applicators you reach for most often in an open cup, shallow tray, or compact organizer where their shapes are immediately visible.

    Vertical storage can help with brushes and palettes because it uses less counter space and lets you see what you own. Clear compartments can also prevent buying another brush simply because the one you already have disappeared underneath everything else.

    This is where time-saving beauty tools for everyday use become more practical. The benefit is not only that a tool performs quickly. It is that you can find it quickly, use it confidently, and put it away without creating another mess.

    Cleanliness deserves a place in the system, too. Brushes and reusable sponges collect makeup residue and should be cleaned regularly according to their materials and use. Keeping a small cleaning routine alongside storage prevents buildup from becoming a bigger chore later.

    When Specialized Tools Earn Their Place

    When Specialized Tools Earn Their Place

    Specialty tools can be worthwhile when they solve a problem that appears often. A fine brow tool makes sense for someone who regularly shapes brows. A precise eyeliner brush can help someone who prefers detailed eye looks. A lash tool may be unnecessary for one person and indispensable for another.

    The mistake is treating every new beauty tool as essential. Before adding something, ask whether it performs a job your existing tools cannot handle comfortably. If the answer is no, leaving it out may make your routine better.

    This logic extends beyond makeup. A compact nail-care setup can complement a streamlined beauty space when each item has a clear purpose. Keeping professional nail tools for home use in a separate, organized section prevents manicure supplies from getting mixed into everyday makeup while keeping them accessible.

    Build a Smaller Kit Around Your Habits

    Start by tracking the tools you reach for during a normal week. Those repeated choices reveal more than a shopping list. If one brush handles several products well, keep it accessible. If another has not been used in months, it may belong in secondary storage.

    Storage should support that decision-making process rather than become another project. A small organizer with visible sections can be enough. There is no need to fill every compartment. Empty space can be useful because it gives frequently used tools room to stay visible.

    FAQs: Makeup Tools That Simplify Everyday Routines and Keep Your Kit Organized

    1. What makeup tools are most useful for everyday routines?

    A versatile complexion brush, makeup sponge, detail brush, spoolie, and eyelash curler cover common daily tasks without creating unnecessary clutter.

    2. How many makeup brushes do I actually need?

    There is no fixed number. A small collection works well if each brush serves a purpose and matches the formulas and looks you use regularly.

    3. How should I organize everyday makeup tools?

    Keep frequently used brushes and applicators visible and easy to reach. Store occasional tools separately so they do not bury the items you use most.

    4. Are multipurpose makeup tools worth buying?

    Yes, when they perform different jobs comfortably. Dual-ended or multitasking tools can reduce storage needs and simplify travel and daily routines.

    Why A Simpler Kit Often Works Better

    The most useful makeup collection is rarely the one with the most pieces. It is the one that removes small obstacles from the routine. When familiar tools are clean, organized, and suited to the products you actually wear, getting ready becomes less about searching and more about applying makeup.

    A thoughtful kit does not make beauty boring. It makes room for the parts you enjoy.

  • Nail Care After Gel Manicures: Restore Weak Nails

    Nail Care After Gel Manicures: Restore Weak Nails

    I love the smooth finish and long-lasting color of gel polish, but I know how disappointing nails can look once the coating is removed. They may feel unusually flexible, develop rough white patches, or begin peeling at the tips. Although this can be alarming, it does not always mean the nail is permanently damaged.

    Effective nail care after gel manicures begins with gentle removal, regular moisturization, and protection from everyday wear. Existing damage cannot be erased overnight, but a consistent routine can prevent additional breakage while healthier nail material grows from the base.

    Why Nails Feel Weak After Gel Removal

    Gel polish creates a firm coating that makes natural nails feel stronger than they actually are. Once that coating is removed, the exposed nails may suddenly feel thin or bendy.

    The gel itself is not always the main cause. Damage frequently results from aggressive buffing, repeated scraping, prolonged contact with acetone, or peeling the coating away. Repeated picking or pulling may also be associated with Onychotillomania, a body-focused repetitive behavior involving self-induced damage to the nails or surrounding tissue. When gel is pulled from the surface, it can take layers of the natural nail plate with it.

    Back-to-back applications may worsen the problem because the nail is prepared and removed repeatedly. Frequent exposure to water, cleaning products, and hand sanitizer can then make unprotected nails more likely to split.

    What to Do Immediately After Gel Removal

    What to Do Immediately After Gel Removal

    The first few days should focus on minimizing stress. Trim nails to a manageable length so that the weakened tips do not catch on clothing or other objects. A short, softly rounded shape usually provides fewer corners that can snag.

    Use a fine-grit file to smooth rough edges. Avoid forceful back-and-forth filing, scraping, or heavy buffing. Buffing removes additional material from a nail plate that may already be thin.

    Wash away any remaining remover and apply a fragrance-free hand cream. Follow it with cuticle oil or petroleum jelly around the nail and surrounding skin. This combination supplies moisture and helps reduce its loss.

    Do not immediately cover visible damage with another gel set. A temporary break allows you to monitor changes and avoid repeating the preparation and removal process before the fragile areas have grown out.

    Build a Simple Daily Recovery Routine

    Moisturize After Washing Your Hands

    Water exposure followed by drying can contribute to brittle nails. Apply hand cream after washing and massage a small amount into the fingertips, nail plates, and cuticle area.

    At night, use a thicker cream or a thin layer of petroleum jelly. Cotton gloves can help keep the product in place while you sleep, although they are optional.

    Cuticle oil can improve flexibility and reduce the dry appearance of nails and surrounding skin. It does not permanently rebuild damaged nail layers, but regular use can make the exposed nail less likely to crack from dryness.

    Protect Nails From Water and Chemicals

    Wear household gloves while washing dishes, cleaning bathrooms, gardening, or working with strong detergents. The gloves should fit comfortably and remain dry inside.

    Avoid using fingernails to peel labels, open cans, separate key rings, or scrape hardened material. Gel-coated nails may tolerate these habits temporarily, but bare, recovering nails can bend or tear much more easily.

    Choose Nail Strengtheners Carefully

    A clear protective coating may reduce snagging and temporarily support flexible nails. However, stronger is not always better. An extremely rigid hardener can cause a flexible nail to snap when pressure is applied.

    If a product makes the nails feel excessively hard, dry, or uncomfortable, discontinue it. Look for a removable protective base coat rather than using another enhancement to conceal the problem. Follow the manufacturer’s application and removal directions instead of continuously adding new layers.

    Mistakes That Can Delay Recovery

    Mistakes That Can Delay Recovery

    Never peel remaining gel from the nail. Even if the coating is already lifting, pulling it away may remove surface layers. Proper soak-off gel should soften with its recommended remover and release with minimal pressure. If it remains firmly attached, repeat the removal process or visit a qualified nail technician.

    Do not cut or aggressively push back the cuticles. This tissue helps protect the space where the nail grows from bacteria and fungi. Damaging it can cause tenderness, inflammation, or infection.

    Avoid relying on supplements as an instant solution. Nail appearance can sometimes reflect nutritional problems, but taking high-dose supplements without a confirmed need may not repair damage caused by filing or peeling. Persistent weakness affecting many nails should be discussed with a healthcare professional.

    How Long Does Nail Recovery Take?

    Minor dryness may begin improving after several days of regular moisturizing. Breakage can decrease within a few weeks when nails are kept short and protected.

    However, damaged nail plate must grow forward before it can be trimmed away. Complete fingernail replacement often takes several months. Recovery speed can vary based on age, health, nail-growth rate, repeated trauma, and the extent of the original damage.

    Photographing the nails every two weeks can make progress easier to see. Look for smoother, firmer growth emerging near the cuticle rather than expecting the damaged tips to transform.

    When Can You Get Another Gel Manicure?

    When Can You Get Another Gel Manicure

    To make a manicure last longer, wait until the nails are no longer painful, excessively flexible, peeling, or breaking during ordinary activity. There is no universal waiting period, although one to two polish-free weeks may be sufficient for mild dryness. More obvious thinning may require a longer break.

    For the next manicure, choose a trained technician who uses clean tools and removes gel patiently. Ask for minimal surface filing and do not allow lifted polish to be pulled away. Sunscreen on the hands or opaque, fingerless UV-protective gloves can reduce skin exposure during curing.

    Warning Signs That Need Professional Attention

    Contact a dermatologist or other qualified healthcare professional if you notice persistent pain, swelling, warmth, pus, bleeding, green or dark discoloration, or separation of the nail from the nail bed.

    Itching, redness, blisters, or peeling skin around the fingertips may indicate contact dermatitis from ingredients used in gel products. Stop using the suspected product rather than covering the reaction with another manicure.

    Frequently Asked Questions

    1. What is the best nail care after gel manicures?

    Keep nails short, moisturize them several times daily, apply cuticle oil, wear gloves for wet work, and avoid scraping, peeling, or aggressive buffing.

    2. Should nails be left bare after removing gel?

    Leaving them bare temporarily makes it easier to observe damage and prevents immediate exposure to another application and removal cycle. A gentle protective base coat may be suitable if it does not cause irritation.

    3. Can cuticle oil repair damaged nails?

    Cuticle oil cannot fuse removed nail layers back together. It can reduce dryness, improve flexibility, and support the surrounding skin while healthier nail grows.

    4. Do nails need to breathe between manicures?

    Nails do not breathe. A break is helpful because it reduces repeated filing, remover exposure, picking, and mechanical stress.

    Final Thoughts

    I have found that patience matters more than adding numerous treatments at once. A short shape, regular moisturization, protective gloves, and careful product use give fragile nails the best opportunity to grow without further damage. If symptoms become painful, unusual, or persistent, I would seek professional guidance instead of trying to hide them beneath another gel manicure.

  • Nail Care Tips for Nail Biters: A Practical Recovery Plan

    Nail Care Tips for Nail Biters: A Practical Recovery Plan

    I know how frustrating it can feel to look down and see short, uneven nails surrounded by sore or damaged skin. Nail biting often happens automatically while I am concentrating, bored, anxious, or stressed, so simply deciding to stop may not solve the problem. I need to care for the existing damage while also addressing what makes me bite.

    These nail care tips for nail biters focus on gentle grooming, daily protection, trigger management, and realistic recovery. Nails do not transform overnight, but a consistent routine can reduce rough edges, protect new growth, and make biting less tempting.

    What Nail Biting Does to the Nails

    Occasional biting may leave an uneven edge, but repeated biting can affect much more than appearance. It can damage the nail plate, irritate the surrounding skin, create painful hangnails, and expose small wounds to bacteria or fungi.

    Chronic biting may also injure the nail bed or the nail matrix, where new nail cells develop. Damage in these areas can cause ridges, discoloration, distorted growth, or changes in nail shape. Biting can also place repeated pressure on the teeth and jaw.

    Recovery depends on the severity and duration of the damage. New fingernail growth gradually replaces the injured portion, but a full nail generally takes several months to grow from the base to the tip. Severe matrix damage may take longer to improve and may not always be completely reversible.

    Begin With Gentle Cleaning and First Aid

    If I have just bitten a nail or torn the surrounding skin, I wash my hands gently with soap and running water. I avoid scrubbing the wound, digging underneath the nail, or applying irritating household remedies.

    Minor bleeding can usually be managed by applying gentle pressure with clean gauze. Once the area is clean and dry, I can protect an exposed fingertip with a clean bandage. Covering it also creates a physical barrier against another unconscious biting episode.

    I do not apply cosmetic glue, gel, acrylic, or a press-on nail over broken or inflamed skin. Sealing damaged tissue beneath an enhancement can conceal worsening irritation and make the area more difficult to monitor.

    Keep Bitten Nails Short and Smooth

    Keep Bitten Nails Short and Smooth

    Very short nails do not necessarily need aggressive trimming. If little free edge remains, I let the nail grow instead of trying to cut it closer. I use a fine nail file to smooth sharp corners and ragged sections that could catch on clothing or tempt me to bite.

    A small file kept near my desk or in my bag lets me fix a snag before I instinctively use my teeth. I file carefully without pressing into the surrounding skin. Excessive filing, scraping, and buffing can thin an already weakened nail plate.

    When enough nail has grown, I trim it with clean clippers and soften the corners with a file. Keeping each edge smooth matters more than creating a perfect shape during the early recovery period.

    Moisturize Nails and Cuticles Every Day

    Dry, peeling skin can become a sensory trigger. A person may notice one rough piece, start picking at it, and then begin biting the nail. Regular moisturizing helps reduce these tempting imperfections.

    I apply fragrance-free hand cream after washing my hands and massage a small amount around each nail. At night, I can add cuticle oil or an ointment to especially dry areas. The goal is to keep the skin flexible and comfortable, not to make the nails grow unnaturally fast.

    Keeping the nails and surrounding skin properly moisturized is an important part of managing brittle nails, especially when dryness and repeated damage make the nail plate more prone to splitting.

    Cuticles form part of the nail’s protective seal, so I do not cut, tear, or bite them. If a true hangnail develops, I use clean, sharp clippers to remove only the detached skin. Pulling it can extend the tear into living tissue.

    Protect New Nail Growth

    Water exposure, cleaning chemicals, and repeated physical impact can make recovering nails more vulnerable. I wear suitable gloves while washing dishes, cleaning, gardening, or handling products that irritate my hands.

    I also avoid using my nails to open packages, scrape labels, or lift can tabs. Short nails may still split when they are treated as tools. Using my fingertips or an appropriate tool protects the thin new growth.

    Regular polish may provide a visual reminder not to bite, while bitter-tasting polish can interrupt an automatic hand-to-mouth movement. It should be treated as an awareness tool rather than a punishment. Anyone using it for a child should follow the product’s age and safety directions.

    Choose Manicures Carefully

    Choose Manicures Carefully

    A basic manicure can keep edges smooth and make me more motivated to protect my progress. However, a salon should not work over bleeding skin, swelling, significant tenderness, or suspected infection.

    Artificial nails may create a temporary biting barrier for some people, but they are not automatically the healthiest choice for damaged nails. Application, lifting, prolonged wear, and improper removal can cause additional trauma. Picking or peeling off gel, acrylic, or press-on products can strip layers from the natural nail.

    If I choose a manicure, I tell the nail professional about the biting damage and request gentle preparation. Tools should be properly cleaned, and the cuticles should not be aggressively cut.

    If your nails or surrounding skin become irritated easily, following a nail care routine for sensitive skin can help you choose gentler products and avoid additional damage during recovery.

    Address the Habit as Well as the Damage

    Physical care cannot fully work if biting continues unchecked. I first identify when it happens. Common triggers include deadlines, driving, watching television, studying, boredom, anxiety, and noticing a rough nail edge.

    Once I recognize the pattern, I place a competing activity in that environment. A fidget object beside the computer, sugar-free gum during a commute, or a stress ball near the television gives my hands or mouth another job. Although research into the effect of gum chewing on blood flow and stress responses continues, I primarily use gum as an oral substitute for nail biting. Gloves, finger covers, tape, or bandages can provide a temporary barrier during predictable high-risk periods.

    Tracking each episode can reveal patterns that are difficult to notice otherwise. I record the activity, emotion, finger involved, and response I tried. If stopping all at once feels overwhelming, I protect one hand or selected fingers first and gradually expand the no-biting area.

    Frequently Asked Questions

    1. What are the most useful nail care tips for nail biters?

    Keep the nails short and smooth, moisturize the surrounding skin, protect damaged fingertips, manage hangnails with clean tools, avoid aggressive cosmetic treatments, and use barriers or replacement behaviors to interrupt biting.

    2. Can badly bitten nails grow back normally?

    Many bitten nails improve as undamaged nail grows from the base. Recovery may take several months, however, and repeated injury to the nail matrix can cause longer-lasting changes.

    3. Should I put acrylic nails over bitten nails?

    Acrylics may deter biting, but they should not be applied over open, bleeding, swollen, or infected skin. Discuss the condition of the nails with a qualified nail professional before choosing an enhancement.

    4. Does cuticle oil make bitten nails grow faster?

    Cuticle oil does not dramatically accelerate natural nail growth. It can moisturize dry skin and reduce rough areas that encourage picking, which helps protect the growth that is already occurring.

    A Healthier Path Forward

    I do not expect one manicure or one bottle of bitter polish to undo a long-term habit. My best results come from combining gentle nail care with awareness of when and why I bite. I keep rough edges smooth, moisturize consistently, protect broken skin, and prepare an alternative action for moments when the urge appears.

    Progress may include setbacks, but one damaged nail does not erase the healing already underway. By returning to the routine instead of responding with frustration, I give every new section of nail a better opportunity to grow safely.

  • How to Make a Manicure Last Longer Without Chipping

    How to Make a Manicure Last Longer Without Chipping

    Few things are more disappointing than spending time on freshly polished nails only to discover a chip the following day. I used to assume that the polish formula was always responsible. 

    However, I learned that preparation, application, drying time, and everyday habits all affect durability. When I follow a complete routine for how to make a manicure last longer, my nails remain smoother, shinier, and more presentable without constant repairs.

    Why Does a Fresh Manicure Chip So Quickly?

    Nail polish adheres best to a clean, dry, and stable surface. Natural oil, hand cream, water, filing dust, and leftover remover can create a barrier between the nail and the base coat. The color may then lift around the cuticle or peel away in larger sections.

    Application mistakes can cause similar problems. Thick coats may appear dry on the surface while remaining soft underneath. They can wrinkle, dent, or separate when pressure is applied. Painting over the cuticle or surrounding skin also creates an edge that can lift easily.

    Daily activities matter as well. Repeated handwashing, cleaning chemicals, long showers, gardening, typing, opening packages, and scraping labels all place stress on a manicure.

    Prepare the Nails Before Applying Polish

    Prepare the Nails Before Applying Polish

    Remove Old Product and Surface Residue

    Begin by removing every trace of old polish. After shaping and cuticle care, wipe each nail with an appropriate nail cleanser or a small amount of isopropyl alcohol on a lint-free pad. This removes surface oil and dust that could interfere with adhesion.

    Avoid applying hand cream or cuticle oil immediately before painting. These products are useful after the manicure, but residue on the nail plate can make polish slide, streak, or peel prematurely.

    Avoid Soaking the Nails

    A traditional manicure may begin with a bowl of warm water, but prolonged soaking can work against polish durability. Nails absorb water and temporarily expand. As they dry, they return to their usual size, while the hardened polish does not contract in exactly the same way. This movement can contribute to early cracking or lifting.

    If the cuticles need softening, use a dedicated cuticle softener and follow its directions. Make sure the nails are completely clean and dry before applying the base coat.

    Shape and Manage Cuticles Carefully

    Smooth rough tips with a fine nail file so they are less likely to snag. Rounded or softly squared edges generally have fewer sharp corners that can catch on clothing and other objects.

    Gently push back visible cuticle tissue instead of aggressively cutting it. Removing too much living tissue can cause soreness and increase the possibility of infection. Polish should be applied to the nail plate rather than onto the cuticle.

    Build Thin, Durable Polish Layers

    Build Thin, Durable Polish Layers

    Use a Suitable Base Coat

    A base coat creates a more consistent surface, improves color adhesion, and helps prevent staining. Choose one suited to the condition of the nails. A ridge-filling formula can smooth uneven texture, while an adhesion-focused product may suit nails on which polish regularly peels.

    Products designed as a system often perform best together. To prevent nail polish from chipping, avoid mixing incompatible base coats, colors, and top coats, as this can sometimes cause shrinking, bubbling, or peeling.

    Apply Two Thin Coats of Color

    Remove excess lacquer from one side of the brush. Place the brush slightly above the cuticle and guide the color toward the tip using a few controlled strokes. Keep the polish away from the surrounding skin.

    Two thin color coats normally provide better durability than one heavy coat. Allow the first layer time to settle before adding the second. If the polish is thick and difficult to spread, use an appropriate polish thinner rather than ordinary remover, which may alter the formula.

    Seal the Free Edge

    After covering the main surface, lightly sweep the brush across the exposed tip of the nail. This technique, often called capping the free edge, places polish over an area that experiences considerable friction.

    Cap the tip lightly with the color and top coat. Avoid creating a bulky ridge because an excessively thick edge may take longer to set and can still chip.

    Finish With Top Coat

    A top coat adds shine and creates a protective layer over the color. Cover the entire painted surface and seal the tip. Some traditional polish systems also benefit from another thin top-coat application after two or three days. Follow the directions for the particular system rather than automatically layering incompatible products.

    Allow the Manicure to Set Properly

    Polish can feel dry on the surface while remaining vulnerable underneath. Avoid showering, washing dishes, exercising, or completing hands-on work immediately after painting.

    A cool fan may help the surface dry, but intense heat is not a reliable shortcut. Avoid blowing directly on the nails, placing them near a heater, or using very hot water. Give the manicure as much undisturbed setting time as possible.

    Protect the Finish During Daily Activities

    Protect the Finish During Daily Activities

    Wear protective gloves when washing dishes, cleaning, gardening, or handling products that may affect the finish. Gloves reduce prolonged contact with water and cleaning agents.

    Use the pads of the fingers instead of the nails to open containers, press buttons, or remove labels. Nails are decorative protective structures, not tools. Even a well-applied coating can break when it is repeatedly used for prying and scraping.

    Apply cuticle oil and hand cream regularly after the manicure has set. Hydrated skin looks neater, while flexible nails may be less likely to split beneath the polish.

    What Different Types of Damage Can Mean

    Wear along the tips commonly results from friction or an edge that was not sealed. Peeling near the cuticle may indicate remaining oil or polish applied over the skin. Dents and wrinkles often develop when coats are too thick or have not received enough setting time.

    Large sections peeling away can indicate moisture, incompatible products, or a peel-off base coat. Cracks across the surface may appear when thick, rigid layers are applied over flexible nails. Identifying the damage pattern makes it easier to correct the routine next time.

    How to Repair a Small Chip

    Do not pull at a chipped area because this can remove more polish and sometimes disturb the surface of the natural nail. Smooth a rough tip carefully if necessary. Apply a small amount of matching color to the exposed section and allow it to settle.

    Add another thin layer if the repair remains uneven. Once dry, cover the entire nail with top coat to blend the edges and restore shine. Extensive lifting, moisture beneath an enhancement, pain, discoloration, or swelling requires removal and appropriate professional advice rather than a cosmetic patch.

    Frequently Asked Questions

    1. How long should a regular manicure last?

    Traditional polish commonly remains presentable for several days, although wear depends on nail condition, application, products, work, and water exposure. Proper preparation and protection can improve the result.

    2. Does cuticle oil make polish peel?

    Oil can interfere with adhesion when applied before painting and left on the nail plate. Once the manicure has set, carefully applied cuticle oil can support flexibility and improve the surrounding skin.

    3. Can I apply top coat every day?

    Daily application is usually unnecessary and may create thick, uneven layers. For compatible traditional polish, a thin refresh every two or three days is often sufficient.

    4. What is the best advice for how to make a manicure last longer?

    Start with clean, dry nails, apply compatible products in thin layers, seal the tips, allow adequate setting time, and protect the finish from water, chemicals, and unnecessary pressure.

    Final Thoughts

    I now treat manicure durability as a complete process rather than a single product claim. Careful preparation gives the base coat something clean to grip, thin layers dry more evenly, and sensible aftercare limits avoidable damage. Although no manicure remains perfect indefinitely, these habits help me achieve a cleaner finish and enjoy it for considerably longer.

  • How to Prevent Nail Polish From Chipping and Make It Last

    How to Prevent Nail Polish From Chipping and Make It Last

    I used to blame the polish whenever my manicure chipped within a day or two. However, I eventually realized that nail preparation, application technique, drying time, and daily habits mattered just as much as the formula. Once I understood how to prevent nail polish from chipping, I could make an ordinary at-home manicure look smoother and remain presentable for much longer.

    Long-lasting results do not come from applying more product. They come from creating a clean surface, using controlled layers, sealing vulnerable areas, and protecting the finish while it hardens.

    Why Nail Polish Chips So Quickly

    Nail polish dries into a firm film, but the natural nail beneath it remains flexible. When the nail bends, absorbs water, or hits a hard surface, the polish may crack or separate.

    Oil, hand cream, water, dust, and old polish residue can weaken adhesion. Thick coats are another common problem because the surface may feel dry while the lower layers remain soft. Polish can also lift when it touches the cuticle or surrounding skin.

    The location of the damage often reveals the cause. Wear along the tips usually comes from friction or an unsealed edge. Peeling near the cuticle may indicate surface oil or polish touching the skin. 

    Dents and wrinkles normally mean the layers were too thick or had not dried sufficiently. However, persistent changes may be among the fingernail problems not to ignore, especially when accompanied by pain, swelling, discoloration, or separation from the nail bed.

    Prepare the Nails Before Painting

    Prepare the Nails Before Painting

    Preparation gives polish a stable surface to grip. Begin by removing every trace of old color. Shape the nails and smooth rough edges that might catch on clothing or hair.

    Buff only when necessary and use a light touch. Excessive buffing can thin the nail plate, making it more flexible and likely to bend beneath the polish.

    Carefully push back the cuticles and remove dead tissue attached to the nail plate. Avoid cutting living skin around the nail because this can cause irritation or injury. Polish applied over cuticle tissue is likely to lift as the skin moves.

    Complete showers, baths, dishwashing, and other water-based activities before beginning. Natural nails can absorb water and temporarily expand. If they are painted while holding moisture, the polish may separate as the nails dry and return to their usual shape.

    Immediately before applying the base coat, wipe every nail with an appropriate nail cleanser or polish remover. This removes oil, lotion, dust, and remaining residue. Avoid touching the cleaned nail surfaces afterward.

    Apply a Suitable Base Coat

    A base coat creates a surface to which colored polish can adhere. It can also reduce staining and help smooth minor imperfections.

    Choose one suited to the condition of your nails. A bonding base may help when polish regularly peels from otherwise healthy nails. A ridge-filling formula can improve an uneven surface, while a compatible strengthening treatment may support weak nails.

    Do not assume that a clear top coat can replace a base coat. These products perform different jobs. Apply one thin base layer over the entire nail, leaving a narrow space around the cuticle and sidewalls.

    Use Thin, Controlled Color Layers

    Use Thin, Controlled Color Layers

    Thick polish takes longer to dry and is more likely to dent, wrinkle, or peel. Two thin color coats generally produce a smoother and more durable finish than one heavy coat.

    Remove excess lacquer from one side of the brush. Place the brush slightly above the cuticle and guide the color toward the tip using a few controlled strokes. Keep the polish away from the surrounding skin, especially if you are using ciclopirox topical for a fungal nail infection, because it should be applied according to its prescribing instructions rather than treated like cosmetic polish.

    Give each layer time to set before adding the next. Drying time varies according to the formula, room temperature, humidity, and thickness. If the brush drags the previous coat or creates bare patches, wait longer.

    Instead of shaking the bottle aggressively, roll it gently between your palms. Vigorous shaking can introduce air bubbles that may appear as bumps in the finished manicure.

    Seal the Free Edge

    The free edge is the part of the nail extending beyond the fingertip. It receives frequent impact from typing, cleaning, opening containers, and other daily activities.

    After painting the nail surface, lightly sweep the brush across the tip. This process is called capping or wrapping the edge. Repeat it with the top coat to create a continuous protective layer around the most vulnerable area.

    Use only a small amount of product. A thick ridge at the tip may take longer to dry and can chip more easily. Short nails can still be capped by using the narrow side of the brush.

    Finish With Top Coat

    The top coat protects the colored layers from scratches, moisture, and ordinary wear. Apply it across the painted surface and over the free edge without allowing it to flood the cuticles.

    Quick-dry formulas can help the surface set sooner, but the lower layers still need time to harden. Treat the manicure carefully even if it feels dry when lightly touched.

    A fresh, thin layer of top coat every two or three days may restore shine and reinforce exposed areas. Avoid repeatedly adding heavy layers because excessive product can make the manicure look bulky and crack unevenly.

    Allow Enough Drying Time

    One of the easiest ways to damage fresh polish is to resume normal activities too quickly. Allow enough drying time before you moisturize nails and cuticles, and avoid hot showers, baths, dishwashing, tight footwear after a pedicure, and tasks requiring pressure from the fingertips.

    Quick-dry drops or cool air may help the surface set, but they cannot fully correct thick application. Schedule the manicure for a time when you will not immediately need to cook, clean, pack bags, or handle small objects.

    Protect the Manicure Every Day

    Protect the Manicure Every Day

    Wear gloves while washing dishes, gardening, or cleaning with household products. Repeated exposure to water can encourage the nail to expand and contract, while detergents may dry the nails and surrounding skin.

    Use your fingertips rather than your nails to open cans, scrape labels, separate key rings, or press stiff buttons. Even a carefully applied manicure can chip when the nails are treated like tools.

    Once the polish has hardened, apply cuticle oil regularly. Hydrated nails are generally more flexible and less likely to split or peel beneath the color. Keep oil away from bare nails immediately before a new application.

    Troubleshoot the Chipping Pattern

    When polish disappears from the tips, smooth rough edges and improve free-edge sealing. If it lifts around the cuticles, remove surface oil more thoroughly and leave a clearer gap between the polish and skin.

    Whole sections peeling away can indicate moisture, incompatible products, or the use of a peel-off base coat. Cracks across the surface may result from thick layers applied over flexible nails. Dents usually show that the manicure needed additional drying time. The easiest way to do a nail treatment is to remove the polish gently, moisturize the nails and cuticles, and give damaged nails time to recover before applying another manicure.

    If the natural nails are peeling or badly damaged, shortening them and improving their condition may be more effective than repeatedly covering them with harder products.

    Frequently Asked Questions

    1. What is the easiest way to learn how to prevent nail polish from chipping?

    Follow a complete routine: clean and dry the nails, apply a base coat, use thin color layers, seal the tips, add top coat, allow adequate drying time, and protect the manicure from water and impact.

    2. How many coats of nail polish should I apply?

    Two thin color coats are usually sufficient. A sheer shade may require a third coat, but each layer should remain light and be given enough time to set.

    3. Can I use cuticle oil before painting my nails?

    Cuticle oil is helpful between manicures, but it should be removed from the nail plate before applying polish. Use it again after the finished manicure has fully hardened.

    4. Why does my polish chip after one day?

    Possible causes include surface oil, moisture, thick coats, insufficient drying, polish touching the skin, unsealed tips, or frequent contact with water and cleaning products.

    Final Takeaway

    I have found that a lasting manicure depends on small decisions made throughout the process. Careful preparation, thin layers, sealed edges, patient drying, and sensible protection work together better than relying on one special product.

    When my polish chips, I now examine where the damage started. That usually tells me whether I need to improve preparation, application, drying, or aftercare. With a consistent routine, regular polish can remain smooth, glossy, and attractive for considerably longer.

  • Home Remedies for Dry Cuticles: 9 Safe, Simple Fixes

    Home Remedies for Dry Cuticles: 9 Safe, Simple Fixes

    I used to assume rough skin around my nails only needed a quick dab of oil. However, I learned that lasting improvement requires more than temporarily making the skin look glossy. The cuticle area needs moisture, protection, and relief from the habits that repeatedly strip its natural oils.

    The most effective home remedies for dry cuticles combine a moisturizer with an ingredient that seals hydration into the skin. They also reduce exposure to hot water, detergents, nail polish remover, and unnecessary trimming. With consistent care, mildly dry skin may begin feeling softer within several days.

    Why Do Cuticles Become Dry and Cracked?

    Cuticles help form a protective seal between the nail plate and surrounding skin. When this area becomes damaged, it can peel, split, or develop painful hangnails.

    Frequent handwashing is a common cause because soap and hot water remove some of the skin’s protective oils. Alcohol-based hand sanitizer, household cleaners, acetone nail polish remover, cold weather, low humidity, and repeated manicures can make the problem worse.

    Biting, picking, or aggressively cutting the skin may create tiny injuries. People with eczema or contact dermatitis may also experience recurring dryness, itching, and inflammation around their nails. Identifying the likely cause is important because applying oil will not completely solve the problem if the skin continues to encounter the same irritant.

    1. Apply a Thick Hand Cream After Washing

    Moisturizing immediately after washing helps replace water and oils lost during cleansing. Pat your hands dry instead of rubbing them vigorously, leaving the skin slightly damp. Massage a fragrance-free hand cream into the fingers, nail folds, and surrounding skin.

    Look for ingredients such as glycerin, ceramides, shea butter, hyaluronic acid, or urea. Glycerin and hyaluronic acid attract water, while ceramides help support the skin barrier. A thick cream generally provides more lasting protection than a thin, fast-evaporating lotion.

    2. Seal Moisture With Petroleum Jelly

    Petroleum jelly is an occlusive, meaning it forms a protective layer that reduces water loss. It works especially well when applied over a moisturizing cream rather than placed on severely dehydrated skin by itself.

    At bedtime, apply hand cream and cover the skin around each nail with a small amount of petroleum jelly. This two-step method helps keep moisture in contact with the skin for longer and can reduce morning roughness.

    3. Massage With Jojoba or Coconut Oil

    Plant oils soften rough skin and make dry nail folds feel more flexible. Jojoba oil is lightweight and easy to massage into the nail area. Coconut, argan, sunflower, and olive oils can also serve as simple alternatives.

    Place one drop on each nail and massage gently for approximately one minute. Regular application matters more than using a large amount. Oil can be helpful during the day, but extremely cracked skin usually benefits from a cream and an occlusive as well.

    Stop using any oil that causes itching, burning, redness, or a rash.

    4. Try an Overnight Cotton-Glove Treatment

    For intensive care that may help stop nails from peeling, apply a generous layer of fragrance-free hand cream before bed. Add petroleum jelly around the driest areas and put on clean cotton gloves.

    The gloves keep the moisturizer in place while protecting bedding. Repeat the treatment several nights a week until the skin becomes smoother. Cotton is preferable to airtight disposable gloves for prolonged overnight use because trapped sweat can irritate sensitive skin.

    5. Protect Your Hands From Water and Detergents

    Repeated exposure to water can worsen dryness even though wet skin initially feels hydrated. Wear protective gloves when washing dishes, cleaning bathrooms, gardening, or handling detergents.

    If waterproof gloves make your hands sweaty, wear cotton liners underneath and remove the gloves periodically. Wash with lukewarm rather than very hot water, and choose a mild fragrance-free cleanser whenever possible.

    6. Use Warm-Water Soaks Carefully

    A brief warm-water soak can soften hard skin and make a hangnail easier to manage. Soak the fingertip for five to ten minutes, pat it dry, and apply moisturizer immediately.

    Long or frequent soaking may have the opposite effect by increasing moisture loss after the water evaporates. Avoid adding lemon juice, vinegar, or strongly scented essential oils. Acidic and fragranced ingredients may sting or irritate cracked skin.

    7. Manage Hangnails Without Pulling Them

    A hangnail is a torn piece of skin beside the nail. Pulling or biting it can tear living tissue, cause bleeding, and create an opening for bacteria.

    After softening the area, use clean, sharp nail clippers to trim only the loose piece. Do not cut into attached skin. Apply petroleum jelly and, if needed, cover the fingertip with a clean bandage to prevent picking.

    8. Stop Cutting or Aggressively Pushing Cuticles

    The living skin at the base of the nail provides important protection. Cutting too deeply or pushing forcefully can lead to soreness, inflammation, and infection.

    If you push back the cuticle area for a manicure, soften it first and use gentle pressure. Never continue if the process hurts. Salon instruments should be properly cleaned and sterilized, and existing cracks should be allowed to heal before another manicure.

    9. Take a Break From Irritating Nail Products

    Acetone, nail adhesives, removers, and repeated gel or acrylic manicures may worsen dehydration. Taking a temporary break gives the surrounding skin time to recover.

    When using remover again, limit contact with the skin and moisturize afterward. If dryness appears after a particular polish, adhesive, or nail-care product, discontinue it because the reaction could be irritant or allergic contact dermatitis.

    How Long Does Healing Take?

    Minor roughness may improve within a few days of consistent moisturizing. Cracks, hangnails, and significant irritation can take one to two weeks or longer, particularly if frequent washing or chemical exposure continues.

    Consistency is essential. Apply cream after washing, oil when convenient, and an occlusive treatment before bed. Severe symptoms that fail to improve may have an underlying cause requiring professional evaluation.

    When Should You Seek Medical Care?

    Seek medical advice if the area becomes increasingly painful, warm, swollen, or intensely red. Pus, red streaks, bleeding that does not stop, or changes in the nail may indicate infection or another condition.

    Recurring symptoms can also be associated with eczema, psoriasis, chronic paronychia, allergies, or occupational exposure. Avoid trying to drain a swollen nail fold at home.

    Frequently Asked Questions

    1. What are the best home remedies for dry cuticles?

    A fragrance-free hand cream followed by petroleum jelly is one of the simplest combinations. Jojoba or coconut oil can provide additional softness, while overnight cotton gloves help keep the treatment in place.

    2. Can petroleum jelly heal cracked cuticles?

    Petroleum jelly reduces water loss and protects damaged skin. Apply it over moisturizer for better hydration, particularly before bed or after handwashing.

    3. Should I cut peeling cuticles?

    Do not cut living skin or remove the protective nail fold. You may carefully clip a loose hangnail with clean, sharp clippers, but never pull it.

    4. Why are my cuticles dry even when I use oil?

    Oil may soften the area without supplying enough water or addressing ongoing irritation. Add a humectant-rich cream, seal it with an occlusive, and reduce exposure to hot water, acetone, and detergents.

    Final Thoughts

    I have found that a simple routine is more dependable than complicated DIY mixtures. Applying cream after washing, sealing it at night, protecting my hands during wet work, and leaving the living skin intact addresses both moisture loss and repeated damage.

    Natural oils can support this routine, but they should not replace basic barrier care. By staying consistent and watching for signs of infection, I can keep the skin around my nails softer, more comfortable, and less likely to split.

  • LED Face Masks With Multiple Light Wavelengths: What Each Light Does

    LED Face Masks With Multiple Light Wavelengths: What Each Light Does

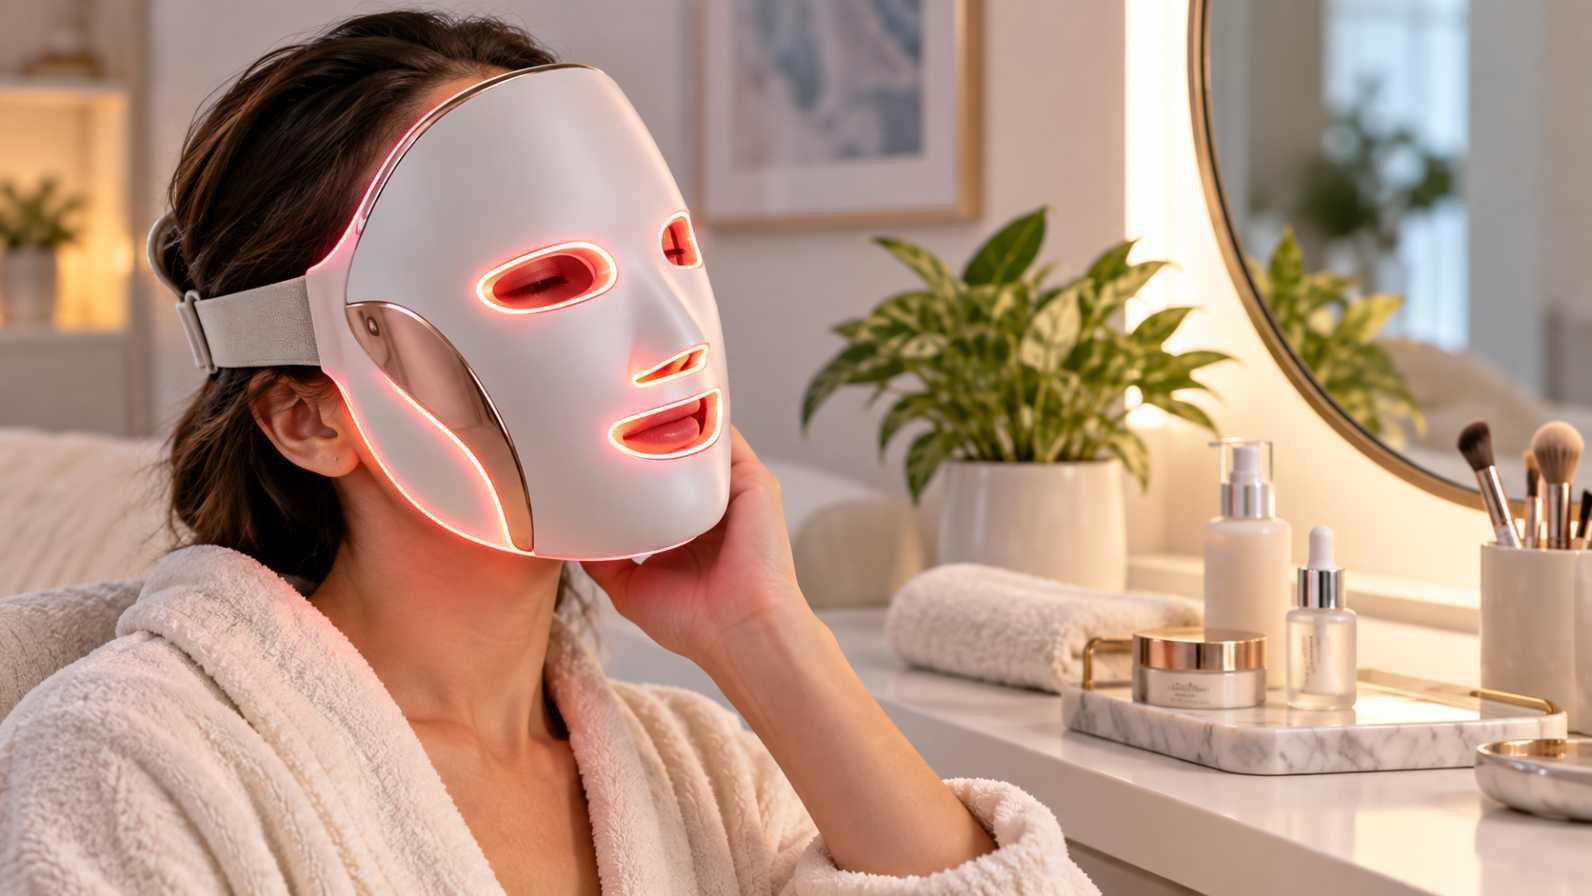
    I started noticing how quickly LED masks have moved beyond the simple red-light devices I first saw online. Some now offer several wavelengths, each marketed for a different skin concern, and that made me curious about what those colors actually mean. A mask can look futuristic, but the useful question is what light reaches the skin, and why?

    I also found that the number of colors can be misleading. A mask with seven settings is not automatically better than one with two well-chosen wavelengths. Once I looked past the color names, the useful details were wavelength, treatment intensity, coverage, session length, and how consistently the device could be used.

    Why LED Masks Use Multiple Wavelengths

    LED light therapy delivers specific wavelengths of light to the skin without the intense heat associated with some other energy-based treatments. Wavelength is measured in nanometers, and it influences how light interacts with tissue. Different wavelengths can therefore be selected for different skincare goals.

    That is the basic idea behind LED face masks with multiple light wavelengths. A device can combine ranges or let users switch easily. Evidence for individual wavelengths is not equally strong.

    What Blue Light Does

    What Blue Light Does

    Blue light, often around 415 nanometers, is commonly used in LED devices designed for acne-prone skin. It works near the skin surface and can affect acne-associated bacteria, making it relevant for mild inflammatory breakouts.

    Blue light is not a universal acne treatment. Home devices are generally less powerful than professional equipment, and combination treatments using blue and red light are also common.

    What Red Light Does

    Red light, commonly found around 630 to 660 nanometers, is one of the most established features in consumer LED masks. It reaches deeper than blue visible light and is used in photobiomodulation, a process involving light-driven cellular responses.

    For skincare, red light is associated with collagen-related processes, fine-line appearance, and visible inflammation. Results are gradual, with regular use over several weeks being a more realistic expectation.

    What Near-Infrared Light Adds

    Near-infrared light sits beyond visible red light, with many skincare devices using wavelengths around 830 to 850 nanometers. Because it can penetrate farther into tissue, it is often paired with red light in photobiomodulation devices.

    Near-infrared exposure is intended to influence biological processes in deeper tissue. Research continues to explore these effects, so marketing claims should be viewed alongside a device’s specifications and evidence.

    Where Yellow, Green, Purple, and Cyan Fit

    Multi-color masks often add yellow or amber, green, purple, or cyan. These options can make a device seem more versatile, but their evidence should be interpreted carefully.

    Yellow or amber light is commonly marketed for visible redness and soothing sensitive-looking skin. Green light is promoted for a brighter, more even-looking complexion. Purple generally combines red and blue light, while cyan, around 490 nanometers, is marketed as a calming option.

    These uses do not all have the same clinical support. Color labels alone are not proof that a wavelength will produce a particular result.

    More Wavelengths Does Not Automatically Mean Better

    More Wavelengths Does Not Automatically Mean Better

    A long list of colors may look impressive, but wavelength is only one part of the equation. Irradiance, or the amount of light delivered over an area, affects the dose reaching the skin. Treatment duration and frequency matter too.

    A useful device should provide good facial coverage, fit securely, and make the recommended schedule easy to follow. Eye protection deserves attention, particularly with bright visible light or photosensitizing medications.

    The appeal of wearable beauty technology for skincare routines is convenience. A hands-free mask can fit a routine more easily than a clinic treatment. That matters because LED therapy is generally a consistency game. Ten minutes used several times a week can be more useful than an elaborate device sitting in a drawer.

    How to Choose a Multi-Wavelength Mask

    Start with the skin concern you actually want to address. For acne, look for a clearly specified blue wavelength and, where relevant, red light. For visible signs of aging, red and near-infrared are more commonly associated with the intended use.

    Then check the technical information. Look for disclosed wavelengths in nanometers, recommended session length, treatment frequency, and safety guidance. FDA clearance can also be worth checking for devices making specific medical or cosmetic claims, but clearance applies to the particular device and indication, not every LED mask.

    A practical routine might involve cleansing, using the mask as directed, and continuing with normal skincare. More sessions are not necessarily better.

    That is why high-tech facial devices for everyday skincare should be judged by usability rather than novelty. A device can have multiple modes and wavelengths yet still be a poor choice if it is uncomfortable or difficult to use consistently.

    What Results Should You Expect?

    LED therapy is not an overnight transformation. Improvements, when they occur, tend to develop with repeated use. Acne-focused devices may require several weeks, while changes in the appearance of fine lines and overall skin quality can take longer.

    LED masks can complement a skincare routine, but they do not replace proven acne medications, sunscreen, or professional treatment when needed. Think of the mask as one tool, not the entire toolbox.

    FrequentlyAsked Questions 

    1. Which LED wavelength is best for acne?

    Blue light is commonly used for acne-prone skin because it can affect acne-associated bacteria. Red light is also frequently paired with blue light.

    2. Is red light better than blue light?

    Neither is simply better. They serve different purposes, and the appropriate choice depends on the skin concern and device specifications.

    3. Do multiple LED wavelengths work better?

    Not automatically. Wavelength, dose, irradiance, coverage, treatment time, and consistency all influence how useful a device may be.

    4. How often should an LED mask be used?

    Follow the manufacturer’s schedule. Most home devices require repeated sessions over several weeks rather than occasional use.

    Choosing Light With a Little More Perspective

    The most useful way to look at a multi-wavelength mask is not as a collection of trendy colors, but as a controlled light-delivery device. Red, blue, and near-infrared have different roles, while newer color options deserve a measured look at the evidence. Once wavelength, dose, safety, and usability are considered together, the technology becomes easier to understand.

    The best mask is rarely the one with the longest menu. It is the one that fits the goal, provides clear specifications, feels comfortable enough to use, and earns a regular place in the routine.

  • No Makeup Makeup Look for Beginners: Easy Step-by-Step Guide

    No Makeup Makeup Look for Beginners: Easy Step-by-Step Guide

    The easiest natural makeup routines do not try to erase every pore, freckle, or bit of texture. I get the best result when I focus on fresh-looking skin and keep every layer light. A no-makeup makeup look for beginners should feel forgiving, quick, and realistic enough for work, school, errands, or a casual weekend.

    Once my skincare has settled, I can usually finish this routine in under 10 minutes. The goal is simple: hydrated skin, soft color, groomed brows, defined lashes, and lips that still look like my own.

    How Do You Prep Skin for a Natural Makeup Look?

    I start with clean, moisturized skin because makeup blends more smoothly over a hydrated base.

    If my skin feels unusually dry, tight, irritated, or sensitive after using exfoliating products, I focus on restoring it before applying makeup.

    This guide on how to repair the skin barrier after over-exfoliating explains practical steps for getting the skin back to a healthier state.

    If my skin feels dry, I pay extra attention to areas where foundation tends to catch. If it is oily, I still moisturize but use a lightweight formula.

    For daytime makeup, I apply sunscreen before complexion products. The American Academy of Dermatology recommends broad-spectrum, water-resistant sunscreen with SPF 30 or higher. I let it settle before moving on.

    What Is the Best Lightweight Base for Beginners?

    Heavy full-coverage foundation can make a barely-there look harder to achieve. If my skin already looks even, I skip foundation. If I want more polish, I use a sheer skin tint, tinted moisturizer, BB cream, or a thin layer of lightweight foundation.

    If I only have regular foundation, I can mix a small amount with a compatible moisturizer to sheer it out. I apply the base through the center of my face and blend outward with my fingers or a damp sponge so natural texture can still show.

    Even with a lightweight base, uneven application or incompatible skincare underneath can cause makeup to separate. If that happens, these tips on why foundation separates on your face can help identify the likely cause.

    Where Should You Apply Concealer for a Natural Finish?

    Where Should You Apply Concealer for a Natural Finish?

    I use concealer only where I need it. I tap a small amount under the eyes where darkness is visible, around the nose for redness, and directly onto blemishes or discoloration.

    For small areas, I often use my ring finger and press rather than drag the product. I blend the edges into the surrounding skin so the coverage disappears.

    How Do You Apply Blush Without Looking Overdone?

    After evening out my complexion, I bring color back with cream or liquid blush because these textures can melt into the base.

    I start with a tiny amount of warm peach, pink, or berry on the apples of my cheeks and blend upward toward the temples. For a subtle sun-kissed effect, I tap whatever is left on my finger across the bridge of my nose.

    How Should Beginners Do Brows and Eyes?

    I brush my brows upward and outward before deciding whether they need extra color. Clear or tinted brow gel may be enough. If I see gaps, I add soft, hair-like strokes rather than filling the entire brow heavily.

    For the eyes, I curl my lashes first, then use one thin coat of brown, soft black, or clear mascara. If I want extra definition, I softly blend a neutral brown shade close to the lash line instead of drawing a sharp line.

    What Lip Products Look Most Natural?

    A tinted balm, lip oil, gloss, or sheer lip color close to my natural lip tone usually gives me the finish I want.

    Another simple trick is to dab a little cream lipstick onto the center of the lips and press them together. It creates a soft, just-bitten effect without a sharply painted edge.

    Should You Use Powder for This Makeup Style?

    Should You Use Powder for This Makeup Style

    Powder is optional. If my skin is dry, I usually leave most of my face alone so I do not remove the glow. If I get oily, I lightly dust translucent powder only through the T-zone, especially the forehead, nose, and chin.

    I also check my makeup in natural light whenever possible. Bathroom lighting can make heavy application harder to notice, while daylight quickly shows whether my base, concealer, blush, or powder looks obvious.

    How Do You Adjust the Routine for Dry, Oily, or Textured Skin?

    For dry skin, I prioritize hydration and keep cream or liquid layers thin. For oily skin, I use lightweight skincare and control shine only where necessary.

    For acne or visible texture, I avoid covering the entire face with heavy foundation. Targeted concealer usually looks more natural because the surrounding skin stays sheer.

    What Beginner Mistakes Make Natural Makeup Look Heavy?

    The biggest mistake is adding more product before the first layer has been properly blended. Thin layers are easier to control and build.

    I also avoid making every feature equally strong. Bold brows, heavy mascara, full foundation, bright blush, and sharply lined lips can overpower a minimal look.

    How Can You Do This Look in Five Minutes?

    How Can You Do This Look in Five Minutes

    When I am short on time, I simplify the routine to sunscreen, sheer coverage where needed, spot concealer, cream blush, brushed brows, curled lashes with one coat of mascara, and a tinted lip product. I skip anything my face does not need that day.

    That flexibility is why I think a no-makeup makeup look for beginners works so well. It does not depend on perfect technique or a long product list. It simply makes me look polished while still looking like myself.

    Frequently Asked Questions 

    1. Can I Do This Without Foundation?

    Yes. I often skip foundation when my skin tone already looks fairly even and use concealer only on redness, blemishes, or dark areas.

    2. What Is the Difference Between Natural Makeup and No-Makeup Makeup?

    Natural makeup can still include noticeable shadow, liner, or lip color. No-makeup makeup aims to make the makeup itself much less noticeable.

    3. How Do I Make Minimal Makeup Last All Day?

    I let skincare settle, apply thin layers, avoid excess product, and use powder only where oil tends to break through.

    4. Is This Routine Good for Someone Who Has Never Worn Makeup?

    Yes. Most steps are optional, mistakes are easy to blend out, and the technique focuses on subtle enhancement rather than precise full-glam application.

    Final Thoughts

    For me, the best natural makeup is the kind that still lets my real skin show through. I do not need heavy foundation, sharp contour, or a long list of products to look polished. A light base, targeted concealer, soft blush, groomed brows, defined lashes, and a natural lip color can make a noticeable difference without making the makeup feel obvious.

    The key is to work in thin layers and stop before the look becomes too perfected. When I focus on enhancing rather than covering, the result feels fresher, faster, and much easier to recreate every day.

  • How to Stop Nails From Peeling and Grow Stronger Nails

    How to Stop Nails From Peeling and Grow Stronger Nails

    I used to think peeling nails simply needed another coat of strengthening polish. However, I eventually learned that damaged nail layers cannot be permanently sealed back together. Understanding how to stop nails from peeling means identifying what weakened them, preventing further damage, and protecting the healthier nail growing underneath.

    Peeling nails are commonly caused by frequent water exposure, dryness, cleaning chemicals, manicure damage, and rough filing. Less commonly, persistent changes can be connected to an infection, nutritional deficiency, inflammatory condition, or another health concern. Most everyday cases improve with a gentle routine, although visible recovery takes time.

    Why Do Nails Peel in Layers?

    The nail plate is made from compact layers of keratin. When the bonds between these layers weaken, thin sections can separate horizontally, especially near the tips. This condition is sometimes called onychoschizia or lamellar splitting.

    Repeated wetting and drying is a major trigger. Nails absorb water and temporarily expand when wet. They contract again while drying. Frequent dishwashing, swimming, cleaning, or handwashing can repeat this cycle enough to weaken the nail structure.

    Dry environments, strong soaps, alcohol-based products, cleaning chemicals, and nail polish remover may strip away protective oils. Excessive soaking can create the opposite problem by making nails too soft. Both extremes leave the nail plate more vulnerable to splitting and peeling.

    Protect Nails From Water and Chemicals

    Waterproof gloves offer simple protection during dishwashing, cleaning, gardening, and other wet tasks. Cotton-lined gloves may be more comfortable because they reduce direct water contact while absorbing some perspiration.

    Normal handwashing should continue, but the hands need to be dried carefully afterward. Moisture left around the nail folds can cause irritation, while repeated washing without moisturizing can leave the nail plate dry.

    People whose work involves frequent handwashing or chemical exposure may have an increased risk of contact dermatitis and may need to reapply hand cream several times during the day. Keeping a small tube near a sink or workstation makes this protective habit easier to maintain.

    Moisturize the Entire Nail

    Moisturize the Entire Nail

    Hand cream should be massaged over the nails rather than applied only to the skin. Products containing petrolatum, lanolin, glycerin, ceramides, or urea can help reduce moisture loss. A thicker ointment used at night often provides longer-lasting protection.

    Cuticle oil can improve flexibility and condition the skin surrounding the nail. Apply a small amount to the nail surface, cuticle area, and underneath the free edge when possible.

    Oil cannot reconnect layers that have already separated. Its purpose is to improve flexibility and limit additional dryness while the damaged section grows forward. Daily application is generally more helpful than applying a large amount occasionally.

    Trim and File Peeling Edges Gently

    Long nails bend more easily and place greater pressure on weakened tips. Keeping them relatively short during recovery reduces snagging and prevents splits from travelling farther down the nail plate.

    Use sharp, clean clippers and avoid cutting into sensitive or attached tissue. When researching ways to cut acrylic nails, remember that artificial enhancements require different removal and trimming techniques than natural nails. Smooth rough edges with a fine-grit file using gentle, controlled strokes. Aggressive back-and-forth filing and heavy buffing may thin the natural nail even more.

    Never pull away a loose layer. Tearing it can remove attached nail material and extend the damaged area. If an edge catches on fabric, carefully file it until it feels smooth.

    Nails should not be used to open containers, scrape labels, separate objects, or perform other tasks that place pressure on their tips. Use the pads of the fingers or an appropriate tool instead.

    Pause Damaging Manicure Treatments

    Gel polish, dip powder, acrylics, and press-on nails can contribute to peeling when the natural nail is over-filed or the product is removed incorrectly. Adhesives and prolonged acetone exposure may also leave already-fragile nails feeling dry.

    Picking or peeling away an enhancement can lift natural nail layers along with it. If the nails are noticeably thin or separating, pause enhancement services to repair damaged nails and allow the affected areas to grow out.

    When returning to manicures, choose a technician who avoids excessive buffing and follows the correct removal procedure. The surrounding living skin should not be aggressively cut, and products should never be forced off the nail.

    Use Strengthening Treatments Carefully

    Use Strengthening Treatments Carefully

    A clear base coat may create a temporary shield over fragile nails. It can reduce snagging and limit direct exposure to water, but it cannot reverse damage that has already occurred.

    Keratin- or calcium-based treatments may provide short-term support. However, an extremely hard nail is not necessarily healthier. Some formulas can make the nail too rigid, increasing the chance of snapping. Discontinue any product that causes irritation, dryness, or greater brittleness.

    Gentler polish removers may be preferable while the nails recover. Acetone removes polish efficiently, but frequent or extended exposure can make dry nails feel worse.

    Support Nail Growth With Balanced Nutrition

    Healthy nail production depends on sufficient protein, iron, zinc, selenium, and other nutrients. A varied diet is more sensible than assuming one vitamin can fix every case of peeling.

    Iron deficiency may contribute to brittle or unusually shaped nails, particularly when nail changes appear alongside fatigue, weakness, pale skin, shortness of breath, or hair loss. Proper testing is necessary because nail appearance alone cannot confirm a deficiency.

    Biotin is frequently promoted for nail strength, but it is not appropriate for everyone. High doses can interfere with certain laboratory tests. Speak with a qualified healthcare professional before starting supplements specifically for nail changes.

    When to Seek Professional Advice

    Arrange a medical evaluation if peeling begins suddenly, affects both fingernails and toenails, causes pain, or continues despite several weeks of careful protection.

    Thickening, yellow or brown discoloration, crumbling, debris beneath the nail, or lifting from the nail bed may indicate a fungal infection. Pitting, inflammation, unusual ridges, or nearby rashes may be associated with conditions such as psoriasis.

    Nail changes accompanied by unexplained fatigue, hair loss, dry skin, weight changes, or unusual sensitivity to cold also deserve professional attention. These symptoms do not automatically indicate a serious condition, but they should not be diagnosed through appearance alone.

    Frequently Asked Questions

    1. What is the fastest way to learn how to stop nails from peeling?

    Keep the nails short, gently smooth lifted edges, moisturize after washing, use gloves during wet work, and pause damaging manicures. There is no overnight cure because the separated section must grow out.

    2. Can cuticle oil repair peeling nails?

    Cuticle oil cannot reconnect separated layers, but it can reduce dryness and improve flexibility. Consistent application may help protect the healthier nail growing from the base.

    3. Can I cover peeling nails with polish?

    A gentle clear base coat may shield fragile tips. Avoid covering nails that are painful, swollen, discolored, thickened, or potentially infected until they have been professionally assessed.

    4. Are peeling nails always caused by a deficiency?

    No. Repeated water exposure, chemicals, manicure damage, dryness, and physical trauma are more common causes. Nutritional deficiencies require proper testing rather than diagnosis based only on nail appearance.

    Final Thoughts

    I now treat peeling as a sign that my nails need protection, not more aggressive filing or another damaging manicure. My most effective routine is simple: I keep the tips short, moisturize after washing, wear gloves around water, and leave loose layers alone.

    Patience is essential because healthier nails must grow from the base. When peeling continues despite careful treatment or appears with pain, discoloration, thickening, skin changes, or other symptoms, professional assessment is the safest next step.