Blog

  • Retinol Purging vs Allergic Reaction Breakouts: How to Tell

    Retinol Purging vs Allergic Reaction Breakouts: How to Tell

    I spent weeks mistaking an inflamed contact allergy for a stubborn retinoid adjustment. That mistake left my stratum corneum stripped, raw, and reactive to basic tap water.

    Understanding retinol purging vs allergic reaction breakouts comes down to distinct cellular mechanics. One represents accelerated clearance of pre-existing microcomedones. The other signals an adverse immunological or inflammatory defense. 

    Misdiagnosing the two leads either to abandoning a working active prematurely or compounding serious dermal barrier damage.

    The Biological Difference: Turnover Acceleration vs Immune Defense

    The Biological Difference: Turnover Acceleration vs Immune Defense

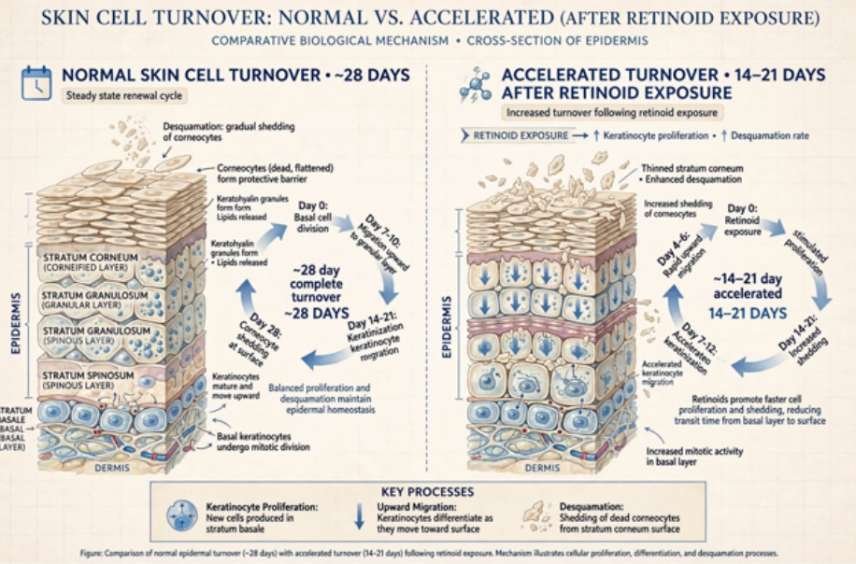
    Retinoids act directly on cellular gene expression. They bind to retinoic acid receptors (RARs) in the skin, speeding up cellular turnover from the standard 28-day cycle to roughly 14 to 21 days.

    [Normal Skin Turnover: ~28 Days]

    Retinoid Binding (RARs) ──> Accelerated Desquamation ──> Underlying Microcomedones Erupt Early (Purge)

    [Allergic Reaction / Contact Dermatitis]

    Topical Allergen/Irritant ──> Dendritic / T-Cell Activation ──> Histamine & Cytokine Surge (Inflammation)

    The biological responses branch into two distinct paths:

    What Retinol Purging Actually Does Under the Microscope

    What Retinol Purging Actually Does Under the Microscope

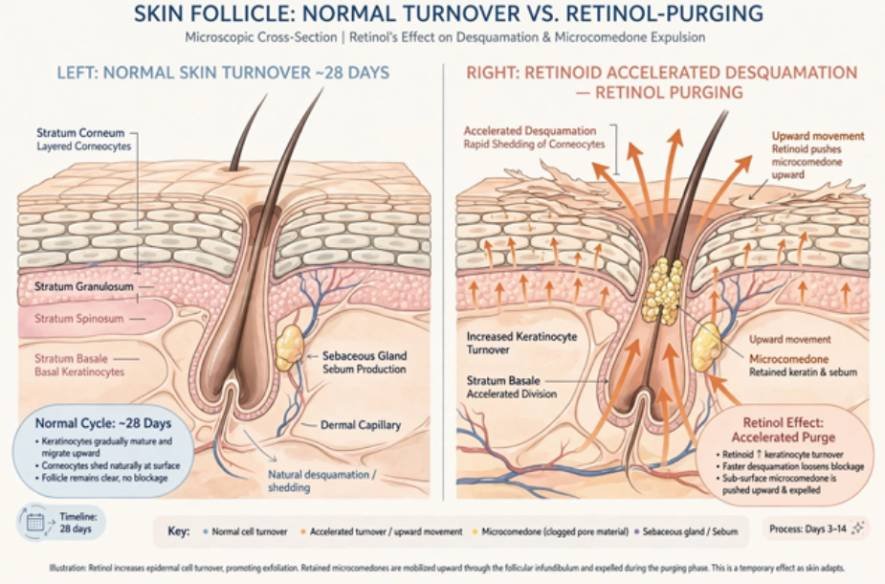
    Purging cannot generate novel blemishes from clean tissue. According to clinical data published in the National Center for Biotechnology Information, retinoids accelerate desquamation—the shedding of top-layer corneocytes.

    If sub-surface microcomedones already exist inside the follicular infundibulum, the accelerated cycle pushes them upward all at once. If you frequently try to get rid of closed comedones on forehead contours, this is the exact region where your purge will cluster.

    What an Allergic Reaction or Contact Dermatitis Looks Like

    An allergic response does not require a clogged pore. It is driven by type IV cell-mediated hypersensitivity or acute chemical irritation. As documented by the American Academy of Dermatology, severe sensitization presents as sudden mast-cell and T-cell activation.

    The skin releases histamines and inflammatory cytokines. Instead of classic whiteheads or blackheads, you experience widespread vascular dilation, intense heat, pruritus (itching), and superficial edema.

    Quick Diagnostic Matrix: Purge vs Allergy vs Formula Breakout

    When my clients evaluate new reactions, I point them to physical location, morphology, and sensation before looking at timing.

    Diagnostic Marker Retinol Purging  Allergic Reaction  Formula Breakout (Pore-Clogging) 
    Primary Location Usual congestion zones (chin, nose, jawline) Diffuse; covers entire application surface Random; often new areas like cheeks or neck
    Lesion Morphology Classic papules, pustules, open comedones Erythematous hives, rash, uniform pinhead bumps Inflamed follicular bumps, deep painful cysts
    Dominant Sensation Mild tenderness localized to active spots Pruritus (sharp itching), stinging, burning heat Soreness upon direct pressure
    Onset Timing Weeks 2 to 4 after initiating treatment Within 12 to 72 hours of first contact Weeks 1 to 3 of continuous use
    Resolution Horizon Resolves fully in 4 to 8 weeks Worsens until product removal; settles in days Continues indefinitely while formula is used
    Surrounding Tissue Dry or peeling, but calm Tight, raw, hot, visibly erythematous Normal oiliness without systemic redness

    The 72-Hour Rule: How I Track My Skin’s Response

    The 72-Hour Rule How I Track My Skins Response

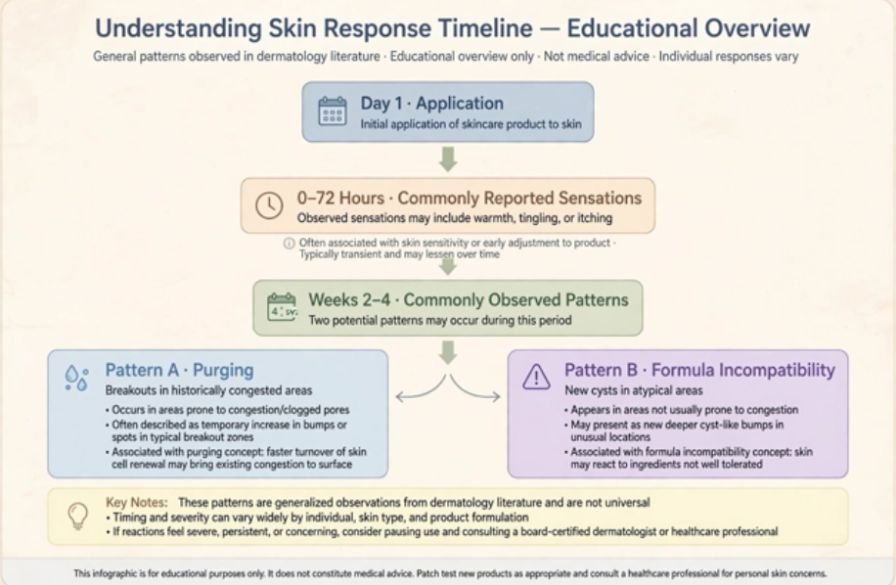
    I use a clinical self-audit protocol whenever a client introduces a new retinoid formula:

    [Day 1: Baseline Application]

             │

             ▼

    [First 72 Hours] ─── Heat, intense itching, swelling? ───► YES: Allergic Contact Dermatitis (Halt Immediately)

             │

             ▼ NO

    [Weeks 2 to 4]   ─── Breakouts exclusively in historical zones? ──► YES: Retinoid Purge (Buffer & Proceed)

             │

             ▼ NO

    [New, random cyst formation across dry zones] ──────────► Formula Vehicle Incompatibility (Switch Formula)

    The distinction lies in physical sensations. A true retinoid purge does not itch. Purging lesions may be tender when touched, but they never prickle or crawl with histamine irritation.

    If washing with lukewarm water burns, or your jawline feels prickly within 72 hours, you are not purging. You are experiencing an adverse reaction.

    Corrective Protocols: How to Pivot Without Wrecking Your Skin

    Once you distinguish the trigger, adjust your routine immediately to prevent scarring or prolonged trans-epidermal water loss (TEWL).

    Protocol A: Weathering the Purge Safely

    1. Reduce Application Frequency: Cut back to twice weekly. Spacing treatments preserves cellular momentum without overwhelming the stratum corneum.
    2. Deploy the Sandwich Technique: Apply a bland lipid layer first, let it dry for ten minutes, layer your pea-sized retinoid, and seal with a second light layer of moisturizer.
    3. Protect the Moisture Barrier: Never pair chemical exfoliants (glycolic, salicylic, or lactic acids) with your retinoid during the first eight weeks.
    4. Shield with Broad-Spectrum SPF: Use a non-nano zinc oxide sunscreen daily. Retinoid-accelerated skin cells lack mature melanin defense, leaving fresh post-purge marks prone to hyperpigmentation.

    Protocol B: Immediate Relief for Allergic Flare-ups

    1. Cease Product Use Immediately: Wash off any residual film using cool water and an inert, non-foaming cleansing lotion.
    2. Apply Cold Compresses: Cool, damp cloths suppress localized histamine response and capillary dilation.
    3. Rebuild the Lipid Layer: Look for physiological lipid ratios containing ceramides, cholesterol, and free fatty acids to repair damaged skin barrier from retinol and soothe reactive irritation.
    4. Seek Clinical Guidance: If facial swelling, wheals, or persistent periorbital edema occur, consult a board-certified dermatologist via the Mayo Clinic health directory or visit an urgent care clinic for topical hydrocortisone or antihistamine support.

    Recovery Timelines Compared

    Healing follows an established biological schedule.

    Phase Purging Recovery Path Allergic Reaction Recovery Path
    Days 1–3 Microcomedones start surfacing along oily zones Sudden red patches, swelling, or prickly rash appear
    Week 1–2 Peak blemish turnover; localized peeling appears Active inflammation clears after discontinuing product
    Week 3–4 Lesions subside; skin begins to smooth out Stratum corneum desquamation stabilizes with barrier balms
    Week 6–8 Retinization completes; clearer baseline emerges Full recovery achieved; skin tolerates basic hydrators

    Frequently Asked Questions

    1. Can an allergic reaction mimic tiny acne bumps?

    Yes, contact dermatitis presents as uniform, itchy, erythematous papulovesicles that look identical to micro-breakouts.

    2. Does retinol purging cause facial itching?

    No, pure purging does not itch; sensations of sharp itching, burning, or tingling point to allergic sensitization or barrier failure.

    3. How long should a genuine retinol purge last?

    A standard purge lasts four to six weeks, resolving within eight weeks as cellular turnover stabilizes.

    4. Should I pop retinol purge pimples?

    Never extract purging lesions, as accelerated skin turnover leaves vulnerable tissue prone to severe post-inflammatory hyperpigmentation.

    Drop the Active, Save the Barrier

    Skin transformation demands patience, not punishment. If your face itches, burns, or erupts in patches where you never normally break out, put down the retinoid tube.

    Strip your routine down to a gentle cleanser, a simple ceramide cream, and mineral sunscreen for two full weeks. Let your skin rest, let the barrier rebuild, and return to actives only when your moisture matrix can handle the work.

  • Makeup Routine for Beginners Step by Step: Easy Everyday Guide

    Makeup Routine for Beginners Step by Step: Easy Everyday Guide

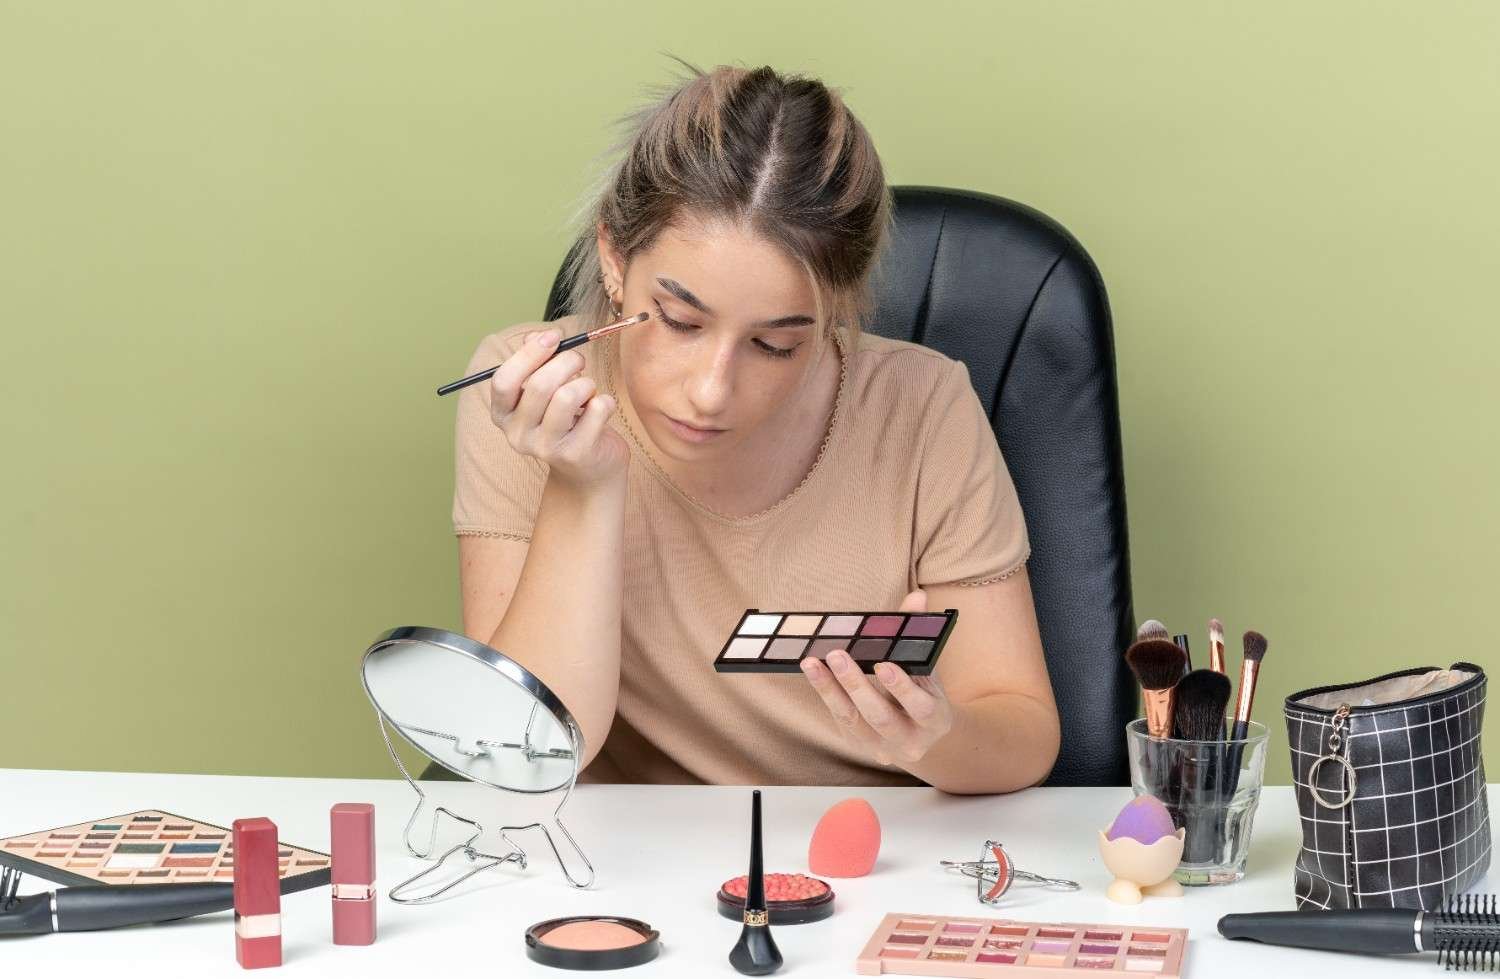
    Learning makeup should not feel complicated. I find it easier to think in four phases: prepare the skin, create an even base, define the eyes and brows, then finish with cheeks and lips. This makeup routine for beginners step by step, keeps each stage simple while explaining why it matters.

    For a US audience dealing with dry winters, humid summers, indoor heating, and air-conditioning, flexibility matters. Your skin type, climate, and preferred finish should guide how much makeup you use.

    How Should Beginners Prepare Their Skin Before Makeup?

    Step 1: Cleanse and Moisturize

    Start with clean skin, then moisturize. Hydrated skin usually helps makeup spread evenly and reduces dry or patchy areas. Let skincare settle for a few minutes before continuing so the next layers are less likely to pill or slide.

    Step 2: Apply Sunscreen During the Day

    For daytime makeup, apply broad-spectrum sunscreen before makeup and give it time to set. This helps create a stable base while keeping sun protection part of your daily routine.

    Step 3: Use Primer Only Where You Need It

    Primer is optional. I would use it only when it addresses visible pores, excess shine, dryness, or short wear time. A small amount through the T-zone or other problem areas is often enough.

    What Is the Correct Order for a Smooth Makeup Base?

    What Is the Correct Order for a Smooth Makeup Base?

    Step 4: Apply a Light, Even Base

    Start with a small amount of foundation, BB cream, or another light base and blend from the center of the face outward. A damp sponge, clean fingers, or a brush can all work. Build coverage gradually instead of applying a thick layer at once.

    For a natural-looking shade, compare it against your jawline and neck in natural light. Check both depth and undertone so the face does not look noticeably different from the neck.

    Step 5: Apply Concealer After the Base

    I generally apply concealer after foundation because the base may already cover some redness, dark circles, or blemishes. Dab a small amount only where extra coverage remains and tap it into the skin.

    Step 6: Set Only the Areas That Need Powder

    Use a small amount of powder under the eyes or through the T-zone if those areas crease or become shiny. Dry skin may need very little, while oily skin may benefit from slightly more. Too much can make the finish look heavy.

    Step 7: Add Bronzer and Blush Gradually

    Sweep bronzer lightly where you want warmth, then add blush for fresh color. I prefer building both slowly because excess pigment is harder to correct. Soft blending matters more than strong color.

    How Can Beginners Make Eye Makeup Look Natural?

    How Can Beginners Make Eye Makeup Look Natural?

    Step 8: Fill Brows With Light Strokes

    Brush the brows into place and fill only sparse areas. Use short, hair-like strokes rather than creating one solid block of color. Keeping the inner portion softer usually looks more natural.

    Step 9: Keep Eyeshadow Simple

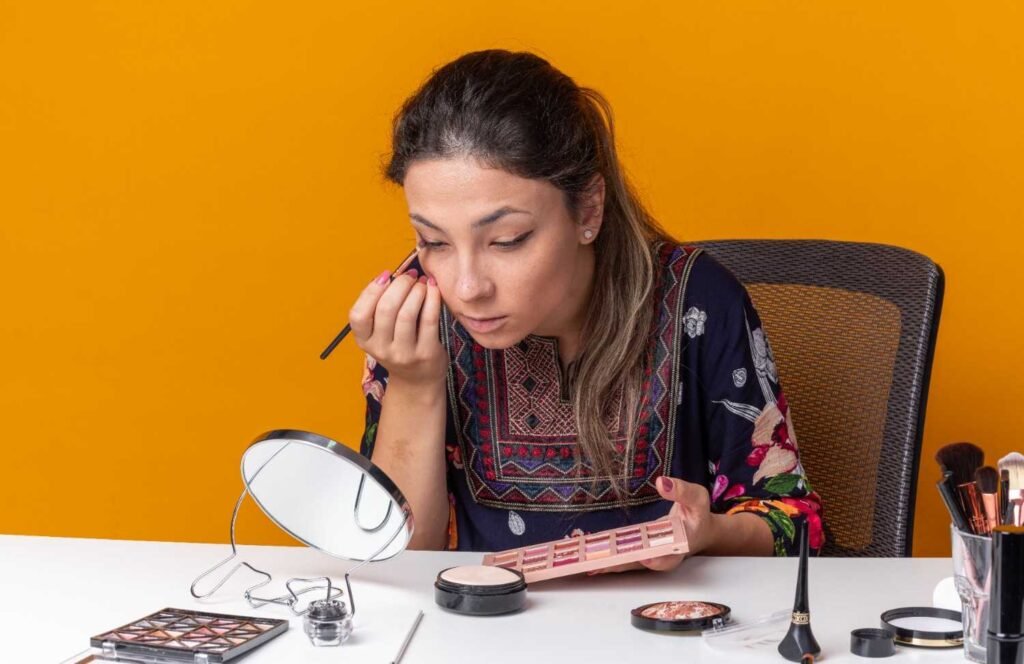
    For everyday makeup, one or two neutral shades are enough. Sweep a soft neutral shade across the lid and blend a slightly deeper shade through the crease if you want more dimension. Blend until there are no obvious lines.

    Step 10: Add Eyeliner and Mascara

    Eyeliner is optional. If you use it, keep it close to the upper lash line. Finish with mascara from the roots toward the tips. One or two light coats usually look cleaner than several heavy layers.

    How Should Beginners Finish the Look?

    Step 11: Keep the Lips Simple

    Choose a comfortable lip finish that suits the look, whether that means sheer color, gloss, or a more defined neutral shade. Softer finishes are usually easier for beginners to apply and maintain.

    Step 12: Use Setting Spray If Needed

    Setting spray is optional. Hold it away from the face, mist lightly, and let it dry naturally. It can help the layers look more blended and may improve wear during long days or warmer weather.

    What Beginner Makeup Mistakes Should You Avoid?

    The biggest mistake I see is applying too much too soon. Thick foundation, heavy concealer, excessive powder, dark brows, and strong blush make blending harder.

    Another mistake is copying someone else’s routine without considering skin type or climate. Makeup that works during a humid Florida summer may need different preparation from makeup worn during a dry Colorado winter.

    Do not rush blending either. Soft edges make complexion makeup, eyeshadow, bronzer, and blush look more polished.

    How Can Beginners Do Makeup in Five Minutes?

    How Can Beginners Do Makeup in Five Minutes?

    When I am short on time, I even out only the areas that need coverage, lightly define the brows and lashes, add a little cheek color, and finish the lips. Choosing the best drugstore makeup products makes this routine affordable, simple, and easy to complete without sacrificing a polished look. This quick routine works well for busy workdays, college mornings, school runs, or casual weekends.

    Frequently Asked Questions (FAQs)

    1. What is the easiest makeup routine for beginners step by step?

    Start with clean, moisturized, sun-protected skin, create a light base, add concealer where needed, set areas that crease, define the brows and eyes, add cheek color, finish the lips, and use setting spray only when useful.

    2. Should concealer go before or after foundation?

    For most beginners, foundation first is easier because it may already cover some discoloration. You can then use less concealer and apply it only where extra coverage is needed.

    3. Do beginners need primer and setting spray?

    No. Both are optional. Use them when they address a real concern such as shine, texture, dryness, or makeup longevity.

    4. Should makeup always be layered from lightest to heaviest?

    Not necessarily. Formula matters. Cream, liquid, and powder textures behave differently, and some people prefer doing eye makeup before their complexion. Think of the standard order as a beginner-friendly framework rather than an unbreakable rule.

    Final Thoughts

    A good beginner routine should make makeup easier, not more intimidating. I recommend learning one technique at a time, keeping layers thin, and adjusting the routine to your skin and environment. Once the basics feel natural, you can experiment with different finishes and levels of definition.

  • Professional Nail Tools for Home Use: What You Actually Need

    Professional Nail Tools for Home Use: What You Actually Need

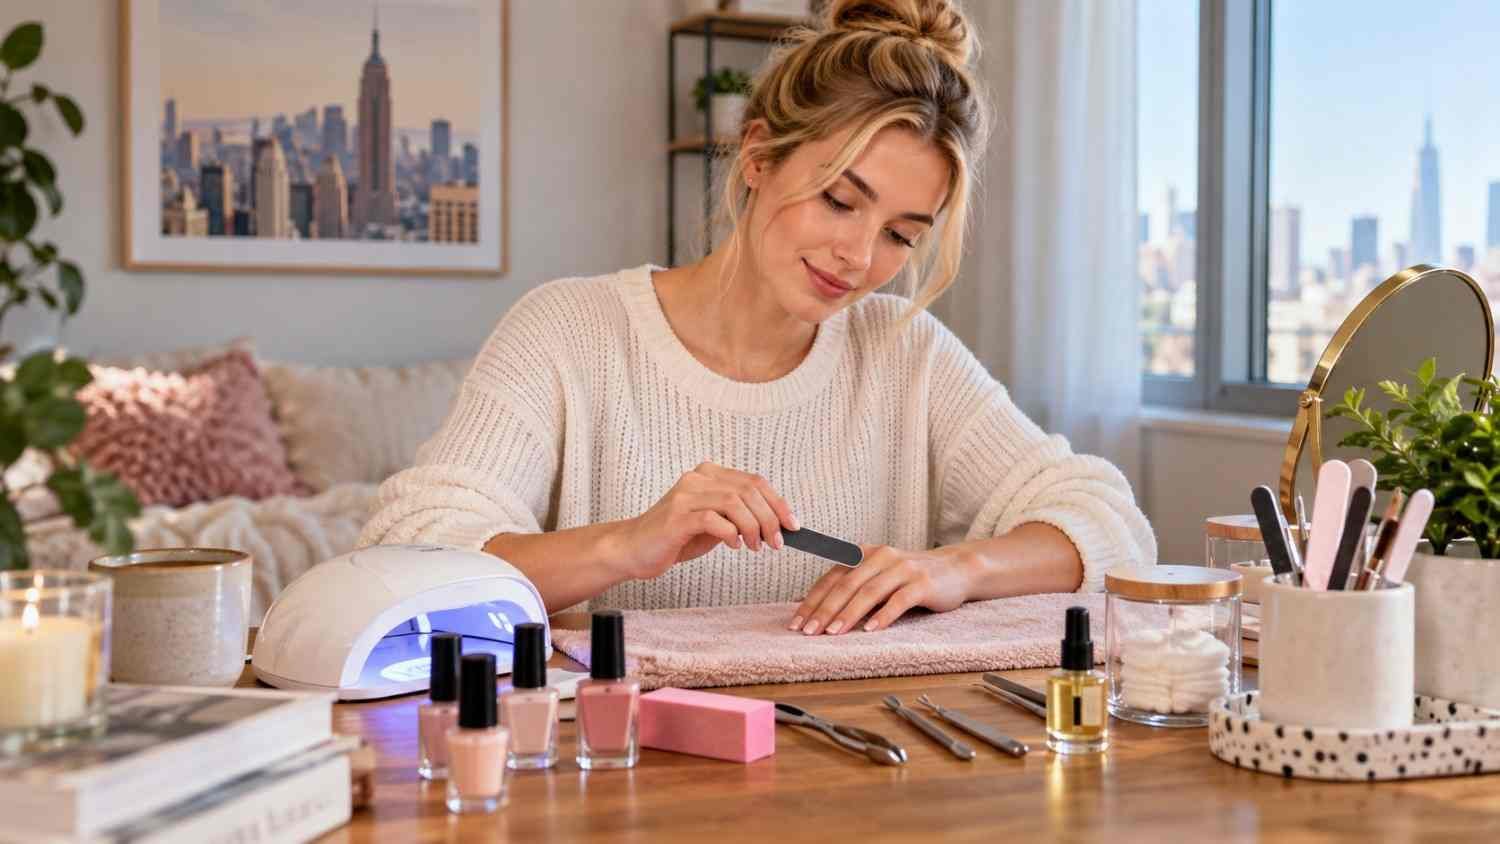
    I used to think a better manicure mostly came down to polish. After a few rushed attempts at home, I realized the tools were doing much of the work. A sharp clipper, a dependable file, and a simple cuticle tool could make an ordinary manicure feel cleaner and more controlled without filling an entire drawer.

    I also noticed that buying every tool labeled professional was not the answer. Some pieces rarely earned their space, while a few well-made basics made shaping, prep, and cleanup noticeably easier. The goal is not to recreate a salon station at home. It is to build a small kit that matches the kind of nail care you actually do.

    What Makes a Nail Tool Professional?

    Professional does not automatically mean expensive, complicated, or electric. A useful professional-grade tool should be precise, comfortable to hold, durable, and easy to clean. Stainless steel is common for reusable implements because it is sturdy and practical for repeated cleaning. That balance keeps the routine practical, consistent, and easier to maintain daily.

    The Essential Professional Nail Tools for Home Use

    The Essential Professional Nail Tools for Home Use

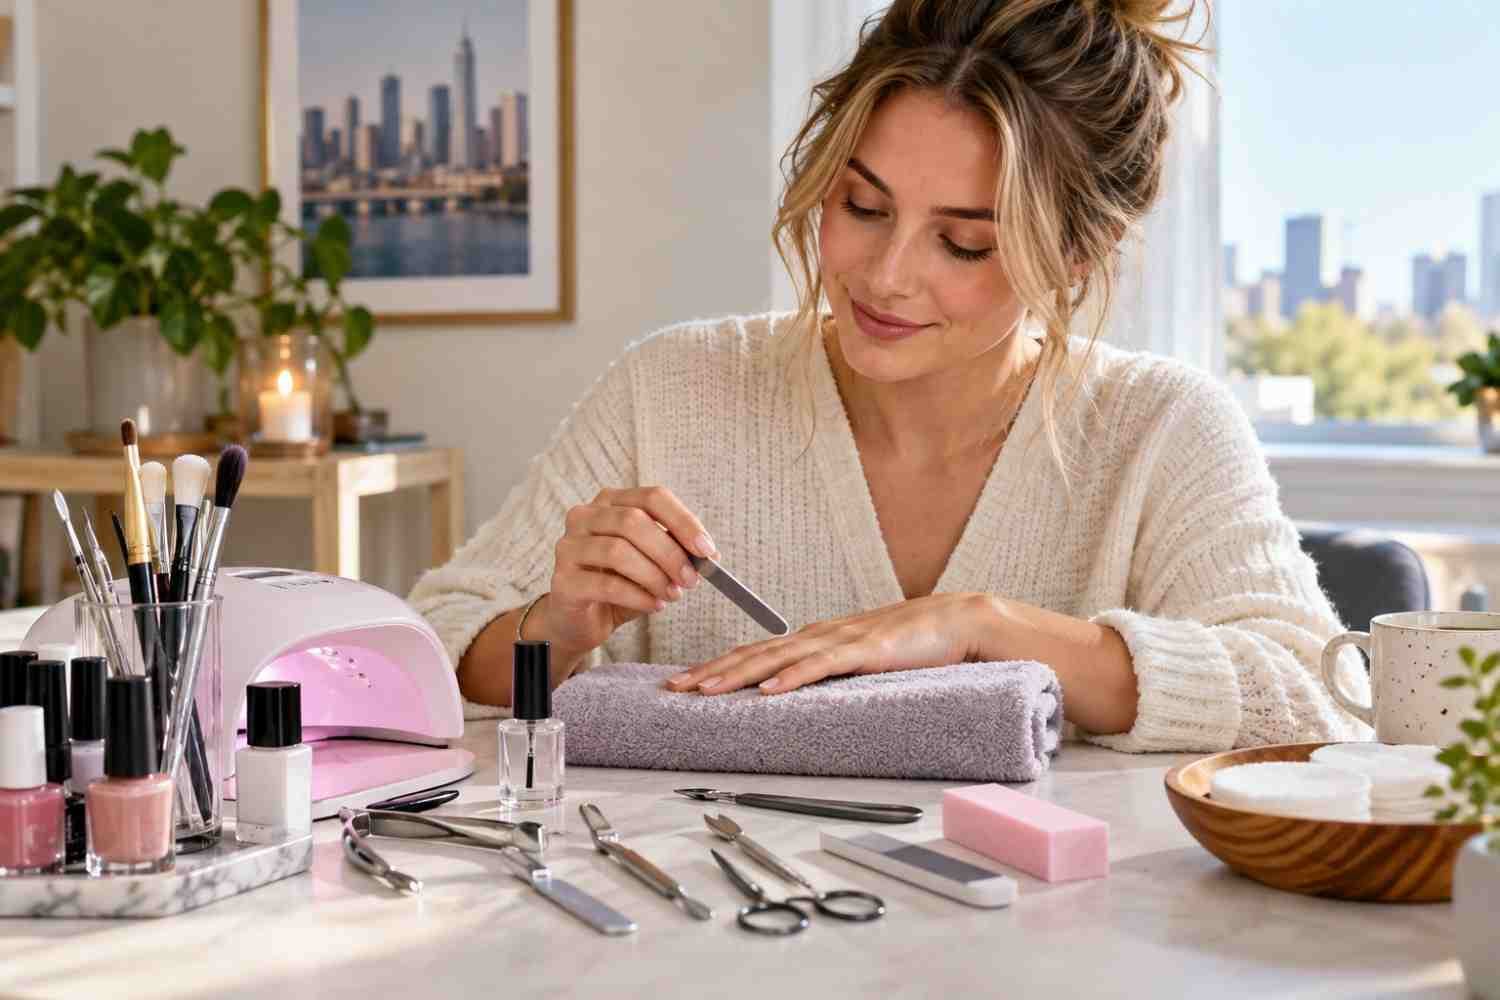
    Start with nail clippers for controlled length reduction. Fingernail clippers should let you make clean cuts without crushing the edge. After trimming, use a file to refine the shape rather than trying to create the final outline with the clippers alone.

    A double-sided nail file is one of the most useful pieces in the kit. Different grits let you handle shaping and finishing with more control. For natural nails, gentle filing is preferable to aggressive back-and-forth sawing, which can weaken the edge.

    A buffer can smooth minor surface irregularities and create a cleaner finish, but it should not become a routine way to thin the nail plate. Light pressure is enough for most home manicures.

    A cuticle pusher can help tidy the nail area, but technique matters more than appearance. The cuticle helps protect the nail from infection, so it should not be aggressively cut or forced backward. If a hangnail needs attention, a precise cuticle nipper can remove the loose piece without digging into healthy skin.

    Prep and Finishing Tools Worth Keeping Nearby

    Clean preparation often separates a neat manicure from one that starts lifting or looking uneven quickly. Lint-free wipes are useful for removing dust and residue, while the appropriate nail cleanser or alcohol can help prepare the nail surface when a product system calls for it.

    If you regularly wear gel polish, an LED curing lamp becomes an important piece of equipment. The lamp needs to be compatible with the gel products being used, because curing is not simply a matter of choosing the brightest light. Follow the product manufacturer’s curing time and lamp recommendations rather than guessing.

    Cuticle oil belongs in the finishing routine, especially after filing, washing, or polish removal. Hydrated surrounding skin makes the manicure look more finished and helps reduce dry, rough skin around the nail.

    For people who like efficient routines, time-saving beauty tools for everyday use can also make sense when the same few tasks are repeated regularly. The point is convenience without turning a simple manicure into an equipment-heavy project.

    When an Electric Nail Drill Makes Sense

    An electric nail file can be useful for people who regularly maintain gel or acrylic enhancements, remove product, or perform detailed shaping. It offers speed and consistent results when the user understands pressure, bit selection, and movement.

    For someone who mainly trims and shapes natural nails, however, an e-file is not essential. A quality hand file provides plenty of control and has a smaller learning curve. Beginners should avoid treating a nail drill like a shortcut. Holding it in one spot too long or applying excessive pressure can generate heat and damage the natural nail.

    Match the Kit to Your Nail Routine

    A natural-nail routine can stay simple: clippers, a file, buffer, gentle cuticle-care tool, nail brush, and cuticle oil cover most needs. Gel users can add lint-free wipes, appropriate prep products, a compatible LED lamp, and removal supplies.

    A compact setup is useful for people who move between home, work, and travel. Portable beauty tools for frequent travelers can keep the essentials organized without taking over a toiletry bag, especially when choosing multipurpose tools and compact files.

    Hygiene Is Part of Tool Quality

    Hygiene Is Part of Tool Quality

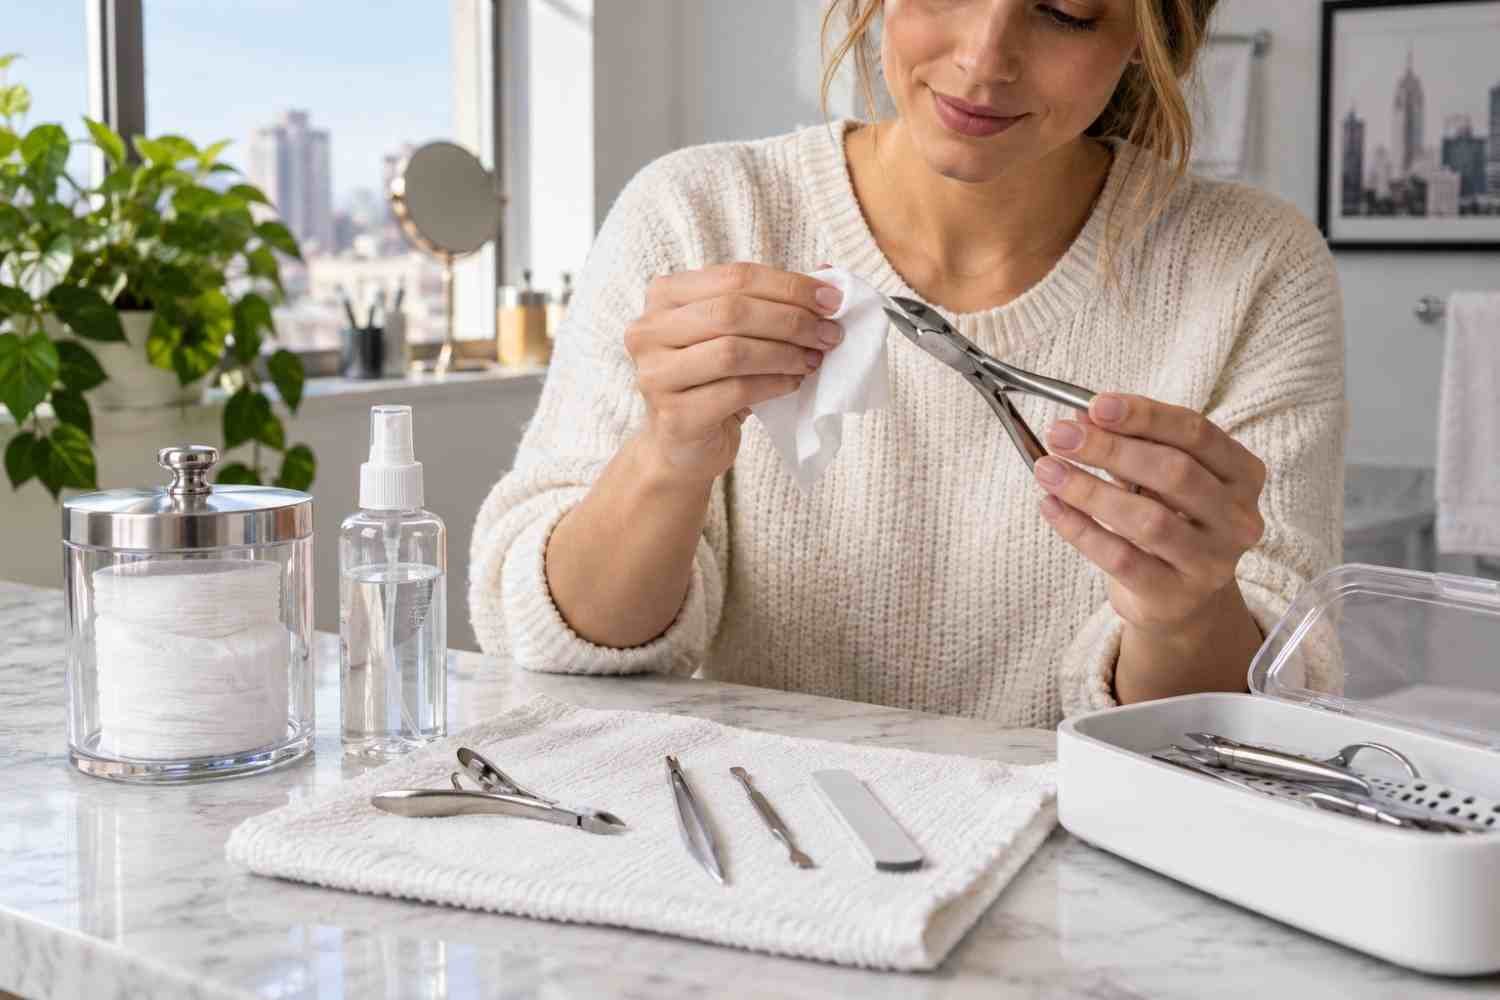
    Clean tools are not an optional extra. Wash reusable implements according to their material and the manufacturer’s instructions, then disinfect them appropriately and allow them to dry completely before storage. Keep personal tools separate from other people’s supplies.

    The safest approach is simple: clean your hands and workspace, avoid cutting living cuticle tissue, and stop if a tool causes pain. If a nail changes color, texture, or shape unexpectedly, professional medical advice is more appropriate than trying to correct the problem with stronger tools.

    Spend More Where Precision Matters

    You do not need premium versions of everything. Put more of your budget toward tools that directly affect control and repeated use, such as a good file, well-made clippers, precise nippers, or a reliable curing lamp if you use gel.

    FAQs: Professional Nail Tools for Home Use: What You Actually Need

    1. What are the most important professional nail tools for home use?

    Start with clippers, a quality file, buffer, cuticle-care tool, nail brush, and cuticle oil. Add gel-specific equipment only if your routine requires it.

    2. Do I need a nail drill for home manicures?

    Not usually. A hand file is enough for basic natural-nail care. Drills become more useful for regular gel or acrylic maintenance.

    3. Are stainless steel nail tools worth buying?

    Yes, especially for reusable implements. Durable stainless steel can offer good control and is practical for proper cleaning and maintenance.

    4. How often should nail tools be cleaned?

    Clean tools after use and disinfect reusable implements appropriately. They should be completely dry before being stored to reduce contamination and corrosion risks.

    Build a Kit That Earns Its Space

    The best home manicure setup is rarely the biggest one. It is the collection of tools you can reach for confidently, maintain properly, and use without fighting the equipment. Good clippers, a reliable file, sensible cuticle care, and clean finishing tools can cover an impressive amount of nail work.

    Professional results at home come less from owning everything and more from knowing what each tool is meant to do. Choose carefully, work gently, and let a smaller kit do more.

  • Makeup That Lasts All Day: A Long-Wear Routine That Works

    Makeup That Lasts All Day: A Long-Wear Routine That Works

    A fresh makeup look should not disappear before lunch. Heat, humidity, commuting, office air conditioning, facial oil, and everyday touching can make foundation fade, crease, or separate. I have found that how to make makeup last all day is less about piling on more product and more about preparing the skin well, applying thin layers, and setting only where extra hold is needed.

    Why Does Makeup Fade, Separate, or Crease?

    Makeup usually breaks down because oil, sweat, movement, or excess product weakens its grip. Heavy moisturizer can leave skin too slick, while dry patches can make foundation cling unevenly. Hot, humid weather can speed up fading during US summers.

    Formula compatibility matters too. If primer and foundation pill, separate, or slide when layered, I simplify the routine or change one formula.

    How Should I Prep My Skin Before Makeup?

    I start with clean skin and a lightweight moisturizer suited to my skin type. During the day, I apply sunscreen and give my skincare time to absorb before starting makeup. Applying foundation while the surface still feels wet or greasy can make later layers move.

    Primer should solve a specific problem. On an oily T-zone, I may use a gripping or mattifying primer. On dry skin, I prefer a smoother, more hydrating base. I keep the layer thin before foundation.

    How Do I Apply Foundation So It Lasts Longer?

    How Do I Apply Foundation So It Lasts Longer?

    Thin, buildable layers usually wear better than one thick coat. I apply a small amount where I need coverage most and blend outward.

    Instead of swiping repeatedly, I press and push foundation into the skin with a damp sponge or dense brush. If I need extra coverage, I build another light layer only over redness or discoloration.

    I also avoid loading unnecessary product onto high-movement areas such as the sides of the nose and upper lip. If those spots look even, less product often means less separation later.

    What Is the Sandwich Setting Method?

    The sandwich-setting technique adds hold without relying on a heavy final layer of powder. After liquid and cream complexion products, I lightly mist setting spray and let it settle. Then I press a small amount of translucent loose powder into areas that crease or become oily, such as the T-zone, around the nose, and under the eyes when needed. This lighter approach can be especially useful when wearing the best concealer for mature skin, since too much powder may emphasize fine lines or dryness.

    After blush, bronzer, eye makeup, and lips are finished, I use another light mist of setting spray. Some makeup artists also mist between selected steps for very long days, but I avoid soaking the skin.

    How Can I Keep Blush, Bronzer, Eyes, and Lips From Fading?

    For extra staying power, I layer a light cream or liquid blush or bronzer under a small amount of powder in a similar shade. The first layer gives color and grip, while the powder helps set it.

    For eye makeup, I keep excess skincare away from the lids and use eye primer if creasing is common. Waterproof eyeliner and tubing or water-resistant mascara can help reduce smudging in sweat and humidity.

    For lips, longer-wear or transfer-resistant formulas generally hold up better than very creamy textures.

    How Do I Make Makeup Last on Oily or Dry Skin?

    How Do I Make Makeup Last on Oily or Dry Skin?

    For oily skin, I concentrate oil control where I need it most. A mattifying or gripping primer through the T-zone, thin foundation, and pressed powder can improve wear without making the entire face look flat.

    For dry skin, I prioritize hydration and use powder sparingly. Too much powder can exaggerate flakes and texture. Combination skin often benefits from more setting around the forehead, nose, and chin, with lighter powder elsewhere.

    How Do I Keep Makeup On in Heat and Humidity?

    When temperatures rise, I simplify. Heavy skincare and thick complexion layers are more likely to move once sweat appears.

    I use lighter layers and give each step time to set. Long-wear, transfer-resistant, smudge-resistant, and waterproof formulas can be useful when I expect an outdoor event, humid commute, or long summer day.

    Most importantly, I do not powder directly over sweat. I blot moisture first and then touch up only where necessary.

    How Should I Touch Up Makeup Without Making It Cakey?

    How Should I Touch Up Makeup Without Making It Cakey?

    When shine appears, I blot instead of immediately adding powder. Blotting papers or a clean tissue can remove excess oil without building extra texture.

    If foundation has shifted, I gently press the existing makeup back into place before adding anything. Only then do I use a tiny amount of concealer, foundation, or powder if coverage is still needed. I also keep my hands off my face because oils from the fingers can break down base makeup.

    For me, how to make makeup last all day comes down to controlled layering rather than maximum layering.

    FAQs About Long-Lasting Makeup

    1. Should I Use Both Setting Powder and Setting Spray?

    Yes, when used strategically. Powder helps control oil and stabilize cream or liquid makeup, while setting spray can help the finished layers meld together and improve wear.

    2. Does Primer Really Make Makeup Last Longer?

    It can, especially when it targets oiliness, texture, or poor foundation grip. I do not consider primer mandatory for every skin type, so I use it only where it improves wear or finish.

    3. How Can I Stop Makeup From Melting by Midday?

    Use lightweight skincare, let layers set, apply foundation sparingly, press instead of swipe, set oily areas, and blot before touching up. In hot weather, lighter layers usually wear better than thick ones.

    4. What Is the Best Way to Keep Makeup Fresh From Morning to Night?

    The most reliable answer to how to make makeup last all day is balanced skin prep, thin application, targeted powder, setting spray, durable eye and lip formulas, and minimal midday touch-ups.

    Final Thoughts

    Long-lasting makeup should still look like skin. I get better wear when I build coverage gradually, press products into place, and set strategically. A consistent skin care routine can also create a smoother, more balanced base for makeup, especially when it supports the skin’s hydration needs.

    The exact routine can change with oiliness, dryness, temperature, and humidity, but the core approach stays the same: prep carefully, layer lightly, set intelligently, and touch up only when needed.

  • How to Make Perfume Last Longer on Skin Without Overspraying

    How to Make Perfume Last Longer on Skin Without Overspraying

    Perfume does not disappear because your skin “eats” fragrance. It fades because aromatic molecules leave your skin at different speeds. A 2025 study measuring fragrance evaporation on volunteers found that hydration, water loss, and skin-surface characteristics can influence that process, although the research involved only 10 people. 

    That chemistry explains the simplest answer to how to make perfume last longer on skin: start with hydrated skin, apply fragrance evenly, and avoid habits that encourage faster evaporation.

    Why Perfume Lasts Longer on Some Skin

    A fragrance works almost like a timed release. Highly volatile top notes—often citrus, herbs, and bright aromatics—leave first. Less volatile heart and base materials remain detectable longer. The Open University’s explanation of perfume chemistry notes that volatility helps determine why top, middle, and base notes emerge at different stages.

    Skin is not an inert perfume strip. Temperature, hydration, airflow, perspiration, and the fragrance formula affect what eventually reaches your nose. That helps explain why one perfume may seem powerful on one person but comparatively short-lived on another.

    In the recent evaporation study, hydration was the strongest measured skin factor associated with evaporation among the small volunteer group. More hydrated skin tended to retain certain less-volatile fragrance molecules better, while greater transepidermal water loss was linked with faster evaporation of some compounds.

    The Best Way to Make Perfume Last Longer on Skin

    1. Moisturize Before You Spray

    Apply a thin layer of fragrance-free moisturizer to the areas where you plan to wear perfume. Allow it to settle briefly before spraying.

    If you want to avoid competing aromas, choose “fragrance-free” rather than simply “unscented.” The American Academy of Dermatology explains that unscented products can still contain fragrance ingredients used to cover other odors. 

    A tiny amount of petroleum jelly may also provide a more occlusive surface on spots such as the wrists. Direct research on petroleum jelly specifically extending perfume wear is limited, however, so a normal fragrance-free lotion is the more practical starting point.

    If your skin feels dry, tight, or irritated after using too many exfoliating products, learning how to repair your skin barrier after over-exfoliating can help you build a healthier base before applying fragrance.

    2. Apply After Bathing—but Not Because Your Pores “Open”

    2. Apply After Bathing—but Not Because Your Pores “Open”

    A shower can improve fragrance application because it removes old scent, sweat, and surface debris while leaving the outer skin hydrated.

    But pores do not literally open after warm water. Towel-dry, moisturize, let the lotion absorb, and then spray your perfume. Avoid freshly shaved, broken, sunburned, or irritated skin because the alcohol and fragrance ingredients may sting.

    3. Use Pulse Points Strategically

    Wrists, inner elbows, and the sides of the neck are traditional fragrance locations because warmth helps aromatic molecules move into the surrounding air.

    That can improve projection, but there is a tradeoff: more heat can also encourage evaporation.

    For longer wear, pair one warm pulse point with a more protected location, such as the upper chest or lower neck. The warmer area provides projection while the protected spot is less exposed to frequent hand washing, wind, and friction.

    4. Spray and Leave It Alone

    Rubbing your wrists together does not literally smash or “break” perfume molecules under normal conditions.

    The more sensible reason to avoid vigorous rubbing is physical: it spreads the fragrance into a thinner layer, adds warmth, and can encourage the most volatile opening materials to disappear sooner.

    Spray from several inches away, then allow the fragrance to dry naturally.

    5. Match Fragrance Concentration to Your Goal

    Higher fragrance concentrations often provide better persistence, but the wording on the bottle is not an absolute guarantee.

    When deciding whether a more expensive fragrance is worthwhile, consider how often you wear it, how long you want it to last, and whether the added concentration provides a noticeable benefit; this same approach can help identify beauty products worth investing in.

    The International Fragrance Association notes that terms such as eau de toilette and eau de parfum do not have one universally fixed international concentration definition. The ranges below reflect common industry practice.

    Fragrance Type Typical Concentration General Character
    Eau de Cologne 3–8% Light and fresh
    Eau de Toilette 5–15% Moderate wear
    Eau de Parfum 10–20% Often fuller and longer-lasting
    Extrait/Perfume 15–40% Usually richest and most persistent

    Composition matters as much as concentration. A woody eau de toilette with persistent base materials can sometimes outlast an eau de parfum dominated by bright citrus notes.

    Try This Two-Wrist Longevity Test

    Try This Two-Wrist Longevity Test

    Instead of guessing which trick works, run a simple test on your own skin.

    Start with clean wrists. Apply fragrance-free lotion to one wrist while leaving the other bare. Wait about two minutes, then spray each wrist once using the same perfume, distance, and amount. Do not rub either side.

    Compare them after 30 minutes, two hours, four hours, and six hours. Avoid washing the area or applying additional fragrance.

    If the moisturized wrist consistently remains easier to detect later, you have evidence that pre-moisturizing works for your skin and that particular fragrance.

    Repeat the experiment another day because activity, temperature, humidity, and even your own sense of smell can change the result.

    Why Your Perfume May Still Fade Quickly

    You May Be Going Nose-Blind

    Repeated exposure to the same odor can make you less conscious of it even though other people can still detect the fragrance.

    Before adding several extra sprays, move into fresh air or ask someone nearby whether your perfume is still noticeable.

    Your Perfume May Be Designed to Fade Lightly

    Bright citrus, herbs, and airy “clean” accords often create an impressive opening but can disappear sooner than woods, musks, balsamic notes, and other slower-evaporating materials.

    That is not automatically evidence of a cheap or poorly made perfume. Sometimes a transparent, short-lived character is part of the perfumer’s design.

    Heat and Sweat Change Performance

    A summer commute, outdoor activity, or warm workplace can noticeably change fragrance behavior.

    Heat helps fragrance diffuse, which may make it stronger at first without necessarily making it last longer. Sweat, friction, and repeated washing can also remove or redistribute perfume.

    During hot U.S. summers, applying a moderate amount to protected skin can be more effective than constantly respraying exposed wrists.

    What About Spraying Perfume on Clothing?

    What About Spraying Perfume on Clothing?

    Fabric often retains fragrance longer than bare skin, so a light mist on clothing can extend your overall scent trail.

    It does not technically make the perfume remain longer on your skin, though.

    Always test a hidden area first. Perfume oils, alcohol, or colorants may affect silk, satin, suede, leather, and some pale or delicate fabrics.

    Skin Safety Matters More Than Longevity

    In the United States, perfumes and colognes marketed for application to the body are regulated as cosmetics. The FDA guidance on fragrances in cosmetics notes that some fragrance components can cause sensitivities or allergic reactions in susceptible people. 

    If a perfume produces itching, burning, redness, swelling, or a recurring rash, stop applying it to that area.

    Fragrance is a recognized cause of allergic contact dermatitis, and a medical review indexed by the National Institutes of Health estimated fragrance allergy prevalence in the general population at approximately 0.7% to 2.6%.

    Longer wear is never worth repeatedly irritating your skin.

    Frequently Asked Questions

    1. Does Vaseline make perfume last longer?

    It may provide an occlusive surface that helps reduce rapid evaporation, but direct evidence is limited. A fragrance-free moisturizer is generally easier to spread evenly over larger areas.

    2. Where should I spray perfume for the longest wear?

    Try the upper chest, lower neck, inner elbows, and wrists. Include at least one area protected from regular washing, rubbing, wind, and direct airflow.

    3. Why does perfume last longer on some people?

    Hydration, skin temperature, water loss, environmental conditions, fragrance composition, and application habits all influence evaporation, so the same perfume can perform differently from person to person.

    4. How to make perfume last longer on skin in hot weather?

    Moisturize first, choose protected application areas, avoid rubbing, and favor fragrances with substantial heart or base notes. Heat increases diffusion, so spraying more does not necessarily extend wear.

    A Better Fragrance Routine Beats More Sprays

    The biggest improvement often happens before the perfume even leaves the bottle. Hydrate your skin, apply fragrance to clean areas, let it dry naturally, and choose locations based on both projection and protection. Then test the routine on your own skin instead of relying on universal fragrance rules.

    Perfume longevity is partly chemistry and partly individual biology, so no trick can force every scent to remain noticeable all day. But controlling hydration, heat, friction, and fragrance concentration gives those aromatic molecules a better surface and a slower route into the air. That is far more reliable than simply spraying more.

  • Best Concealer for Mature Skin: Smooth, Natural Coverage

    Best Concealer for Mature Skin: Smooth, Natural Coverage

    As skin changes with age, concealer has to do more than cover dark circles. It should brighten without looking heavy, soften discoloration without settling into fine lines, and stay comfortable on drier or more textured skin. When I look for the best concealer for mature skin, I focus on hydration, flexibility, buildable coverage, and a finish that still looks like real skin.

    For mature under-eyes, I usually get the smoothest result from thin layers and a natural or softly radiant finish. Even a hydrating concealer can crease when I use too much.

    What Type of Concealer Works Best on Mature Skin?

    I generally prefer lightweight liquid or serum-like textures under the eyes because they spread easily and give me control over coverage. When choosing the best concealer for dark circles, I also look for a flexible formula that moves naturally around crow’s feet and expression lines rather than drying into a thick, rigid layer.

    Cream concealers can be useful for age spots, redness, and hyperpigmentation. I apply them only where extra pigment is needed and soften the edges instead of covering the whole area.

    Is Radiant or Matte Concealer Better for Fine Lines?

    For dry or textured mature skin, I usually choose a natural, satin, or softly radiant finish. These finishes can make the under-eye area look fresher without adding obvious shimmer.

    Very matte formulas can work for oilier skin, but I use them carefully around fine lines because powdery textures may emphasize dryness.

    What Ingredients Should I Look for in Concealer?

    What Ingredients Should I Look for in Concealer?

    Hydrating ingredients can make concealer more comfortable on dry mature skin. Hyaluronic acid and glycerin are common humectants, while squalane and other emollients can add softness and slip. I still judge the whole formula because texture and finish matter just as much as the ingredient list.

    How Should I Prep Mature Under-Eyes Before Concealer?

    Skincare comes first. I prep with a lightweight hydrating eye cream or a small amount of hyaluronic acid serum, then give it time to absorb before applying makeup.

    I avoid leaving a thick or greasy layer behind because excess skincare can make concealer slide or separate. The goal is comfortable hydration, especially if the under-eye area looks dry or crepey.

    How Much Concealer Should I Use on Mature Skin?

    Less is usually more. Instead of drawing a large triangle beneath each eye, I start with one or two tiny dots.

    I place them where shadows are strongest, usually near the inner corner and, if needed, toward the outer edge. Then I gently pat the product into the skin with my ring finger or a damp makeup sponge.

    If darkness is still visible, I add another very thin layer. Building coverage gradually usually looks smoother than applying a thick coat at once.

    How Can I Cover Dark Circles Without Looking Cakey?

    How Can I Cover Dark Circles Without Looking Cakey?

    Dark circles may look blue, purple, brown, or gray depending on skin tone and the cause of discoloration. When ordinary concealer is not enough, I prefer subtle color correction rather than piling on more product.

    Peach or warmer tones can help neutralize blue or purple shadows for many complexions. I also avoid choosing a shade that is dramatically lighter than my skin because it can create an ashy effect or emphasize puffiness.

    How Do I Stop Concealer From Creasing in Fine Lines?

    Some movement is normal because the eye area moves whenever we blink, smile, or squint. After blending, I let the concealer settle briefly and gently tap away anything that collects in a line.

    If I need powder, I avoid baking. I use a tiny dusting of finely milled, soft-focus translucent powder only where creasing occurs. A small tapered brush or triangle puff gives me better control and helps prevent a dry, heavy finish.

    How Do I Conceal Age Spots and Hyperpigmentation?

    For age spots, redness, or uneven pigmentation, I use targeted coverage. I place a small amount directly over the discoloration and blend only the edges into the surrounding skin. Changes linked to sun exposure and premature aging can make some areas more noticeable, so precise application helps maintain a natural finish.

    If I still see the spot, I add another thin layer. This avoids the mask-like effect of applying full coverage everywhere.

    What Concealer Mistakes Can Make Mature Skin Look Older?

    What Concealer Mistakes Can Make Mature Skin Look Older?

    The biggest mistake I avoid is overapplication. Thick layers are more likely to settle into lines, separate, and emphasize texture.

    I also avoid skipping moisturizer, applying too much eye cream immediately before makeup, choosing a shade that is far too light, and coating the entire under-eye area with heavy setting powder.

    FAQs About Concealer for Mature Skin

    1. Is Liquid or Cream Concealer Better for Mature Under-Eyes?

    I usually prefer a lightweight liquid formula under the eyes because it is easier to apply in thin layers. Cream formulas can be useful for dark spots or pigmentation.

    2. How Do I Keep Concealer From Settling Into Wrinkles?

    I use lightweight hydration, minimal product, gentle tapping, and only a small amount of setting powder. Thin layers tend to move more naturally with mature skin.

    3. Should I Use Setting Powder Over Concealer After 50?

    Yes, if needed, but I recommend using very little. A finely milled translucent powder applied only where concealer creases can improve wear without making the area look dry.

    4. Should Mature Skin Use a Lighter Concealer Under the Eyes?

    A slightly lighter shade can brighten, but I avoid going several shades lighter. A close match usually looks more natural and reduces the risk of an ashy finish.

    Final Thoughts

    For me, choosing the best concealer for mature skin comes down to using the right texture in the right place. I look for flexible under-eye coverage, targeted pigment for age spots, hydrating skincare underneath, and minimal powder. These choices also fit naturally into a broader approach to skin care and aging, where maintaining hydration and avoiding overly heavy products can help makeup sit more smoothly.

    Thin layers, strategic placement, and a skin-like finish can brighten dark circles and soften discoloration without hiding the natural character of mature skin.

  • Morning Vs Night Skincare Routine Steps Order: The Exact Daily Formula

    Morning Vs Night Skincare Routine Steps Order: The Exact Daily Formula

    Layering your serums in the wrong order wastes money and triggers irritation. When you learn the correct morning vs night skincare routine steps order, your skin shifts from congested to resilient. Morning skin requires protection against solar radiation and pollution; nighttime skin demands repair, cell turnover, and deep barrier replenishment.

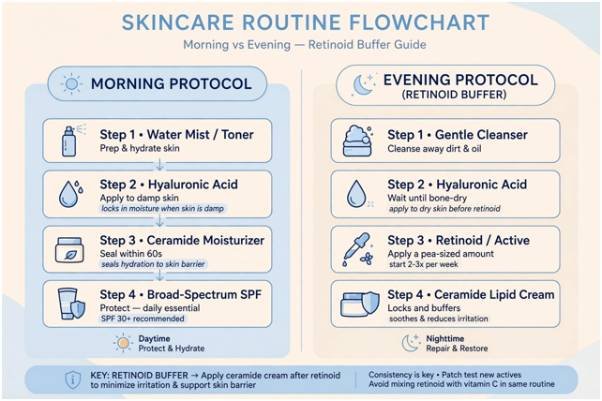
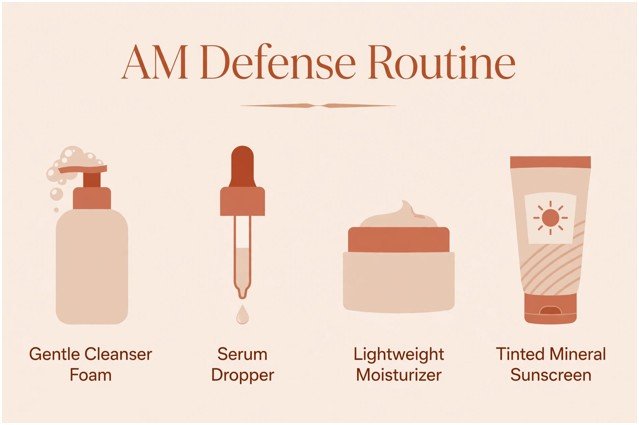
     AM: Cleanse ➔ Tone ➔ Vitamin C ➔ Light Moisturizer ➔ Sunscreen (Protect)

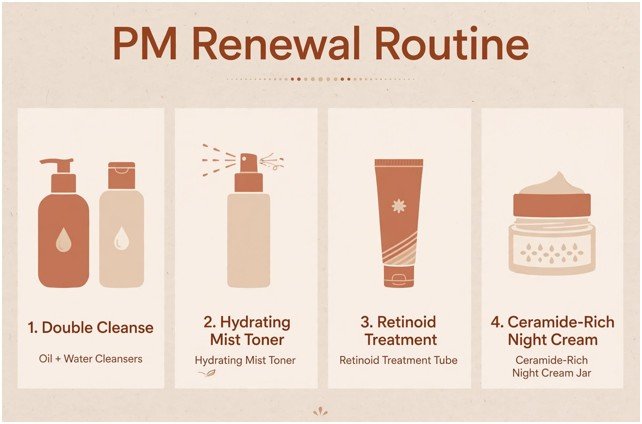
      PM: Double Cleanse ➔ Tone ➔ Retinoid / Acid ➔ Lipid Barrier Cream (Repair)

    The Biological Reason Your AM and PM Routines Must Differ

    The Biological Reason Your AM and PM Routines Must Differ

    Your skin operates on a precise circadian rhythm. During the day, sebum production peaks to create a natural shield while the stratum corneum fights UV damage and oxidative stress. At night, transepidermal water loss (TEWL) surges, skin blood flow accelerates, and nuclear cellular repair mechanisms activate.

    Applying heavy occlusives or light-sensitive actives at the wrong hour works against this biology. The universal rule of formulation physics is simple: apply products from thinnest to thickest consistency, following water-based solutions before oil-based layers.

    Morning Skincare Routine: Step-by-Step Defense Order

    Morning Skincare Routine Step-by-Step Defense Order

    The daytime sequence focuses entirely on non-negotiable photoprotection and neutralizing free radicals before they degrade your collagen lattice.

    +————————————————————————-+

    |                       MORNING STEP SEQUENCE                             |

    |                                                                         |

    |  [Cleanser] ──> [Hydrating Mist] ──> [Antioxidant] ──> [Moisturizer] ──> [SPF 30+]  |

    |   Gentle         Water-based          Vitamin C         Light Emulsion    Shield    |

    +————————————————————————-+

    Step 1: Low-pH Water-Based Cleanser

    Rinse away overnight sebum and shed corneocytes without stripping lipids. The American Academy of Dermatology Association (AAD) emphasizes washing with a non-abrasive, alcohol-free formula to keep your acid mantle intact. If your skin leans dry, a splash of lukewarm water suffices.

    Step 2: Hydrating Toner or Essence

    Pat a water-weight humectant containing glycerin, panthenol, or beta-glucan into damp skin. Damp skin acts like a sponge; it exhibits significantly higher permeability for subsequent actives than parched tissue.

    Step 3: Antioxidant Defense (Vitamin C)

    Apply 4 to 5 drops of L-ascorbic acid (10–15%) or a stabilized derivative. Vitamin C scavenges free radicals generated by ambient UV exposure and pollution, boosting the photoprotective efficiency of your sunblock. Readers frequently ask, can you use niacinamide with vitamin c together? Yes; modern stabilized formulations pair well without causing flushing or destabilizing your formulation.

    Step 4: Lightweight Hydrator

    Use a fast-absorbing gel-cream or light emulsion. This step replenishes the natural moisturizing factor (NMF) without creating an oily film that causes daytime makeup or sunscreen to pill.

    Step 5: Broad-Spectrum Sunscreen

    Apply a nickel-sized amount of broad-spectrum SPF 30 or higher. As clinical guidance from the Cleveland Clinic outlines, sunscreen is your absolute final morning layer. Applying anything over it disrupts the protective chemical or mineral film.

    Night Skincare Routine: Step-by-Step Recovery Order

    Night Skincare Routine: Step-by-Step Recovery Order

    Night is when therapeutic transformation happens. By removing environmental debris and feeding the skin regenerative actives, you encourage cellular renewal.

    +————————————————————————-+

    |                        NIGHT STEP SEQUENCE                              |

    |                                                                         |

    |  [Oil Cleanse] ──> [Water Cleanse] ──> [Toner] ──> [Active (Retinoid)] ──> [Barrier Cream] |

    |   Dissolve SPF      Clear Residue      Prep         Cellular Turnover      Seal Lipids      |

    +————————————————————————-+

    Step 1: The Evening Double Cleanse

    Break down water-resistant sunscreen, particulate grime, and excess sebum with an oil cleanser or cleansing balm. Massage it onto dry skin for 45 seconds, emulsify with warm water, and rinse. Follow immediately with your gentle water-based foaming or gel cleanser to leave pores completely clear.

    Step 2: Balancing Prep & Penetration Enhancers

    Apply a soothing, alcohol-free toner to normalize surface pH. When clearing stubborn congestion, this is the prime spot to address texture and learn how to get rid of closed comedones on forehead using gentle chemical exfoliants.

    Step 3: High-Performance Actives (Retinoids or Exfoliants)

    Apply your cell-signaling actives to completely dry skin.

    • Retinoids (Retinol, Retinal, Tretinoin): Accelerate cellular turnover and stimulate collagen synthesis.
    • Chemical Exfoliants (AHA/BHA): Dissolve the desmosomes binding dull, dead cells together.

    Clinical tip: Alternate these actives across different nights using a skin-cycling model to prevent moisture barrier collapse.

    Step 4: Barrier Lipids and Occlusives

    Seal your treatment with a restorative night cream rich in ceramides, physiological fatty acids, and cholesterol. Research cataloged by the National Institutes of Health shows that disciplined post-wash moisturizing drastically decreases erythema and improves barrier function. For severely dry complexions, lock in moisture with two drops of squalane oil over your cream.

    Layering Pitfalls: Ingredient Collisions to Stop Making

    Problem Combination Why It Fails Safe Correction
    Retinol + Glycolic Acid Simultaneously strips the barrier and spikes inflammation. Separate them: use AHAs on Monday, Retinol on Tuesday.
    Vitamin C + Pure Retinol Requires drastically different pH levels to remain bioavailable. Keep Vitamin C in the AM; reserve Retinol for the PM.
    Sunscreen Mixed Into Cream Dilutes UV filter concentrations and creates uneven protection. Apply moisturizer first, allow 60 seconds to dry, then apply SPF.
    Active Over Occlusive Vaseline or thick petrolatum prevents water-soluble serums from absorbing. Always apply thin serums before dense petroleum-based ointments.

    Frequently Asked Questions

    1. Can I wash my face with only water in the morning?

    Yes, dry and sensitive skin types benefit from a plain water rinse to preserve natural surface lipids.

    2. How long should I wait between skincare steps?

    Wait 30 to 60 seconds for serums to dry down, and let moisturizer set for two full minutes before applying sunscreen.

    3. Do I apply eye cream before or after facial moisturizer?

    Apply eye cream before heavy face creams so delicate orbital skin absorbs the concentrated ingredients directly.

    4. Can I use hyaluronic acid morning and night?

    Yes, hyaluronic acid is a non-reactive humectant suitable for both routines when applied to damp skin.

    Stop Overcomplicating Your Routine

    Your skin isn’t a lab experiment—it’s a living barrier that values predictability over endless product stacking. Once you align your active ingredients with your body’s circadian clock, results follow naturally. Pick your core essentials, master the viscosity rule, and stay consistent for eight weeks before swapping products.

  • Why Do My Press On Nails Keep Popping Off? The Real Fix

    Why Do My Press On Nails Keep Popping Off? The Real Fix

    A press-on nail can look secure and still be one shower away from lifting. Usually, the problem is not simply weak glue. Adhesive fails when oil, moisture, air gaps, poor sizing, or movement prevents the fake nail from forming close contact with the natural nail.

    If you keep asking why do my press on nails keep popping off, look at which nail fails, where it lifts, and how soon it happens. Those clues usually reveal whether the real issue is prep, fit, curing time, or daily wear.

    What Is Happening When a Press-On Pops Off?

    A 2024 medical review of do-it-yourself nail cosmetics notes that press-on kits commonly use cyanoacrylate- or methacrylate-based glues and are generally designed for about one to two weeks of wear. Read the medical review on DIY nail cosmetics. For glue to hold, the press-on needs close contact with a clean, dry nail plate. Oil creates a barrier. Water can weaken a fresh bond. A tip that is too wide, too curved, or too flat creates constant leverage.

    In other words, longevity depends on both chemistry and fit.

    Five Reasons Press-On Nails Lift Too Soon

    1. Oil or Lotion Is Still on the Nail

    Natural oil, hand cream, cuticle oil, and fingerprints can interfere with adhesion.

    The same principle applies to other beauty routines where product layers can interfere with application; understanding why does sunscreen pill under makeup can help explain how residue and layering affect the final result.

    Before applying nails, wash and dry your hands, remove surface dust, then wipe each nail with isopropyl alcohol or the prep pad supplied with the set. Once cleaned, avoid touching the nail plate.

    Do not over-buff. Aggressive filing may thin the natural nail rather than improve wear.

    2. The Press-On Is the Wrong Size

    A press-on that overlaps the sidewalls can catch on hair or clothing and act like a tiny lever.

    If you are between sizes, choose the smaller option if it still covers the nail properly, then file the edges for a closer fit.

    3. The Curves Do Not Match

    A highly curved press-on placed over a flat nail may leave an air pocket in the center. A flat tip on a more curved nail can lift at the sides.

    Choose a style that follows your natural curve. Extra adhesive cannot permanently correct a badly mismatched shape.

    The same attention to shape and fit matters when refreshing textured hair, since how to refresh curly hair without washing often depends on restoring the curl pattern without disturbing its natural shape.

    4. You Are Rushing the Bond

    Fast-setting glue grabs quickly, but that does not mean the bond is fully stable.

    Place the press-on carefully, then hold firm, even pressure for about 20 to 30 seconds or for the time stated by the manufacturer. Press across the whole nail, not only the center, so the edges make contact too.

    5. Water Reaches the Nails Too Soon

    5. Water Reaches the Nails Too Soon

    Showering, swimming, doing dishes, or soaking in a bath immediately after application puts a fresh bond under stress.

    Applying press-ons before bed, after your final hand-washing, gives the adhesive several dry, low-movement hours before everyday tasks.

    Use the Failure Pattern to Diagnose the Problem

    What happens Most likely cause Best adjustment
    Nail falls off cleanly within hours Oil or incomplete prep Degrease carefully and avoid touching the nail
    Same finger always lifts Poor fit or nail curvature Refit that finger and check for a gap
    Side edge lifts first Tip is too wide or poorly shaped Size down or file the edge
    Nails lift after dishes or a shower Water exposure Give the bond more dry time
    Nail becomes sore or damaged Trauma, over-buffing, or irritation Stop reapplying until it recovers

    If eight nails stay on and the same two fail, changing glue brands may not solve anything. Those fingers probably need a better fit.

    A Better Application Routine

    Size all ten press-ons before opening the glue. Adjust the sides first, then wash and dry your hands thoroughly.

    Gently push back excess cuticle without cutting living skin. Lightly buff only if the manufacturer recommends it. Remove all dust and wipe the nail plate with alcohol or the supplied dehydrating pad.

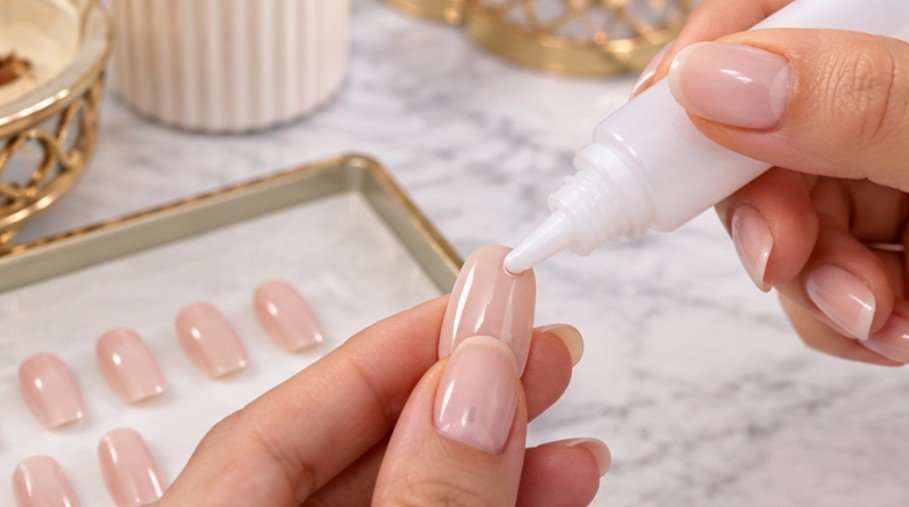
    Work one nail at a time. Use enough adhesive for full contact without flooding the cuticle. Position the tip, press from the base toward the free edge to reduce trapped air, and hold it still for about 30 seconds.

    Then avoid prolonged water exposure or heavy hand work for the next several hours.

    More Glue Is Not Always Better

    More Glue Is Not Always Better

    Too much glue can create an uneven layer and squeeze adhesive onto surrounding skin.

    That matters because nail products can cause irritation or allergic contact dermatitis in some people. The U.S.

    Food and Drug Administration explains FDA guidance on nail care products that reactive ingredients used in artificial-nail products may cause redness, swelling, and pain in people who become sensitized, and recommends minimizing skin contact. 

    The American Academy of Dermatology also identifies artificial nails and nail products as possible triggers of contact dermatitis, including reactions that may appear away from the fingertips.

    Persistent redness, itching, swelling, blistering, pain, or nail separation is a reason to stop using the product and seek medical advice.

    Why a Lifted Nail Should Not Be Ignored

    A partially detached press-on can trap moisture underneath.

    Cleveland Clinic dermatologist Taryn Murray, MD, has explained that moisture trapped beneath press-on nails can create an environment where bacteria or fungi may grow. Signs worth watching include swelling, redness, tenderness, and nail discoloration. 

    If a press-on is clearly lifting, remove it as directed, then clean and dry the natural nail before reapplying.

    Nail-Glue Safety Matters Too

    Nail-Glue Safety Matters Too

    Many fast nail glues contain cyanoacrylate. Poison Control explains that cyanoacrylate bonds skin rapidly and can release heat during polymerization. Large exposures can cause irritation or even burns, and pulling bonded skin apart may worsen an injury. 

    Be particularly careful around cotton or wool because cyanoacrylate can react with these materials and generate significant heat.

    In the U.S., significant glue exposures involving the eyes, mouth, extensive skin bonding, or severe symptoms warrant Poison Control or medical advice rather than experimenting with aggressive removal methods.

    Frequently Asked Questions 

    1. Why do my press on nails keep popping off after one day?

    Oil, poor sizing, an air gap, too little setting pressure, or early water exposure are the most common reasons.

    2. Should I buff my nails before applying press-ons?

    A very light buff can help if the product instructions recommend it. Avoid aggressive filing because it can thin and weaken your natural nails.

    3. Is nail glue better than adhesive tabs?

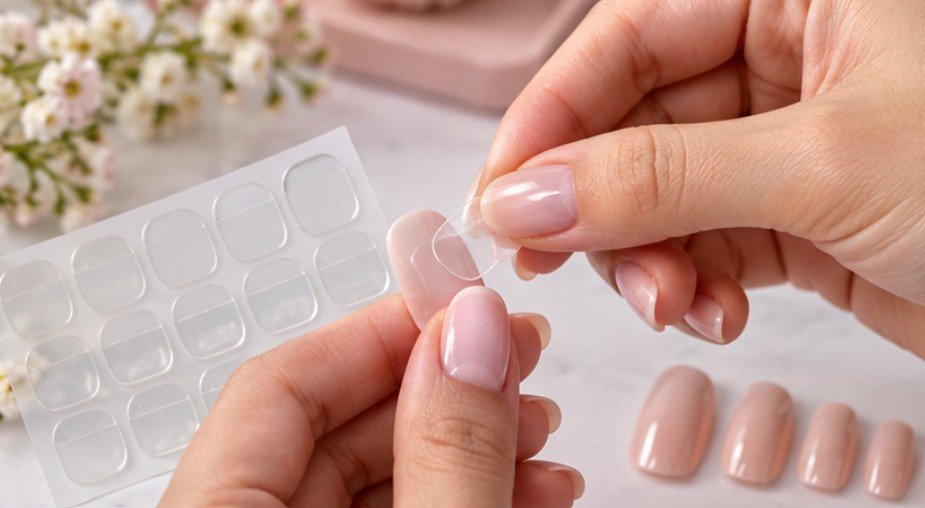
    Glue usually provides longer wear. Tabs are easier to remove and may work better for short-term use, events, or reusable press-on sets.

    4. Can I reglue a press-on that has lifted?

    Yes, if both surfaces are clean, dry, undamaged, and free of old adhesive. Never seal moisture, dirt, or irritation underneath a lifting nail.

    The Takeaway: Fix the Weakest Point

    A popping press-on usually leaves evidence. A clean early release points to prep, repeated failure on one finger points to fit, side lifting suggests sizing or curvature, and post-shower lifting points to moisture.

    Instead of automatically reaching for stronger glue, improve the contact between the two surfaces. Clean carefully, fit each nail individually, use even pressure, and give the adhesive a dry window before testing it. If soreness, rash, discoloration, or nail separation appears, stop and address the natural nail first. Long wear starts with precise fit, not excess glue.

  • What Makes Next-Generation Facial Sculpting Devices Different?

    What Makes Next-Generation Facial Sculpting Devices Different?

    I started noticing how quickly facial beauty tools have changed when simple rollers and massage gadgets gave way to devices promising stimulation, light, heat, and more precise treatments. A compact device can fit into a normal routine while using technology far beyond an ordinary skincare accessory.

    I realized that “facial sculpting” can mean several things. Some devices temporarily make the face look less puffy, while others are designed to stimulate muscles or deliver controlled energy to skin. That distinction matters because next-generation technology is not necessarily about an overnight lift. It is about making home treatments more targeted, consistent, and practical.

    What Makes These Devices Different?

    The biggest shift is from single-purpose tools toward platforms that combine technologies. Instead of relying only on manual massage or one type of current, newer devices may pair microcurrent, radiofrequency, LED, thermal stimulation, or other functions. Different technologies address different cosmetic concerns.

    Research supports this direction, although the evidence is not equally strong for every technology. A recent review found moderate evidence for home-use LED and radiofrequency devices, while another review noted that studies of home devices often have small samples and short follow-up periods. That makes realistic expectations more important than feature lists.

    Multiple Technologies in One Device

    Multiple Technologies in One Device

    Microcurrent is commonly associated with facial toning and temporary lifting effects, while RF uses controlled heat to support changes associated with skin firmness. LED works differently, using specific wavelengths of light rather than electrical stimulation or heat.

    Some combination devices bring these approaches together, while others add massage or cleansing functions. This is where LED face masks with multiple light wavelengths fit into the broader evolution of home skincare technology. Different wavelengths can serve different cosmetic goals, although several colors do not prove better results.

    Someone interested in firmness, texture, and general maintenance may prefer one well-designed device over several separate tools. Clinical research has reported improvements from certain combinations of RF, LED, and microcurrent, but those findings do not prove that every multi-function device works equally well.

    Smarter Controls and More Precise Treatment

    Another difference is how devices manage energy. Newer designs use sensors and programmed modes. Temperature, current, and motion sensors can help a device monitor conditions during use. Research examining home facial devices has documented these features, showing how safety and usability are becoming part of the engineering rather than an afterthought.

    A smart feature is useful only if it makes treatment easier to perform correctly. Good design should reduce guesswork, not add another complicated routine.

    Better Delivery, Not Just More Power

    The word “deeper” appears frequently in beauty marketing, but it should be interpreted carefully. Different technologies interact with different tissue structures, and consumer devices generally operate at lower energy levels than professional equipment. More power is not automatically better, especially with heat or electrical stimulation.

    A clinical trial of a noninvasive home RF device found improvements in wrinkles, skin texture, elasticity, and dermal thickness after eight weeks, with the device reported as well tolerated.

    That helps put device performance into perspective. The useful question is what technology is being delivered, at what level, for what purpose, and with what safety controls. That helps separate engineering from marketing.

    What About Muscle Sculpting?

    What About Muscle Sculpting?

    Facial sculpting devices can differ in where they aim to create an effect. Microcurrent and EMS-based technologies use electrical stimulation, but their mechanisms, intensity, and intended applications are not interchangeable. Some devices are designed to stimulate facial muscles, while others focus primarily on skin.

    This matters when judging claims about a sharper jawline or lifted appearance. A temporary change caused by muscle stimulation, reduced puffiness, or improved circulation is different from structural changes in skin or deeper tissue. Consumers should seek evidence tied to the specific device.

    Choosing a Next-Generation Device

    Start with the concern you want to address, then examine the modality, schedule, specifications, safety features, and evidence. For shoppers, this also means reading specifications instead of relying on labels such as “advanced,” “professional,” or “deep.” Those descriptions can sound impressive without explaining energy levels, treatment limits, or the evidence behind a claimed benefit. Clear specifications are more useful than a crowded feature list.

    Look especially for:

    • Clearly stated technology and intended use
    • Sensible treatment instructions and intensity controls
    • Safety features such as temperature or current monitoring
    • Evidence supporting the underlying technology
    • A design you will realistically use consistently

    A technically impressive device that stays in a drawer has little practical value. Consistency is a major advantage because treatments can fit into a routine.

    Where Professional Treatment Still Fits

    Next-generation home devices should not blur the line between consumer skincare and medical procedures. Some energy-based technologies require professional training.

    The FDA has specifically warned that RF microneedling is a medical procedure and should not be used at home, citing reports of burns, scarring, fat loss, disfigurement, and nerve damage. That warning concerns RF microneedling, not ordinary noninvasive home devices, but it illustrates why the exact technology matters.

    For everyday use, high-tech facial devices for everyday skincare should therefore be judged by appropriate claims, sensible energy levels, clear instructions, and realistic expectations. More advanced does not automatically mean more aggressive.

    Frequently Asked Questions 

    1. Are next-generation facial sculpting devices better than basic tools?

    They can offer more targeted technology, multiple treatment modes, and improved controls, but effectiveness depends on the device and evidence behind its technology.

    2. Can these devices permanently reshape the face?

    Most consumer devices should not be expected to permanently reshape facial anatomy. They may temporarily improve definition or support changes in skin appearance with consistent use.

    3. Is combining several technologies always better?

    No. Combining technologies can help when their purposes complement each other, but extra features do not automatically produce better results.

    4. What should I check before buying one?

    Look at the technology, intended use, treatment instructions, safety features, specifications, and evidence. Also consider whether the routine is realistic enough to follow consistently.

    The Technology Matters Less Than the Fit

    The most interesting development in facial sculpting is not one breakthrough gadget. It is the movement toward devices that combine established technologies with better control, thoughtful design, and clearer treatment goals. That makes informed selection more important. A device should earn its place in a routine by solving a specific problem rather than simply carrying a long list of features.

    The smartest approach is to choose technology with a purpose, use it consistently, and keep expectations grounded. A useful device does not need to promise a new face. It needs to make good skincare easier to maintain.

  • Beauty Patches With Smart Sensors: What to Know Before Trying Them

    Beauty Patches With Smart Sensors: What to Know Before Trying Them

    I started noticing how many skincare products now promise more than surface-level care. Patches once meant a small sticker for a breakout or a dose of an ingredient, but newer concepts make that sticker part of a sensing system. That shift caught my attention because the appeal is easy to understand: instead of guessing what skin needs, a wearable patch could potentially collect information while it sits on the skin.

    I also found myself wondering where the technology ends, and the marketing begins. A patch that measures moisture or UV exposure sounds impressive, but measurement quality, interpretation, comfort, and availability matter just as much as the sensor itself. That distinction is worth understanding before treating smart patches as a replacement for familiar skincare tools.

    What Makes a Beauty Patch Smart?

    A conventional beauty patch generally has one job. It may protect a blemish, hold an ingredient against the skin, or create an occlusive environment that supports topical treatment. A smart patch adds electronics or sensing materials that can collect information from the skin or its immediate environment.

    Flexible sensors can conform closely to moving skin rather than behaving like rigid electronics. Depending on the system, they may monitor hydration, temperature, UV exposure, mechanical changes, or chemical signals associated with sweat. Some experimental platforms can send readings to a phone or another receiver for analysis.

    What Can the Sensors Actually Measure?

    What Can the Sensors Actually Measure

    The phrase smart sensor can make a product sound more capable than it is, so the specific measurement matters. Skin hydration is not the same thing as measuring every aspect of skin health. A hydration-focused sensor may estimate moisture-related changes at the skin surface, while another system might examine temperature or ultraviolet exposure.

    Redness presents another challenge. It can be influenced by irritation, temperature, blood flow, product use, and other factors. A future wearable may combine optical measurements with other signals, but a sensor reading should not automatically be treated as a medical diagnosis.

    How Skin Data Could Become Personalized Care

    The real appeal of smart skincare is not the sensor alone. It is what happens after a measurement is collected. A connected patch could transmit data to an app, where software organizes changes over time and presents them in a form that is easier to understand.

    That could eventually make skincare less dependent on occasional snapshots. Instead of deciding that skin seems dry today, a person might see a longer pattern of changing moisture levels or environmental exposure. With enough reliable data, algorithms could potentially help tailor product recommendations or routines.

    The technology is still developing, though. Wearable sensors have to deal with movement, sweat, skin contact, signal interference, calibration, and differences between users. A reading can be affected by how consistently the patch sits on the skin. More data does not automatically mean better advice if the underlying measurement is unreliable.

    For people already exploring LED face masks with multiple light wavelengths, smart patches represent a different approach to beauty technology. Light-based devices generally deliver a treatment, while sensing patches are designed around collecting information. Future products could potentially combine sensing and treatment, but those are separate technical challenges.

    Where Microneedles Fit In

    Another term likely to appear alongside smart patches is microneedle technology. Microneedles use tiny structures designed to interact with the outer skin barrier and can be investigated for controlled delivery of cosmetic or therapeutic ingredients.

    That does not mean every smart patch contains microneedles. Sensing and delivery are different functions. One system may measure a skin parameter, another may deliver an ingredient, and a more advanced platform could eventually combine both.

    What to Check Before Trying One

    Before buying a product described as smart, look beyond the technology language. The first question is simple: what does the patch measure? A specific claim is more useful than a vague promise about analyzing skin.

    It is also worth checking whether results are displayed directly, interpreted through an app, or used only during product testing. Look for information about wear time, adhesive materials, connectivity requirements, and whether repeated measurements are comparable.

    Finally, consider whether the product is available to consumers. Recent beauty-tech research shows progress in wearable skin sensing, but commercially accessible diagnostic-style patches remain limited. Some impressive systems are still being demonstrated, tested, or developed rather than sold as ordinary skincare products.

    Where Smart Beauty Patches Could Go Next

    Where Smart Beauty Patches Could Go Next

    The most interesting possibility is a shift from reactive skincare toward more measured personalization. Future patches could combine several sensors, track patterns across different conditions, and connect those measurements with a routine. A system might eventually recognize that environmental exposure, moisture changes, and product use are interacting rather than treating each factor separately.

    For readers interested in next-generation facial sculpting devices, the broader trend is worth watching. Beauty technology is moving toward devices that do more than perform a single visible function. The next step may be systems that measure, interpret, and respond, although the distance between a promising prototype and a dependable consumer product can be substantial.

    FAQs: Beauty Patches With Smart Sensors: What to Know Before Trying Them

    1. What are beauty patches with smart sensors?

    They are wearable patches designed to collect information from the skin or surrounding environment. Depending on the technology, measurements may include hydration, temperature, UV exposure, or chemical signals.

    2. Are smart beauty patches widely available?

    Not yet. Research and development are advancing, but many skin-monitoring patches remain experimental or limited in commercial availability.

    3. Can a smart patch diagnose a skin condition?

    A sensor reading should not automatically be considered a diagnosis. Consumer devices may provide measurements or trends, while clinical diagnosis requires appropriate evaluation and validated medical tools.

    4. Do smart patches replace skincare products?

    Generally, no. A sensing patch and a treatment product perform different jobs. Some future systems may combine monitoring with ingredient delivery, but that technology is still developing.

    Why Better Measurement Could Change Skincare

    The promise of smart patches is not really about putting more electronics into beauty products. It is about making skincare more responsive to what is happening on the skin. If sensors become accurate, comfortable, affordable, and easy to understand, they could add context to decisions that are currently based heavily on appearance and guesswork.

    For now, curiosity is reasonable, but realistic expectations matter. The technology is moving forward, and the most useful innovations will be the ones that turn better measurements into practical care.