Blog

  • How Wearable Beauty Technology for Skincare Routines Is Evolving

    How Wearable Beauty Technology for Skincare Routines Is Evolving

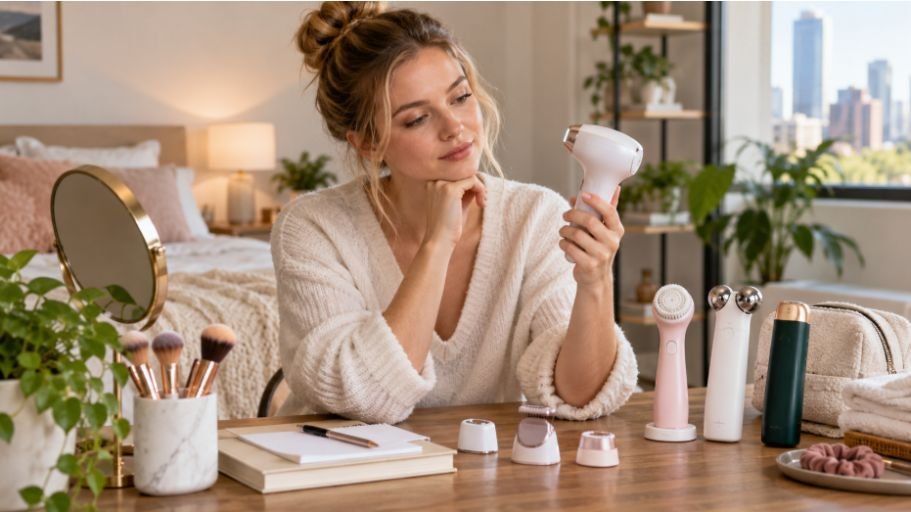
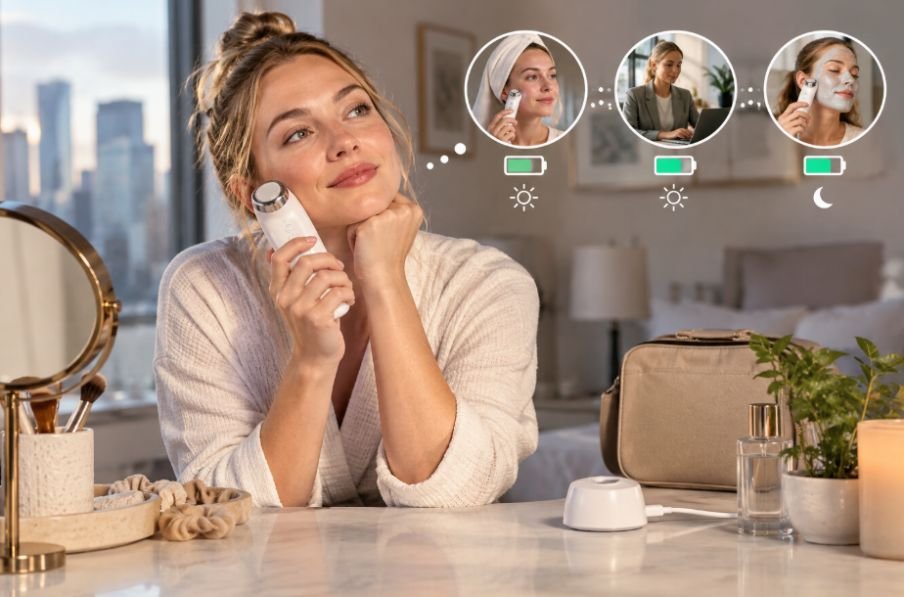
    I started noticing how different my skincare habits felt once beauty devices became smaller, easier to wear, and connected to phones. A light mask used to feel like a separate treatment I had to remember; now the category is moving toward tools that can collect information while I go about my day. That shift makes wearable beauty technology for skincare routines feel less like a novelty and more like an emerging part of personal care.

    The more interesting question became what a device can actually measure, what it can do with that information, and whether the feedback helps me make a better decision. That is where the category gets complicated, because sensors, light therapy, artificial intelligence, and connected apps are beginning to overlap.

    What Counts as Wearable Beauty Technology?

    Wearable beauty technology generally means a device designed to stay on or close to the body while collecting information, delivering treatment, or doing both. That can include flexible LED masks, skin sensors, smart patches, UV monitors, and electronic skin systems.

    From LED Masks to Smarter Wearables

    From LED Masks to Smarter Wearables

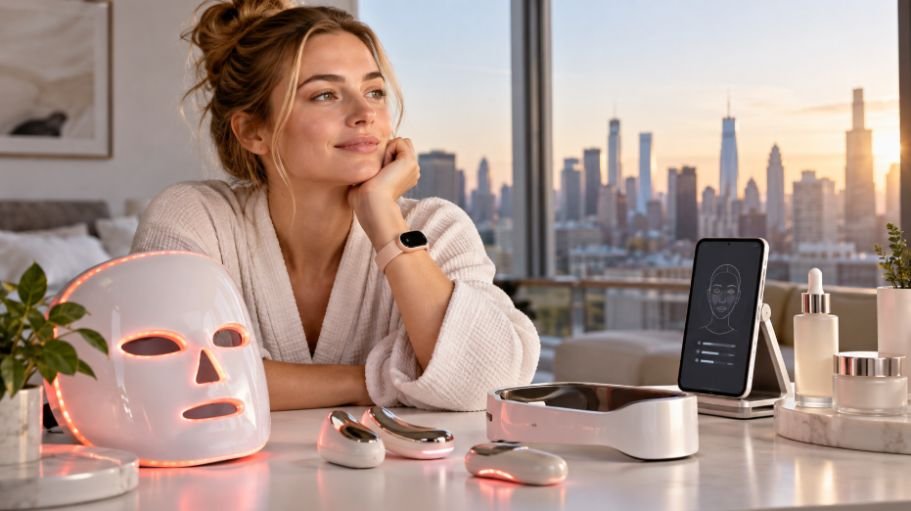
    LED masks helped make beauty technology familiar, but newer designs are pushing the wearable concept further. Flexible masks can make light-based treatments easier to incorporate into a routine because the device sits closely against the face without requiring a large handheld unit.

    That does not mean every LED device delivers dramatic results. At-home light devices are generally less powerful than professional equipment, and outcomes depend on the condition, device, and consistent use. Red and near-infrared light are widely discussed for signs of aging, while visible blue and red light devices can be used for certain acne-related concerns.

    Sensors, Smart Patches, and Everyday Data

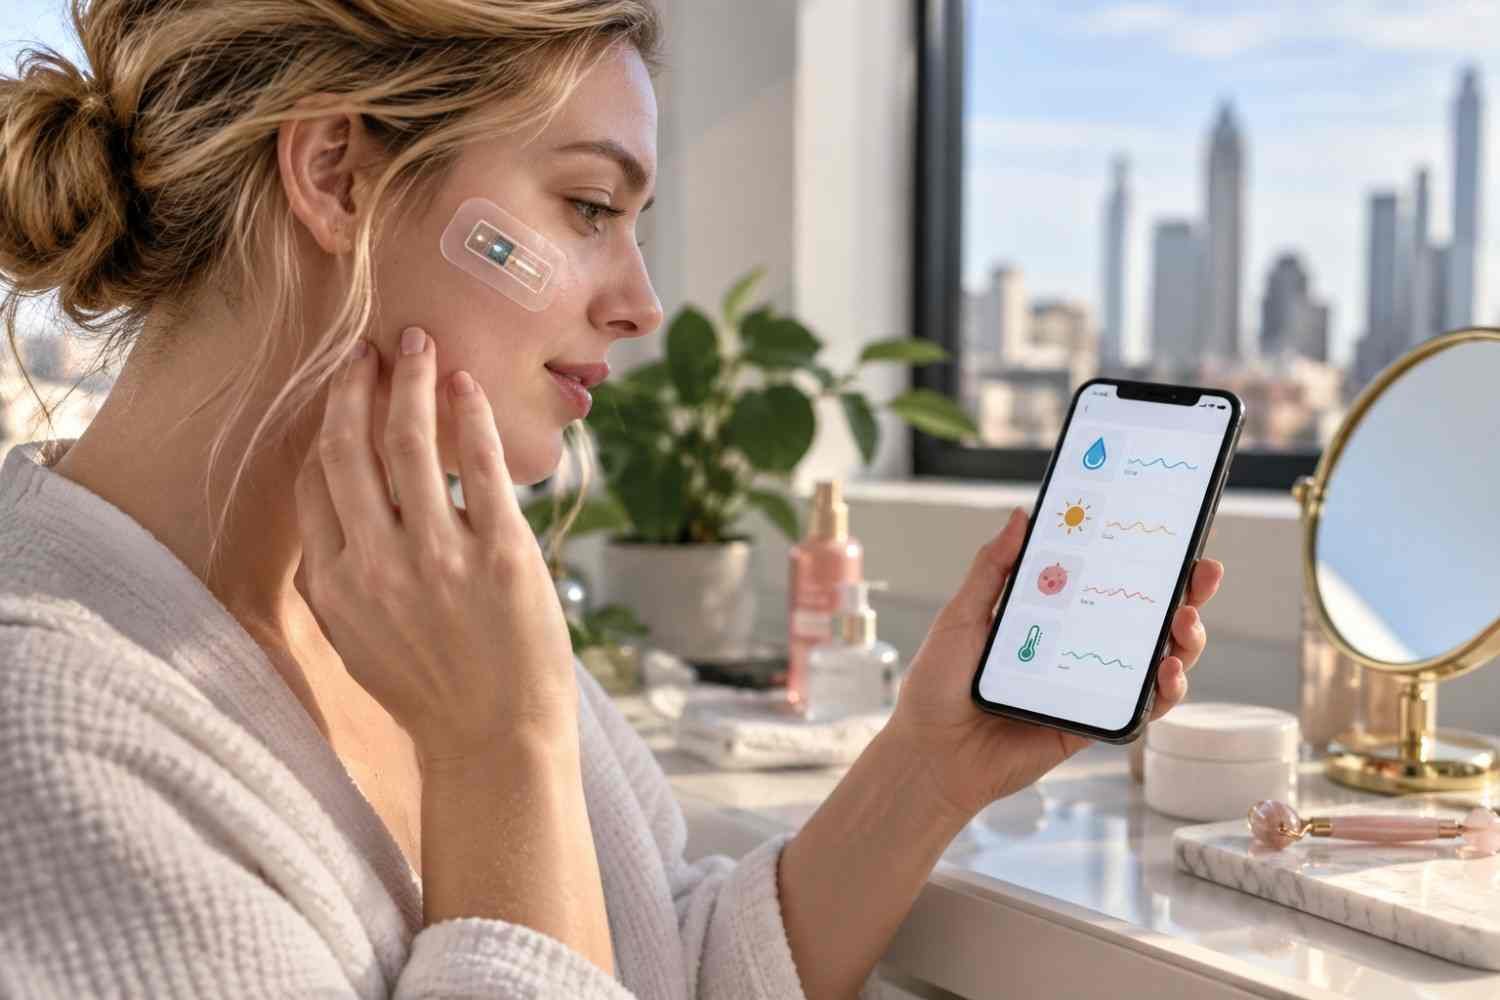
    Wearable sensors are one of the biggest developments in this space. Researchers are working on flexible systems that can monitor physical and chemical signals while remaining comfortable on the body. Skin-contact technologies can potentially track moisture, temperature, sweat, UV exposure, and other biomarkers.

    Smart patches take this idea closer to skincare. Some emerging concepts combine tiny sensors, microfluidic channels, or microneedle structures with delivery systems. Instead of guessing what the skin needs from a single snapshot, a wearable could eventually provide repeated measurements and help inform when an intervention is needed.
    Where AI Fits Into the Routine

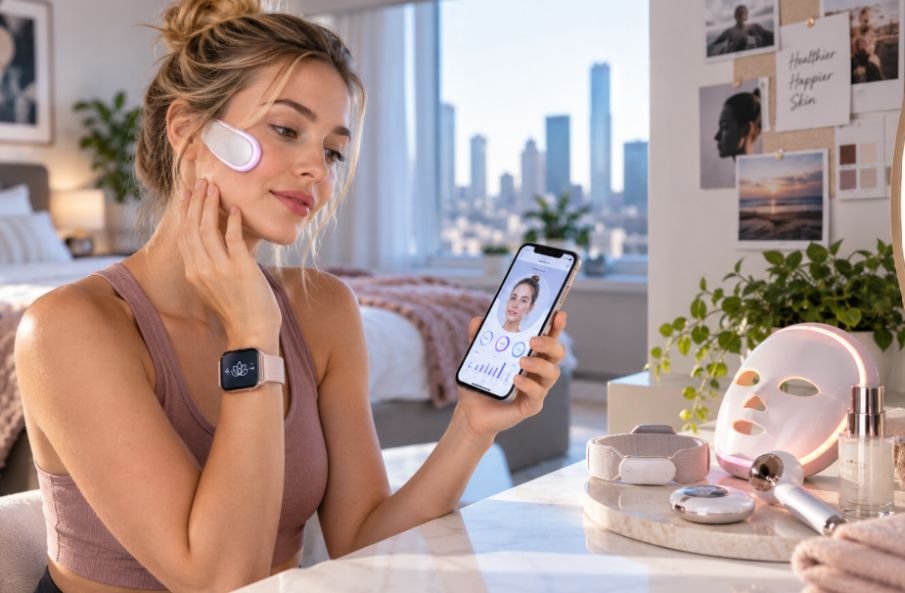
    Artificial intelligence becomes useful when there is enough information to analyze. A connected device can generate readings, but software can turn those readings into patterns, comparisons, and recommendations.

    That could mean recognizing changes over time rather than treating every skin assessment as an isolated event. A platform might compare previous measurements, consider environmental conditions, and suggest routine changes. This is the broader promise behind AI-powered skincare devices for personalized routines, where personalization comes from combining data rather than relying only on a questionnaire.

    Still, an algorithmic recommendation should not be mistaken for a medical diagnosis. Skin changes have many possible causes, and consumer devices do not have the same role as a clinical examination. The most useful systems will make everyday tracking easier while clearly communicating measurement limits.

    What Makes Wearable Beauty Technology Useful?

    Convenience may be the biggest advantage. A device comfortable enough to wear regularly has a better chance of producing useful information than one that sits in a drawer. Complicated routines are also harder to maintain.

    There is also an educational benefit. Seeing how UV exposure, moisture, or environmental conditions change throughout a day may help people understand why their skin behaves differently from one week to another. Data becomes useful when it leads to a sensible action, not simply when an app displays another number.

    The Limits Are Just as Important

    The Limits Are Just as Important

    Wearable skincare technology still has limitations. Sensor accuracy can vary, calibration can drift, and there is not always a standardized way to interpret a measurement. Skin type, environment, device placement, and user behavior can affect readings.

    Privacy deserves attention too. A connected beauty device may collect personal information, behavioral patterns, images, or long-term skin measurements. Consumers should understand what data is stored, where it goes, and whether it can be shared.

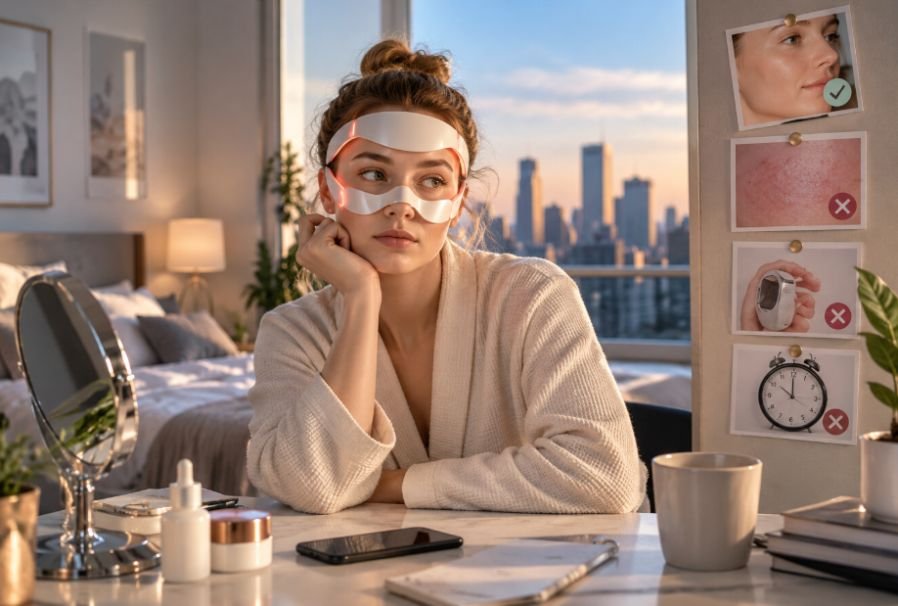
    Light-based devices also need realistic expectations. FDA clearance, where applicable, addresses specific regulatory criteria and does not automatically mean a device will deliver dramatic cosmetic results. Following instructions matters, and people with particular skin concerns may benefit from professional advice before using a new treatment device.

    Choosing Technology That Earns a Place in Your Routine

    A useful wearable should solve a problem rather than add a gadget to a crowded bathroom shelf. Start with the concern you want to address, then look at what the device measures or treats, how often it needs to be used, and what evidence supports its intended purpose.

    Connected ecosystems may also become more important. Tools such as smart beauty mirrors with skin analysis technology can combine visual assessment, routine tracking, and product guidance, creating a broader feedback loop around daily skincare.

    Where Wearable Beauty Tech Is Heading

    The direction is clear: smaller sensors, flexible materials, better connectivity, and more sophisticated software are bringing beauty devices closer to continuous skin monitoring. Future products may combine environmental data, skin measurements, imaging, and treatment in one system.

    The challenge will be proving that this information is accurate enough to improve decisions. Better sensors and AI can make personalization more useful, but they also raise questions about validation, privacy, inclusivity, and responsible recommendations.

    Frequently Asked Questions 

    1. What is wearable beauty technology?

    It includes wearable or skin-contact devices that monitor skin conditions, deliver treatments, or connect measurements to digital platforms for personalized guidance.

    2. Can wearable devices replace a dermatologist?

    No. They may support tracking and routine management, but they cannot replace professional assessment or diagnosis.

    3. Are LED masks considered wearable beauty technology?

    Yes. LED masks are wearable treatment devices, although newer technologies are adding sensors, connectivity, and adaptive features.

    4. What should I check before buying one?

    Look at its intended use, evidence, safety information, comfort, data practices, and whether the device realistically fits your routine.

    The Habits Worth Keeping

    Wearable beauty technology is most promising when it makes skincare more informed without making it more complicated. The opportunity is not having another screen or sensor in the bathroom. It is using meaningful information to understand patterns, improve consistency, and make small adjustments when they genuinely help. As devices become thinner, smarter, and more responsive, the strongest products will probably be the ones that disappear into everyday life instead of demanding constant attention.

    Technology can add useful context, but good skincare still depends on sensible habits and realistic expectations. The future may be smarter, but smarter should also mean clearer, safer, and more practical.

  • How to Get Rid of Closed Comedones on Forehead: A Clinical Guide

    How to Get Rid of Closed Comedones on Forehead: A Clinical Guide

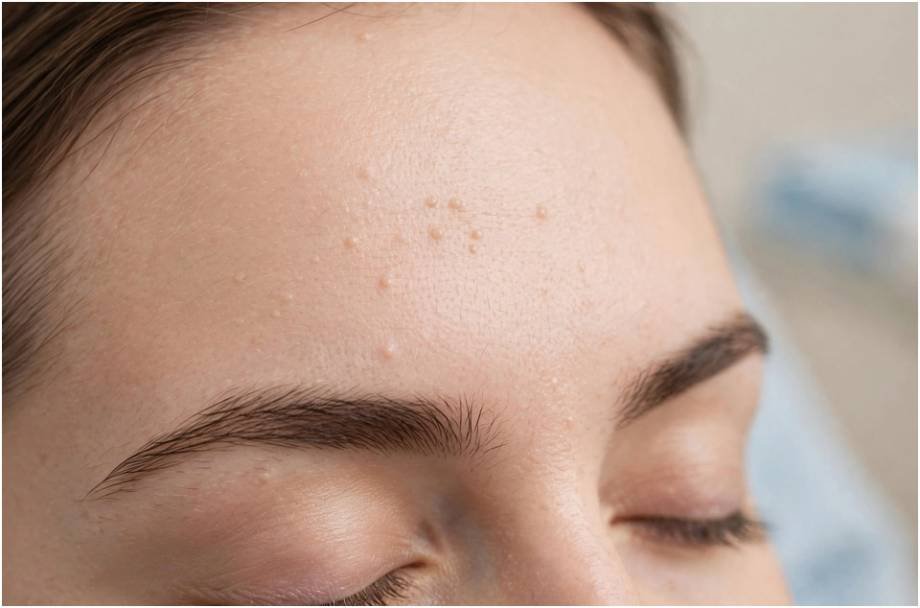
    Those tiny, flesh-colored bumps across your brow line feel like sandpaper, refuse to come to a head, and turn into angry red cysts the second you squeeze them. Learning how to get rid of closed comedones on forehead zones requires understanding cellular mechanics rather than reaching for an aggressive facial scrub.

    I spent months fruitlessly attacking my own forehead congestion with harsh walnut shells and pore strips. The bumps only multiplied. True clearing happened only when I swapped brute force for follicular cell turnover. Here is the exact clinical approach that dissolves these sealed blockages at the root.

    Why Forehead Comedones Refuse to Pop or Drain

    Why Forehead Comedones Refuse to Pop or Drain

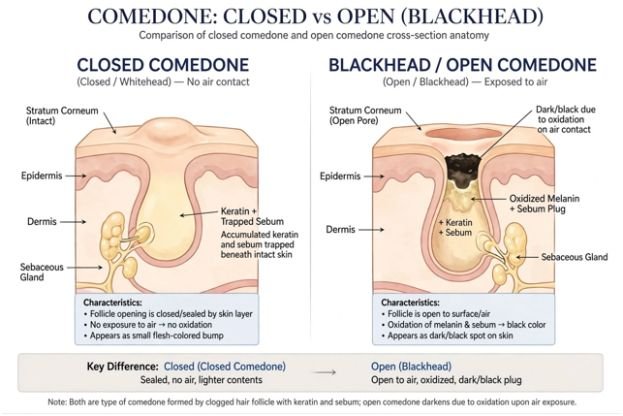
    A closed comedone forms when a pore’s exit canal becomes completely blocked by compacted dead keratinocytes and sticky sebum. Unlike an open comedone (a blackhead), where the follicle opening remains dilated and oxidizes into a dark plug, a closed comedone retains a microscopic roof of epidermal tissue.

          CLOSED COMEDONE                     BLACKHEAD (OPEN)

     ┌───────────────────────────┐       ┌───────┐           ┌───────┐

     │   Intact Layer of Skin    │       │ Skin  │   OPEN    │ Skin  │

     ├───────────────────────────┤       ├───────┴───     ───┴───────┤

     │ Keratin + Trapped Sebum   │       │ Oxidized Melanin/Sebum    │

     │ (No air contact = flesh)  │       │ (Air contact = black)     │

     └───────────────────────────┘       └───────────────────────────┘

    Because the plug has no contact with ambient air, it stays skin-toned. Because an epithelial layer seals the opening, squeezing it merely fractures the inner follicular wall. That ruptures sebum into your dermis, triggering instant inflammatory acne.

    The Microcomedone Trap Beneath the Skin

    Every blemish starts invisibly as a microcomedone weeks before surfacing. According to the American Academy of Dermatology, abnormal hyperkeratinization—the failure of shedding pore cells to desquamate properly—causes cells to stick together like wet leaves in a gutter. 

    If your natural sebum contains higher ratios of squalene peroxides, that oil acts as mortar, locking those dead cells into a stubborn, solid plug.

    The Hairline Factor: Pomade Acne vs. Fungal Overgrowth

    The forehead sits directly in the splash zone of hair styling oils, shampoos, and conditioners. Heavy silicones, coconut oil, and styling waxes migrate onto the brow line while you sleep or sweat. This reaction, clinically designated acne cosmetica, creates dense clusters of comedones along your upper third of the face.

              DIAGNOSTIC TRIAGE: FOREHEAD BUMPS

                              │

                Does the texture itch when you sweat?

                             / \

                           YES  NO

                           /     \

        Pityrosporum Folliculitis   Are bumps uniform in size?

        (Malassezia Yeast)                    / \

                                            YES  NO

                                            /     \

                           Mild Folliculitis     Closed Comedones

                           or Contact Allergy    (Acne Vulgaris)

    However, if your forehead bumps are completely uniform in size, look like pinpoint red dots, and itch after a workout, you might not have acne at all. 

    A clinical review in the Journal of Clinical and Aesthetic Dermatology points out that Pityrosporum folliculitis (an overgrowth of Malassezia yeast within the hair shaft) is routinely misdiagnosed as comedonal acne. 

    Applying traditional acne oils or heavy creams to fungal overgrowth feeds the yeast, making the texture significantly worse.

    The Core Protocol to Dissolve Closed Follicles

    The Core Protocol to Dissolve Closed Follicles

    Scrubbing cannot remove a problem that lives beneath an intact epithelial sheet. You must chemically thin that roof while accelerating follicular purging from underneath.

    Topical Retinoids: Adapalene 0.1% vs. Tretinoin Formulations

    Topical Retinoids: Adapalene 0.1% vs. Tretinoin Formulations

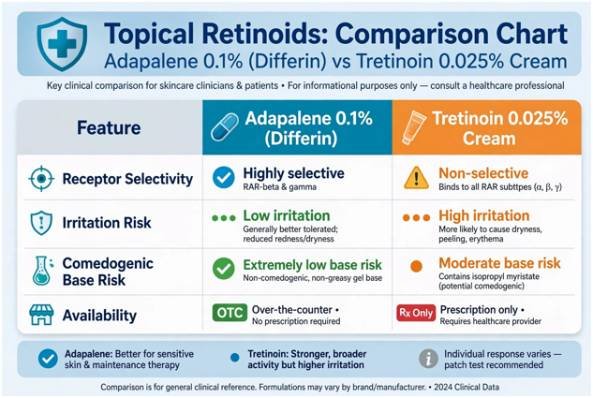
    Topical retinoids remain the absolute standard for clearing non-inflammatory comedones. They bind to retinoic acid receptors (RARs) inside the skin cells, commanding the follicle lining to shed neatly rather than clump.

    Metric Adapalene 0.1% (Differin) Tretinoin 0.025% Cream
    Receptor Selectivity Highly selective for RAR-$\beta$ and RAR-$\gamma$ Non-selective (RAR-$\alpha$, $\beta$, $\gamma$)
    Irritation Risk Low to moderate High
    Comedogenic Base Risk Extremely low (aqueous gel) Moderate (often formulated with isopropyl myristate)
    Availability Over-the-counter in the US Prescription only

    Research indexed in PubMed Central demonstrates that Adapalene 0.1% matches Tretinoin 0.025% in clinical comedone reduction while causing markedly less erythema and peeling.

    Furthermore, many patients struggle to clear forehead bumps on prescription Tretinoin cream because standard pharmacy vehicles use isopropyl myristate—an emollient ester notorious for triggering closed comedones in congestion-prone skin. If you opt for Tretinoin, request a micro-encapsulated gel or solution vehicle from your prescriber. Otherwise, start with over-the-counter Adapalene 0.1% gel.

    Strategic Chemical Exfoliation Without Barrier Burnout

    Pair your nightly retinoid work with targeted chemical acids:

    1. Salicylic Acid (BHA): As an oil-soluble beta hydroxy acid, salicylic acid cuts through sebum to loosen follicular debris. A 2% leave-on fluid or a dedicated morning wash cleans the inside of the pore lining.
    2. Glycolic or Lactic Acid (AHA): Alpha hydroxy acids dissolve the water-soluble cellular glue cementing the skin’s surface. This dissolves the thin roof trapping the closed comedone, allowing the retinoid to evacuate the plug.

    Never layer leave-on AHAs/BHAs simultaneously with your retinoid in the same evening session. Doing so destabilizes your acid mantle, triggers contact dermatitis, and worsens the textural flare.

    How I Restructured My Routine to Clear Stubborn Bumps

    How I Restructured My Routine to Clear Stubborn Bumps

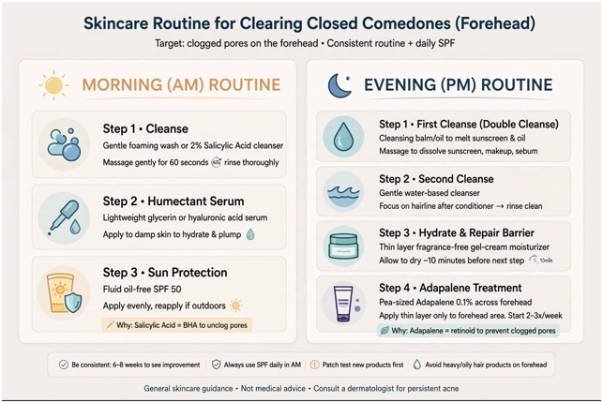
    When clearing my forehead, the breakthrough arrived not from adding stronger products, but from removing hidden clog triggers and separating my actives.

    MORNING (AM) ROUTINE

    Step 1: Gentle foaming wash or 2% Salicylic Acid cleanser (leave on 60 seconds)

    Step 2: Lightweight humectant (pure glycerin or hyaluronic acid serum on damp skin)

    Step 3: Fluid, oil-free, non-comedogenic sunscreen (SPF 50)

    EVENING (PM) ROUTINE

    Step 1: First cleanse to melt sunscreen (weigh cleansing oil vs micellar water for double cleansing based on whether your skin tolerates emulsified plant oils)

    Step 2: Gentle water-based cleanser (wash hairline and forehead AFTER rinsing conditioner)

    Step 3: Thin layer of basic, fragrance-free gel-cream moisturizer; let dry 10 minutes

    Step 4: Pea-sized amount of Adapalene 0.1% spread evenly across the entire forehead

    Two physical habits proved equally crucial: I stopped using leave-in hair serums containing dimethicone near my hairline, and I swapped cotton pillowcases for clean ones twice a week.

    When Your Face Hits Back: Managing the Transition

    When Your Face Hits Back: Managing the Transition

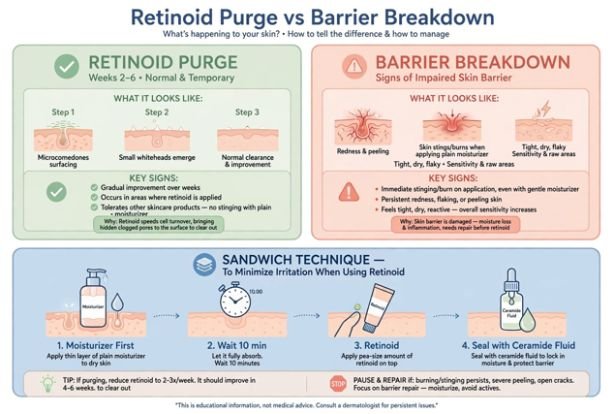
    Expect a purge. Between weeks two and six, microcomedones will surface into small whiteheads as the retinoid speeds your shedding cycle. This is standard clearance.

    However, if your skin begins to sting when applying plain moisturizer, you have crossed from a healthy purge into barrier breakdown. You need to pull back actives and actively repair damaged skin barrier from retinol before continuing your treatment. 

    Buffer your retinoid using the “sandwich technique”: apply moisturizer first, wait ten minutes, apply your retinoid, and seal with a light, non-comedogenic ceramide fluid.

    Frequently Asked Questions About Forehead Texture

    1. How long does it take for forehead closed comedones to go away?

    Consistent use of topical retinoids and gentle chemical exfoliants typically yields noticeable clearance within 6 to 12 weeks.

    2. Can I manually extract closed comedones with an extraction tool?

    No, extracting closed comedones without an open follicular pore tears the surrounding epidermis and often causes deep cystic inflammation or permanent scarring.

    3. Does drinking water clear closed comedones on the forehead?

    Hydration supports general skin health, but it will not unclog follicular keratin plugs cemented by dead cells and sebum.

    4. Will facial oils get rid of closed comedones?

    No, pure facial oils lack keratolytic properties and frequently introduce comedogenic fatty acids that worsen forehead blockages.

    Drop the Extractors, Step Away From the Mirror

    Step back from the magnifying mirror and retire the stainless steel comedone extractors. Getting clear skin on your forehead is a game of biological patience, not manual warfare. 

    Give a stable topical retinoid eight full weeks to reset your follicular shedding, streamline your hair products to eliminate stray pore-clogging oils, and let cellular turnover do the heavy lifting for you.

  • Makeup for Glasses Without Foundation Rubbing Off: Easy Fixes

    Makeup for Glasses Without Foundation Rubbing Off: Easy Fixes

    Glasses can frame the face beautifully, but they can also leave two obvious bare patches where the nose pads or bridge rest. I have found that the best fix is not adding more foundation. It is reducing product at the contact points, controlling oil, and creating a thin base that can handle pressure. 

    For makeup for glasses without foundation rubbing off, I treat the nose differently from the rest of the face and focus on grip rather than coverage.

    Why Does Foundation Rub Off Under Glasses?

    Foundation usually breaks down because pressure, movement, facial oil, sweat, sunscreen, and skincare combine under the frames. Small movements create friction, while oil makes the surface more slippery. A thick layer gives the glasses even more product to pick up.

    This becomes especially noticeable during hot US summers or humid weather when the T-zone gets oilier. I keep the nose bridge lighter and drier.

    How Should I Prep My Nose Before Makeup?

    I apply skincare and sunscreen, but I use less around the nose bridge. Dry skin still needs moisture, so I do not skip moisturizer. I simply avoid leaving a greasy layer where the frames will sit.

    After letting skincare settle, I blot any shine. Then I apply a very thin layer of gripping or oil-controlling primer to the contact points.

    Can Eyeshadow Primer Stop Makeup From Rubbing Off?

    Can Eyeshadow Primer Stop Makeup From Rubbing Off?

    A tiny amount of matte, non-sticky eye primer can help where nose pads rest. Because eye primer is designed to grip pigment and resist oil, it can work as a targeted barrier. I keep the layer thin because too much primer can pill or create buildup.

    Should I Skip Foundation Where My Glasses Touch?

    If foundation always disappears from the same spots, I use almost none there. I apply my regular base elsewhere and use only the leftover product on my sponge around the nose.

    If redness still shows, I use a micro-layer of concealer instead of another coat of foundation. Less product means less makeup for the frames to lift.

    Next, I press a clean, damp makeup sponge over the bridge and sides of my nose without swiping. This lifts excess fluid and leaves a thinner layer before setting.

    How Do I Set Nose Makeup Without Making It Cakey?

    For normal or dry skin, I press a small amount of translucent setting powder into the contact areas with a puff. If my nose is very oily or transfer is severe, I may bake the area by applying more powder, letting it sit briefly, and brushing away the excess. I use this selectively because heavy baking can emphasize dryness and texture.

    I finish with setting spray and let it dry completely before putting my glasses back on. Setting spray can improve longevity, but it cannot compensate for thick foundation or constant frame movement.

    Should I Put Powder on My Glasses Nose Pads?

    Should I Put Powder on My Glasses Nose Pads?

    Some beauty tutorials recommend tapping a tiny amount of setting powder onto clean nose pads to create a drier contact surface. I consider this optional rather than essential.

    I also keep the pads and bridge clean because oil, sunscreen, and old makeup can transfer back onto fresh makeup. While alcohol in everyday life is commonly used for cleaning and disinfecting, I would use rubbing alcohol on eyewear only if the frame or nose-pad manufacturer confirms the material is alcohol-safe. Otherwise, I follow the eyewear maker’s cleaning instructions.

    How Do I Stop an Oily Nose From Ruining My Makeup?

    When shine appears, I blot first rather than immediately adding more powder. This removes surface oil without creating a thick mix of oil, foundation, and powder. After blotting, I press on a small amount of powder only if necessary.

    How Do I Fix Foundation After My Glasses Rub It Off?

    I do not apply fresh foundation directly over an oily, separated patch. I blot the area, smooth the edges, then press a tiny amount of concealer or foundation into the bare spot and set it lightly.

    If my glasses constantly slide down, I also have the fit checked by an optician. Repeatedly pushing frames back into place creates more friction, while very tight frames can leave deeper marks.

    What Eye and Face Makeup Works Best With Glasses?

    What Eye and Face Makeup Works Best With Glasses?

    Glasses can cast shadows under the eyes, so I use a light layer of brightening concealer instead of heavy coverage that may crease. I place blush slightly higher on the cheekbones rather than too close to the nose.

    For lashes, I curl them before mascara and favor definition and volume over extreme length so they are less likely to brush the lenses. These adjustments keep the look balanced around the frames.

    Frequently Asked Questions (FAQs)

    1. How do I stop foundation from rubbing off on my glasses?

    Use very little foundation where the frames touch, let skincare absorb, apply a thin primer, lift excess makeup with a damp sponge, and press setting powder into the contact points.

    2. Can I use concealer instead of foundation under nose pads?

    Yes. A micro-layer of concealer can cover redness while leaving less product for the frames to disturb.

    3. Why do my glasses leave marks after I set my makeup?

    Pressure, friction, oil, sliding frames, or too much product can still create marks even when makeup is powdered.

    4. Do I need to bake my nose when wearing glasses?

    No. Lightly pressed setting powder works for many people. Baking is better reserved for very oily skin or stubborn transfer.

    Final Thoughts

    The most effective approach is built around strategic placement. I use lighter skincare on the contact area, a thin gripping primer, minimal foundation, a damp sponge to remove excess, and targeted powder according to my skin type. These small adjustments also help make makeup that last all day by reducing unnecessary buildup in areas where products are most likely to shift.

    I also keep my frames clean, let setting spray dry fully, blot oil before touching up, and check the glasses fit if they constantly slide. When I want makeup for glasses without foundation rubbing off, reducing friction and excess product gives me a smoother, more natural result than simply adding more layers.

  • Best Hydrating Toner For Sensitive Dry Skin

    Best Hydrating Toner For Sensitive Dry Skin

    My cheeks used to sting before I even finished cleansing. If you know that tight, flaky, red feeling, you know most toners make it worse. I spent the last 3 months hunting for the best hydrating toner for sensitive dry skin that hydrates without alcohol, fragrance, or that burning tingle.

    Dermatologists agree on the formula. The best hydrating toners for sensitive, dry skin are fragrance-free, alcohol-free formulas enriched with ceramides, hyaluronic acid, and soothing botanicals like Cica. Milky and viscous textures work better because they act like a lightweight moisturizer.

    Why Sensitive Dry Skin Needs a Different Toner

    Why Sensitive Dry Skin Needs a Different Toner

    Dry skin lacks oil. Sensitive skin has a weak barrier. When you have both, exfoliating toners and perfume strip what little protection you have left.

    I learned this after ruining my barrier with retinol last winter. I had to completely repair my damaged skin barrier from retinol before any toner would work.

    The 3 Non-Negotiables I Look For

    1. Barrier-repairing actives. Ceramides, multi-weight hyaluronic acid, panthenol, and Centella Asiatica. Ceramides restore lipids, hyaluronic acid holds water, and Cica calms redness. The research on Centella shows it supports wound healing and reduces inflammation.
    2. Milky or viscous texture. Thin, watery toners evaporate. Milky toners leave a soft film that mimics a moisturizer without clogging.
    3. No fragrance, no drying alcohol. Fragrance is a top irritant for sensitive skin, and drying alcohols like denatured alcohol compromise your barrier. Look for labels that say alcohol-free and fragrance-free.

    How I Tested These Toners

    I applied each toner to damp skin twice daily for 10 days, then layered my rich cream over it. I tracked three things: immediate sting, hydration after 2 hours, and pilling under cream. I also checked the morning vs night skincare routine steps order because texture matters more at night.

    4 Best Hydrating Toners For Sensitive Dry Skin That Actually Work

    1. Laneige Cream Skin Cerapeptide Toner & Refiner

    This is a hybrid. It looks like milky water but feels like melted moisturizer. Powered by ceramides, peptides, and white tea leaf extract, it gives deep emollience with rapid absorption.

    I use it when my skin feels like paper. One layer is enough. Under a heavy cream it can feel too rich, so I save it for nights when I skip the heavy occlusive.

    Texture: Milky, viscous
    Best for: Very dry, flaky barrier

    2. Haruharu Wonder Black Rice Hyaluronic Toner – Fragrance-Free Version

    Serum-like and cushiony. It delivers multi-molecular hyaluronic acid and fermented black rice extract with zero essential oils. The fermented rice brings antioxidants without irritation.

    This one layers beautifully. Two thin layers plump fine lines around my nose, and my cream still glides on.

    Texture: Viscous serum
    Best for: Dry skin that needs bounce, not just oil

    3. Purito Seoul Wonder Releaf Centella Toner Unscented

    The most watery-gel of the bunch, but intentionally calming. Focused entirely on Cica, panthenol, and hyaluronic acid to calm acute redness and tightness. If your sensitivity shows as red blotches, this is your rescue.

    In my test, it had zero sting, zero pilling. It is the best base under a rich cream.

    Texture: Watery-gel
    Best for: Redness-prone sensitive skin

    4. Paula’s Choice Resist Advanced Replenishing Toner

    A richer, milky formula with essential lipids, ceramides, and evening primrose oil. Designed to repair compromised, flaky moisture barriers. Paula’s Choice documentation notes that ceramides and fatty acids are critical for barrier recovery.

    I use this like a treatment when my barrier is cracked. Under a rich cream, it is too much. Alone with a light lotion, it repairs overnight.

    Texture: Rich milky
    Best for: Damaged, peeling barrier

    Which Layers Best Under a Rich Cream?

    Why Sensitive Dry Skin Needs a Different Toner

    This is where most lists miss the point. I tested each under my thick cream. Here is what happened:

    Toner Texture Type Pilling Under Rich Cream Hydration After 2 Hours
    Purito Wonder Releaf Watery-gel None High, calm
    Haruharu Wonder Black Rice Serum-viscous None Very high, plump
    Laneige Cream Skin Cerapeptide Milky viscous Light pilling if cream is occlusive Very high
    Paula’s Choice Resist Rich milky Pills with heavy cream High, but redundant

    Reference Table – Ingredient Framework

    Criteria Why It Matters For Sensitive Dry Skin Source
    Fragrance-Free + Alcohol-Free Reduces stinging and barrier disruption Healthline – Sensitive Skin Guide
    Ceramides + Hyaluronic Acid Restores lipids and retains water Dermstore / CeraVe Toner Breakdown
    Centella Asiatica (Cica) Soothes inflammation, supports repair National Library of Medicine
    Milky / Viscous Texture Mimics light moisturizer, locks hydration Paula’s Choice Ingredient Library

    If you wear a rich cream every night, pick Purito or Haruharu Wonder. If you alternate light and heavy moisturizers, Laneige gives you more flexibility.

    Final Pick: My Sensitive Skin Routine

    No toner fixes everything alone. My win was pairing the right toner with the right cream weight. Mornings: Purito + light lotion + SPF. Nights: Haruharu Wonder + rich cream. When my barrier was wrecked, I swapped in Laneige for a week.

    Your skin will tell you fast. If it stings in the first 10 seconds, it fails the sensitive test.

    Frequently Asked Questions 

    1. What ingredients should I avoid in a hydrating toner for sensitive dry skin?

    Avoid fragrance, essential oils, denatured alcohol, and strong AHAs/BHAs.

    2. Is a milky toner better than a watery toner for dry skin?

    Yes for dryness, but watery-gel layers better under a rich cream.

    3. Can hyaluronic acid irritate sensitive skin?

    Pure hyaluronic acid rarely irritates, but formulas with fragrance or low pH can.

    4. How many times a day should I use hydrating toner for dry sensitive skin?

    Twice daily on damp skin is enough. More can over-hydrate and weaken your barrier.

  • Choosing AI-Powered Skincare Devices for Personalized Routines at Home

    Choosing AI-Powered Skincare Devices for Personalized Routines at Home

    I used to think choosing a skincare device was mostly about picking the feature that sounded impressive. A red-light mask promised glow, a microcurrent tool promised lift, and a skin analyzer promised answers. None of those promises told me what my skin actually needed on a Tuesday morning.

    I started paying closer attention to the newer generation of beauty technology when devices began combining cameras, sensors, apps, and treatment functions. I wanted to know whether AI could make a routine more relevant, easier to follow, and less dependent on guesswork.

    What Makes a Skincare Device AI-Powered?

    AI-powered skincare devices for personalized routines generally add an analysis layer to a conventional beauty device. Cameras capture facial images, computer vision assesses visible characteristics, and software turns observations into recommendations. Some systems save measurements over time, allowing users to compare changes.

    That distinction matters because “AI-powered” does not automatically mean a device is diagnosing a medical condition. Many consumer systems are better understood as cosmetic assessment and recommendation tools. A platform may track wrinkles, pigmentation, texture, oiliness, redness, or acne, then suggest products or treatment modes. Smart mirrors combine skin scoring, tips, and product recommendations.

    How Personalization Actually Works

    How Personalization Actually Works

    The useful part is the feedback loop. A user starts with a scan or questionnaire, receives recommendations, follows a routine, then returns for another assessment. Over time, the software can create a record of changes and make future suggestions based on that history.

    Consistency matters here. If one scan happens beside a bright window and another happens under warm bathroom lighting, the apparent differences may have more to do with the environment than the skin. A better system encourages repeatable scanning conditions and makes its measurements understandable.

    Some connected devices go further by linking analysis with treatment. For example, a multifunction device might combine an app with LED, microcurrent, heat, cooling, or massage. The appeal is having software organize when and how those functions fit into a routine.

    Wearable technology is also expanding beyond traditional devices, with beauty patches with smart sensors offering another way to collect skin-related data and support more personalized routines.

    Which Features Are Worth Looking For?

    When comparing AI-powered skincare devices for personalized routines, focus less on modes and more on how the system uses information.

    • Look for meaningful skin tracking rather than a one-time score. A useful platform should show trends and explain changes.
    • Check whether the device offers adjustable treatment settings, clear instructions, app connectivity, and a practical reason for each technology it includes.
    • Review how the company handles images and personal data. A face scan is sensitive information, so privacy policies and account controls deserve attention.

    Treatment technology still matters. LED devices, microcurrent tools, warming or cooling systems, and other at-home technologies serve different purposes. Current beauty-tool coverage shows that consumers can choose among many approaches, from red-light therapy and microcurrent to radiofrequency and multifunction devices.

    When comparing different beauty tools, I also look for makeup tools that simplify everyday routines, especially when a device is meant to make regular beauty steps easier rather than more complicated.

    A personalized routine should match the device to a specific need rather than treating every setting as necessary. More features can create more opportunities for misuse, confusion, or inconsistent use.

    Where AI Skincare Still Has Limits

    Where AI Skincare Still Has Limits

    AI can make skincare measurable, but skin is not a fixed spreadsheet. Hydration, redness, breakouts, and texture can change with weather, sleep, hormones, products, sun exposure, and irritation. A camera can capture what is visible at one moment, while missing factors that require professional examination.

    There is also a fairness issue. AI systems depend on their training data, and beauty technology has faced concerns about whether datasets adequately represent different skin tones and conditions. That makes transparency around validation and performance more meaningful than a glossy claim about machine learning.

    Safety deserves the same attention. Follow the manufacturer’s directions, especially when a device uses light, heat, electrical stimulation, or energy-based technology. The FDA notes that aesthetic devices can have risks and that users should understand benefits, limitations, and potential complications. Some energy-based procedures are not appropriate for everyone, and RF microneedling should not be used at home.

    For routine skincare, AI is most useful when it organizes sensible habits rather than encouraging constant treatment. If a system detects a concern that is persistent, painful, rapidly changing, or difficult to understand, professional medical advice is more appropriate than repeatedly scanning it.

    The Better Way to Choose

    The strongest buying decision starts with the problem, not the gadget. Someone trying to monitor visible pigmentation may value consistent imaging and progress tracking. Another person may care more about convenient LED sessions or microcurrent. A beginner might benefit most from a simple app that explains a routine clearly rather than a complicated device with ten treatment modes.

    Cost matters. Consider the device price, replacement parts, skincare products, subscriptions, and session time. A less expensive tool that gets used consistently can be more useful than an advanced system that ends up in a drawer.

    Look for evidence behind the treatment claims, realistic expectations, a return policy, customer support, and clear cleaning instructions. Usability is part of effectiveness because complicated routines are easy to abandon. FDA guidance also recommends considering whether a home-use device can be operated safely and effectively in the user’s environment.

    Frequently Asked Questions 

    1. Can AI skincare devices replace a dermatologist?

    No. They can help organize cosmetic routines and track visible changes, but they should not be treated as a substitute for professional diagnosis or medical care.

    2. Do AI skincare devices work for every skin type?

    Performance varies. Image quality, lighting, device design, and the diversity of training data can affect results, so claims should be viewed realistically.

    3. Are smart skincare devices safe to use daily?

    Not necessarily. Frequency depends on the technology and device instructions. Using an energy-based tool more often than recommended can increase irritation or other risks.

    4. Should I buy a device with more treatment modes?

    Not automatically. Fewer useful functions may be better than a crowded feature list that makes your routine harder to follow.

    When Technology Should Simplify Your Routine

    The real promise of AI skincare is not a bathroom full of machines or another score to obsess over. It is the possibility of turning scattered observations into a routine that feels more deliberate. When analysis, treatment, and tracking work together, technology can remove guesswork while leaving room for common sense.

    The best device is ultimately the one that fits your needs, earns your trust, and gets used consistently. Personalization should make skincare clearer, not more complicated.

  • Smart Hair Styling Tools With Temperature Control: Features That Matter

    Smart Hair Styling Tools With Temperature Control: Features That Matter

    I used to think the temperature dial on a hair tool was just another setting to ignore. If my straightener got hot quickly and my curls held, I considered it a good tool. After dealing with uneven results, repeated passes, and hair that sometimes felt rough after styling, I started paying closer attention to how heat was actually being delivered.

    I also noticed newer styling devices feel different in use. Some react to what is happening while I style. That made me curious about smart hair styling tools with temperature control and which features genuinely matter.

    What Makes a Hair Tool Smart?

    A conventional heated tool gives you a selected temperature and expects you to manage the rest. A smarter device can add sensors, processors, feedback systems, or programmed settings that monitor conditions and adjust performance. The goal is controlled heat during daily styling.

    Real-time monitoring is one of the more meaningful developments. Sensors can help a device track temperature and maintain a consistent level instead of allowing large fluctuations. Some newer dryers detect proximity to the scalp and adjust heat. That responsive behavior can personalize styling without constant manual changes. Intelligent heat control is increasingly treated as a practical feature.

    Why Consistent Temperature Matters

    Why Consistent Temperature Matters

    High temperature is not automatically better. Hair responds to thermal exposure, and excessive heat can contribute to dryness, brittleness, and surface damage. The bigger issue is exposure time and repeated passes.

    That makes stable temperature regulation useful. If a straightener drops below its selected setting and then overheats while recovering, the experience can be inconsistent. A well-regulated tool aims to deliver predictable heat, helping you avoid extra passes. Ceramic surfaces are also commonly used because they can distribute heat across the styling area, although the material alone does not determine whether a tool is gentle.

    Use enough heat to create the result you want, then focus on technique. Temperature control cannot make careless styling harmless.

    Smart Features Worth Paying Attention To

    Not every digital feature deserves equal weight. Look for technology that changes how the device actually performs.

    • Adaptive heat sensing can monitor temperature and make rapid adjustments during styling.
    • Consistent heat delivery can reduce repeated passes.
    • Hair-type settings can make choosing a starting point easier for fine, thick, curly, or treated hair.
    • Automatic shutoff, cool settings, and controlled airflow add useful safety and convenience.

    Some advanced stylers take personalization further with stored profiles or guided settings. These can help connect hair characteristics with a sensible routine. However, a touchscreen or app is not automatically proof of better heat management. Ask what the technology changes in practice.

    Modern beauty tools increasingly combine functions, too. Current coverage includes dryers, flatirons, rotating curlers, brush dryers, and multi-stylers.

    Match the Tool to Your Hair

    The smartest tool on paper can still be wrong for your hair. Fine or fragile strands generally need conservative heat and fewer passes, while thick or coarse hair may require more controlled power. Curly and textured hair can also benefit from tools that reduce snagging and friction while maintaining predictable heat.

    Color-treated or stressed hair deserves extra care. Precise temperature control helps with restraint, but it does not replace heat protectant or good styling habits. Hair should also be sufficiently dry when using tools designed for dry styling, unless the device specifically supports wet-to-dry use.

    Personalization should mean more than selecting a hair type inside an app. Consider your hair’s condition, density, texture, and styling goal before choosing technology.

    Look Beyond Straighteners

    Look Beyond Straighteners

    Temperature intelligence is no longer limited to flatirons. Hair dryers can regulate heat while monitoring distance or airflow, while hot brushes and multi-stylers combine drying, smoothing, curling, or volumizing in fewer steps. Air-based styling systems are another direction because they use airflow to shape hair rather than relying exclusively on hot surfaces.

    That matters daily. A tool that dries and styles at once can reduce handling and shorten the time hair spends under heat. Recent beauty coverage has emphasized multitasking designs, faster drying, and technologies intended to make styling more efficient.

    Versatility should not overshadow basic performance. A device with ten attachments is not necessarily more useful than a simple, reliable tool.

    What to Check Before Buying

    Before spending more on smart styling technology, examine the features that affect actual use. Check the temperature range, adjustment precision, automatic heat regulation, and consistency during repeated passes. Also consider plate or barrel construction, airflow, weight, controls, and automatic shutoff.

    Think about your routine. If you mainly straighten your hair, precise plate temperature and smooth movement may matter most. If you switch between waves, curls, and blowouts, a responsive multi-styler could make more sense. Ease of cleaning and storage also matter because sophisticated technology is less valuable when the device is annoying to use.

    Smart does not mean maintenance-free. Keep attachments clean, follow instructions, and replace a tool if its temperature behavior becomes erratic.

    FAQs: Smart Hair Styling Tools With Temperature Control: Features That Matter

    1. Do smart hair tools prevent heat damage?

    No. Temperature control can limit unnecessary thermal exposure, but damage also depends on heat level, contact time, passes, hair condition, and technique.

    2. Are ceramic plates better for hair?

    Ceramic surfaces can provide even heat distribution, but overall performance depends on temperature regulation, construction, and how the tool is used.

    3. Are smart hair tools worth the extra cost?

    They can be worthwhile if adaptive heat, precise controls, or multitasking features solve a real problem. Extra technology alone is not a reason to spend more.

    4. Should every hair type use the same temperature?

    No. Texture, thickness, condition, and treatment history can affect the appropriate setting. Start conservatively and increase heat only when necessary.

    The Features Worth Keeping

    The most useful smart styling technology is not the feature that looks futuristic on a product page. It is the one that quietly makes heat more predictable, reduces unnecessary passes, simplifies control, or helps you work with your hair instead of fighting it. That is where temperature sensors, responsive controls, balanced heat distribution, and practical presets can earn their place in a daily routine.

    Good styling still requires judgment. The right tool can make that easier, but cannot replace it. When technology gives you more control without making the routine complicated, smart hair styling starts to feel genuinely useful.

  • Smooth Base, No Flakes: How to Keep Foundation From Clinging to Dry Patches

    Smooth Base, No Flakes: How to Keep Foundation From Clinging to Dry Patches

    Nothing ruins a smooth makeup base faster than foundation collecting around flaky skin on my nose, cheeks, chin, or forehead. I have found that how to keep foundation from clinging to dry patches has much less to do with adding more coverage and much more to do with preparing the skin correctly.

    When my complexion is dry, dehydrated, or slightly flaky, I focus on gentle exfoliation, layered hydration, enough absorption time, thin foundation layers, and pressing rather than rubbing the product into my skin. These small changes can make foundation look noticeably smoother without trying to hide normal skin texture.

    Why Does Foundation Cling to Dry and Flaky Skin?

    Foundation sticks to dry patches because loose skin cells create an uneven surface. Pigment collects around the edges of those flakes, making texture appear more obvious than it did before makeup.

    Dry skin and dehydrated skin are also different. Dry skin generally lacks enough natural oil, while dehydrated skin lacks water. That means even someone with oily or combination skin can experience flaky foundation. Supporting hydration and protecting skin elasticity can also help maintain a smoother-looking surface over time.

    In the U.S., cold winter air, indoor heating, low-humidity climates, and constant air conditioning can make this problem even more noticeable. Harsh cleansers, excessive exfoliation, matte makeup, too much powder, or a disrupted skin barrier can add to the problem.

    How Should I Exfoliate Before Applying Foundation?

    When loose flakes are the problem, gentle exfoliation can create a smoother surface. I prefer mild chemical exfoliation as part of my regular skincare routine rather than aggressively scrubbing my face immediately before makeup.

    Ingredients such as lactic acid can help remove excess dead skin for some people, but exfoliation should not become an everyday emergency fix. If my skin feels red, raw, tight, cracked, or irritated, I skip acids and physical scrubs and focus on hydration and barrier-supportive skincare instead.

    Over-exfoliation can make foundation cling even more because irritated skin often becomes rougher and more sensitive.

    How Can I Hydrate My Skin Before Foundation?

    How Can I Hydrate My Skin Before Foundation

    Hydration works best for me when I layer it rather than applying one extremely heavy cream immediately before makeup.

    I may begin with a hydrating serum containing humectants such as hyaluronic acid or glycerin. Applying these types of products according to their directions can help the skin hold onto moisture.

    I then follow with a comfortable moisturizer. Ceramides, glycerin, hyaluronic acid, squalane, and other moisturizing ingredients can all be useful depending on my skin type and the overall formula.

    However, more skincare is not always better. A thick, slippery layer can make foundation move, separate, or pill.

    How Long Should I Wait After Moisturizer Before Applying Makeup?

    I generally allow moisturizer to settle for around five to ten minutes before applying foundation.

    This gives my skincare time to absorb instead of leaving several wet layers underneath my makeup. If foundation goes on while moisturizer or serum is still sitting heavily on the surface, the products can sometimes roll together, separate, or form tiny flakes known as pilling.

    I want my skin to feel soft and hydrated before makeup, but not greasy or overly wet.

    Should I Use Primer When My Skin Has Dry Patches?

    A hydrating or gripping primer can add another smoothing layer, especially when my foundation tends to disappear or separate during the day.

    I avoid automatically covering flaky areas with thick mattifying or heavy pore-filling primers. Those formulas can work beautifully for oily areas, but they may emphasize dryness when the skin already lacks moisture.

    A lightweight hydrating primer usually makes more sense when dryness is the main concern. Still, primer cannot replace proper skincare. If my skin is visibly peeling, adding another makeup layer will not completely disguise it.

    What Foundation Finish Works Best for Dry Skin?

    What Foundation Finish Works Best for Dry Skin?

    I usually choose natural, satin, radiant, or dewy finishes when my skin is noticeably dry. Flexible formulas tend to make surface texture less obvious than very flat matte foundations.

    When choosing the rest of my makeup, I also consider how eye makeup interacts with the overall finish, especially when creating a soft, balanced make up look  for hooded eyes.

    Coverage also matters. A full-coverage formula is not automatically better for flaky skin. The thicker the foundation layer becomes, the easier it is for pigment to accumulate around rough areas.

    When choosing a foundation for dry or textured skin, I also consider formulas designed for mature skin, since the right foundation for mature skin can help create a more comfortable, natural-looking finish.

    I prefer starting sheer and building coverage only where redness, pigmentation, or uneven tone actually needs it.

    Is a Damp Sponge Better Than a Brush for Dry Skin?

    A damp makeup sponge is one of my favorite tools when dryness is noticeable.

    Dense brushes can sometimes disturb loose flakes when I repeatedly buff them across the skin. Rather than dragging foundation over textured areas, I thoroughly squeeze excess water from my sponge and gently bounce or press the makeup into place.

    This does not mean brushes are always unsuitable for dry skin. A soft brush can still work when I use light stippling motions. The important part is avoiding repeated friction.

    Where Should I Apply Foundation First?

    I put most of my foundation toward the center of my face, where redness and uneven tone are often more noticeable, then blend outward.

    When I reach especially dry areas around my nose, mouth, or cheeks, I use whatever small amount remains on my sponge rather than adding a fresh pump of foundation.

    This low-product approach prevents excess pigment from collecting around flakes.

    How Do I Stop Foundation From Becoming Cakey?

    For me, thin layers make the biggest difference.

    If a dry patch is visible through my first application, covering it with another thick layer rarely makes it disappear. Instead, more foundation usually makes the texture easier to see.

    I apply a light first layer and add a second small amount only where I genuinely need more coverage. This keeps the complexion more skin-like and prevents makeup from becoming heavy.

    Should I Put Setting Powder Over Dry Skin?

    Should I Put Setting Powder Over Dry Skin?

    I avoid heavily powdering areas that are already dry.

    Instead, I concentrate powder where makeup actually tends to move or become shiny, such as the center of my forehead, nose, or chin. I may leave very dry cheeks almost powder-free.

    A hydrating setting spray can also help take down an overly powdery appearance and make makeup look less flat. I still use it lightly rather than soaking my face.

    How Can I Fix Foundation That Is Already Sticking to Dry Patches?

    If I notice flaky foundation after finishing my makeup, I do not immediately add another layer.

    I gently press the area with a clean, slightly damp sponge. This can remove excess pigment and soften the edges of the patch without disturbing the entire base.

    If necessary, I use a tiny amount of moisturizer around the affected area and press carefully rather than rub. Too much moisturizer over finished makeup can break the foundation apart, so less is better.

    Community makeup discussions often reach a similar conclusion: good moisturization and gentle application frequently make a bigger difference than simply changing foundation.

    Frequently Asked Questions 

    1. Why does foundation look flaky even after I moisturize?

    Your skin may still have loose surface flakes, your skincare may not have absorbed fully, or your foundation may be too matte or heavy. Applying too much moisturizer can also cause slipping or pilling rather than solving dryness.

    2. Can dehydrated skin make foundation patchy?

    Yes. Dehydrated skin lacks water and can feel tight or look textured even when it produces plenty of oil. A combination of hydration, gentle skincare, and thinner makeup layers often creates a smoother finish.

    3. How to keep foundation from clinging to dry patches throughout the day?

    I start with properly hydrated skin, allow skincare to absorb, apply minimal foundation over flaky areas, press it in with a damp sponge, and avoid excessive setting powder. If dryness appears later, I gently press the area instead of piling on more makeup.

    Final Thoughts

    Once I understood how to keep foundation from clinging to dry patches, I stopped treating extra foundation as the solution. A smoother base begins with comfortable skin.

    I get better results when I exfoliate gently when appropriate, layer hydration without overloading my face, wait five to ten minutes after moisturizing, choose a flexible foundation finish, and apply thin layers with pressing motions. Using less product around flaky areas and limiting powder also helps my makeup remain natural-looking throughout the day.

    Real skin will always have some texture, and I do not expect foundation to erase it. My goal is simply to keep my makeup from drawing unnecessary attention to dryness.

  • High-Tech Facial Devices for Everyday Skincare: A Practical Guide

    High-Tech Facial Devices for Everyday Skincare: A Practical Guide

    I started noticing how many facial devices had moved beyond occasional luxury treatments and into ordinary bathroom routines. I was curious whether these gadgets could make skincare more useful without turning a simple habit into a complicated project. The more I looked at LED masks, microcurrent tools, cleansing devices, and smart skincare gadgets, the clearer it became that technology can help, but only when the device matches a realistic goal.

    I also realized that the biggest appeal is not having the most advanced gadget available. It is adding a targeted treatment to a routine that already works. A device can look impressive on the counter, but its value comes down to what it does, how safely it works, and whether someone will actually use it consistently.

    What Makes a Facial Device High-Tech?

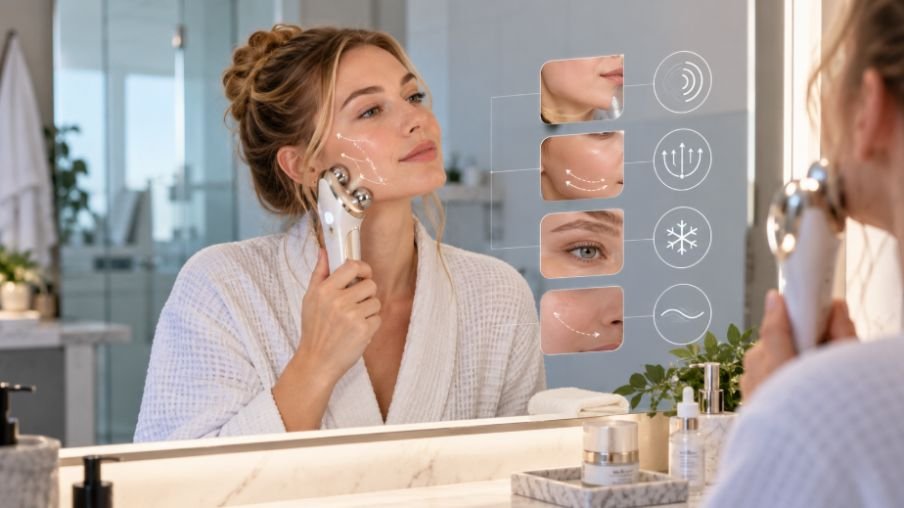
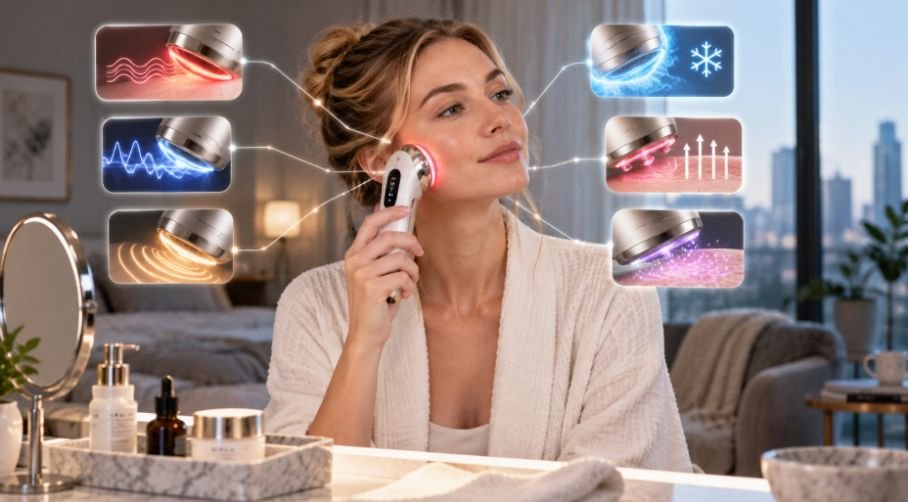
    High-tech facial devices use light, electrical stimulation, vibration, thermal energy, or digital sensors to perform functions traditional skincare products cannot provide. Some tools focus on one technology, while multifunction devices combine several treatments.

    That distinction matters because LED therapy, microcurrent, radiofrequency, and ultrasonic cleansing work differently. Their intended benefits differ too. Choosing a device should begin with a skincare concern rather than the number of features advertised.

    The Main Technologies Worth Knowing

    The Main Technologies Worth Knowing

    Microcurrent for a More Toned Look

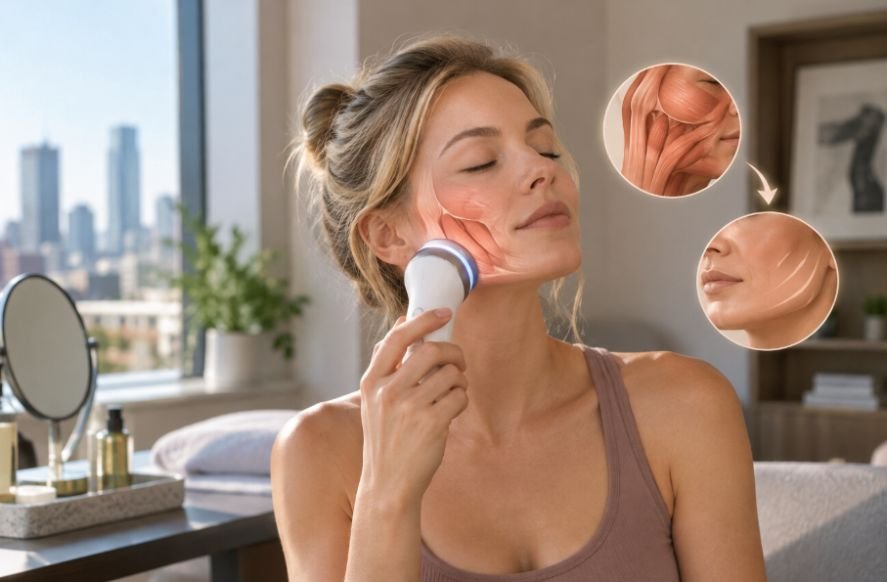
    Microcurrent devices deliver low-level electrical currents through conductive contact with the skin. They are commonly marketed for facial toning and a temporarily lifted or more defined appearance.

    Microcurrent is better viewed as a maintenance-oriented beauty tool than a replacement for professional procedures. Proper conductivity matters, and sessions should stay within the duration and intensity recommended for the device.

    LED Light Therapy

    LED devices use specific wavelengths of visible or near-infrared light. Red-light treatments are commonly associated with signs of aging and overall skin appearance, while blue light is often used in acne-focused devices.

    At-home LED devices are generally less powerful than professional equipment, and outcomes can depend on wavelength, dose, treatment schedule, and individual skin characteristics. LED should not be treated as an instant collagen fix or a substitute for medical acne care when professional treatment is necessary.

    Ultrasonic Cleansing and Exfoliation

    Ultrasonic skin scrubbers use rapid vibrations to help loosen surface debris, oil, and dead skin. Their appeal comes from providing a targeted mechanical approach without aggressive rubbing.

    These tools can be useful for an occasional cleansing or exfoliation step. However, more exfoliation is not automatically better. Excessive use can contribute to dryness, irritation, and disruption of the skin barrier.

    Radiofrequency and Multifunction Tools

    Radiofrequency devices use controlled thermal energy and are generally marketed around skin firmness and rejuvenation. Because power and temperature control vary, users should follow instructions for the exact device.

    Choosing Technology That Fits Your Routine

    Start with one primary concern. Someone focused on acne may consider a blue-light option, while someone concerned about fine lines may look toward red-light technology. A person interested in a temporary toned appearance may prefer microcurrent.

    For people interested in wearable beauty technology for skincare routines, comfort and ease of use deserve as much attention as technical specifications. Wearable technology adds value when it can be used comfortably, safely, and consistently.

    Building a Smarter Home Routine

    Building a Smarter Home Routine

    High-tech tools should support basic skincare rather than replace it. Cleansing, moisturization, and daily broad-spectrum sunscreen still matter. Devices are additions, not shortcuts around those fundamentals.

    Introduce one new device at a time. Adding several technologies together makes it harder to identify what is helping or causing irritation. The same caution applies when introducing strong exfoliating acids or other active products.

    Smart features can add convenience through timers, intensity controls, connected apps, and skin-analysis functions. Smart beauty mirrors with skin analysis technology can help organize routines and observe patterns, but digital measurements should not be treated as a diagnosis. Lighting, hydration, camera quality, and other variables can affect what a sensor detects.

    Safety Matters More Than Extra Features

    Read the manual before the first session. Treatment duration, preparation, intensity, conductive products, cleaning instructions, and compatible skincare can differ between devices.

    Electrical and light-based devices also have contraindications. Broken, infected, or severely inflamed skin may not be an appropriate treatment surface. People taking photosensitizing medications or managing particular skin conditions should ask a qualified healthcare professional whether a light-based device is suitable.

    When Professional Care Makes More Sense

    Home technology has limits. Persistent acne, unexplained pigmentation, painful inflammation, significant scarring, or rapidly changing skin concerns deserve professional assessment rather than repeated experimentation with gadgets.

    Why Consistency Beats a Bathroom Full of Gadgets

    The most useful facial device is rarely the one with the longest feature list. It is the one that matches a specific goal, fits comfortably into an existing routine, and can be used safely enough to become a habit. High-tech skincare works best when technology adds precision or convenience without pushing basic care into the background. Results may be subtle, gradual, or temporary, so expectations should stay realistic.

    A thoughtful routine does not need every new gadget. One appropriate device, used consistently and with realistic expectations, can be more practical than a shelf crowded with tools that promise everything.

    Frequently Asked Questions 

    1. Are high-tech facial devices safe for everyday use?

    Safety depends on the device, treatment type, skin condition, and frequency. Follow the manufacturer’s instructions and stop if significant irritation occurs. Some people may need professional advice before using light-based or electrical devices.

    2. Can facial devices replace skincare products?

    No. Devices generally complement cleansing, moisturizing, sunscreen, and appropriate active ingredients. They should not be considered substitutes for basic skincare or prescribed treatment.

    3. Which facial device is best for acne?

    Blue-light devices are commonly designed around acne-related concerns, while other technologies target different goals. Persistent or severe acne should be evaluated by a dermatologist before relying on home technology.

    4. Do expensive facial devices work better?

    Price alone does not determine effectiveness. Consider the technology, intended purpose, evidence, safety features, instructions, and whether you are likely to use the device consistently.

    A Routine That Works With You

    The smartest approach to facial technology is simple: choose based on your actual skincare needs, learn how the technology works, and give the device enough time to become part of a manageable routine. High-tech tools can add useful options at home, but they work best alongside the fundamentals rather than replacing the basics altogether.

    The goal is not a bathroom full of gadgets. It is a routine that feels sensible, safe, and easy to keep.

  • How to Apply Foundation Without Looking Cakey for a Barely-There Finish 

    How to Apply Foundation Without Looking Cakey for a Barely-There Finish 

    A smooth base is less about heavy coverage and more about skin prep, product control, and blending. When I learned how to apply foundation without looking cakey, the biggest improvement came from using less product, letting skincare settle, and building coverage only where needed. That keeps dry patches, fine lines, pores, and natural texture from looking heavier under makeup.
    Why Does Foundation Look Cakey?

    Foundation usually looks cakey when too much product sits on the skin. Dryness, excess powder, oil buildup, rough texture, heavy layers, or skincare that has not settled can all make the base look thick or patchy. Excess sebum can also cause foundation to separate or gather unevenly, especially around the T-zone.

    Adding more foundation rarely hides texture. I get a smoother result by improving the surface underneath and using targeted coverage instead of another full layer.

    How Should I Prep My Skin Before Foundation?

    I start with clean skin and a lightweight moisturizer suited to my skin type. Dry skin needs enough hydration to keep foundation from gripping rough patches, while oily skin still benefits from moisture. A consistent routine focused on getting clear skin can also help create a smoother, more balanced surface for makeup.

    I let moisturizer and sunscreen settle before makeup. Around 5 to 10 minutes can be useful when the layers need time to absorb, although timing depends on the formula and my skin. Primer is optional; I use it only when I need smoothing or extra hydration.

    Should Primer and Foundation Have the Same Base?

    Should Primer and Foundation Have the Same Base?

    Compatibility matters, but I do not follow a strict rule that every layer must be entirely water-based or silicone-based. Many formulas contain both.

    If makeup pills, separates, rolls up, or turns patchy, I simplify the layers or try another combination. Ingredients such as dimethicone can affect slip, but actual product behavior matters more than one ingredient label.

    What Is the Best Step-by-Step Way to Apply Foundation for a Skin-Like Finish?

    1. How Much Foundation Should I Start With?

    I place roughly one small drop or about half a pump on the back of my hand rather than applying foundation straight to my face. This gives me better control. I then pick up a little at a time with a brush, damp sponge, or fingertips.

    2. Where Should I Apply Foundation First?

    Where Should I Apply Powder?

    I start around the nose and center of the cheeks, where redness and uneven tone are often most visible. Then I blend outward toward the jawline and hairline. The outer perimeter gets very little product, which keeps the finish natural instead of mask-like.

    3. Should I Press or Drag Foundation?

    With a damp sponge, I bounce or press foundation into the skin. With a brush, I use light buffing or stippling motions. Repeated dragging can disturb the layers underneath and leave streaks or buildup.

    4. How Do I Build Coverage Without Making Foundation Heavy?

    If redness, pigmentation, blemishes, or skin discoloration still show, I add a second tiny amount only to those areas. I avoid another full layer because thin, targeted coverage is less likely to settle into pores and expression lines.

    5. Should I Use Concealer Instead of More Foundation?

    Yes, when only a few areas need extra coverage. Once my complexion looks even, I use concealer on blemishes, discoloration, or under-eye darkness. Spot concealing keeps the rest of the base lighter.

    6. Where Should I Apply Powder?

    I use a small amount of finely milled translucent powder mainly where shine develops, such as the forehead, nose, and chin. On dry or textured cheeks, I use very little or none. Strategic powdering helps prevent a dusty finish.

    7. Should I Use Setting Spray After Foundation?

    A light mist of hydrating or natural-finish setting spray can soften a powdery appearance and help the layers look more cohesive. I let it dry naturally instead of touching the face immediately.

    Is a Sponge or Brush Better for Natural-Looking Foundation?

    A damp sponge usually gives me a softer finish because it can redistribute and absorb a little excess product. A brush can provide slightly more coverage and precision.

    Neither tool prevents cakiness by itself. The amount of foundation matters more than the applicator.

    How Do I Stop Foundation From Clinging to Dry Patches or Fine Lines?

    For dry areas, I focus on hydration and avoid rubbing foundation over flakes. Around fine lines and high-movement areas, I start with less product. After blending, I press over the area with a clean, damp sponge to lift excess, then use minimal powder.

    How Can I Fix Cakey Foundation Without Starting Over?

    How Can I Fix Cakey Foundation Without Starting Over?

    If my makeup becomes heavy later in the day, I blot excess oil first. Then I gently press a slightly damp sponge over the cakey area to redistribute the existing base.

    If coverage has worn away, I add a tiny amount of foundation or concealer only to that spot. Another full layer usually makes buildup worse.

    Frequently Asked Questions (FAQs)

    1. Why Does Foundation Look Cakey Around My Nose?

    The nose combines oil, pores, movement, and sometimes dry areas, so product can collect quickly. I use less foundation there and powder only where shine develops.

    2. Does More Powder Make Foundation Last Longer?

    Not necessarily. Too much powder can exaggerate texture and combine with oil later in the day. Targeted setting usually looks smoother.

    3. What Is the Easiest Way to Make Foundation Look Like Skin?

    I focus on hydrated skin, a small amount of foundation, center-out blending, targeted extra coverage, and minimal powder. Those habits keep the finish light and believable.

    Final Thoughts

    Real skin has pores, fine lines, movement, and slight variations in tone, so I do not try to erase every trace of texture. My goal is an even complexion that still looks like skin. This same approach is useful when trying to achieve makeup for glasses without foundation rubbing off, because thinner, well-set layers are less likely to shift around the nose and frame contact points.

    The method I use for applying foundation without looking cakey is simple: prep thoughtfully, let layers settle, apply less than I think I need, build only where necessary, powder strategically, and finish with setting spray when useful. A lighter base is easier to wear, easier to repair, and more natural throughout the day.

  • Best Foundation for Dry Skin: How to Choose a Hydrating Formula

    Best Foundation for Dry Skin: How to Choose a Hydrating Formula

    Finding the best foundation for dry skin is less about chasing a specific product and more about choosing the right texture, finish, ingredients, and application method. I have found that dry skin looks better when makeup stays flexible instead of setting into a rigid, powdery layer. The goal is to even out tone without making flakes, fine lines, or rough texture more obvious.

    Across the US, seasonal cold, indoor heating, low humidity, and strong air conditioning can make facial dryness more noticeable, so I start with hydration and light, buildable coverage.

    What Type of Foundation Is Best for Dry Skin?

    Serum Foundation for Lightweight Coverage

    Serum foundations work well when I want breathable, skin-like coverage. They are usually fluid, easy to spread, and useful for sheer-to-medium coverage. I apply a small amount first and build only where redness or uneven tone needs help.

    These lightweight formulas are especially useful when dry skin also looks dehydrated or dull because they tend to sit more naturally on the complexion than a thick base.

    Liquid Foundation for Flexible Coverage

    Liquid foundation can provide anything from light to full coverage. I look for words such as hydrating, radiant, dewy, glow, natural, or satin on the label.

    These finishes usually suit dry complexions better than formulas designed primarily for oil control. Liquid foundations are also easy to build gradually, which helps prevent foundation from becoming cakey around dry patches.

    Cream Foundation for Richer Coverage

    Cream Foundation for Richer Coverage

    Cream foundation can work well when my skin feels very dry, but I still want fuller coverage. These formulas often feel richer because they contain emollient ingredients, but I still apply them sparingly because thick layers can emphasize texture.

    Cream textures can also suit mature dry skin when the goal is fuller coverage without relying heavily on powder.

    Which Ingredients Help Dry Skin Look Smoother?

    Glycerin is a humectant that helps attract and retain water in the outer skin layer, while hyaluronic acid is widely used to support hydration. Ceramides help support the skin barrier, and squalane can soften and moisturize dry skin.

    I also pay attention to plant oils such as jojoba, argan, and avocado oil. These can improve slip and soften flaky areas, although sensitive or acne-prone skin can respond differently. The American Academy of Dermatology specifically lists jojoba oil among ingredients that may benefit dry skin.

    No single ingredient guarantees good results, so I always consider how the whole foundation formula feels and performs on my skin.

    What Foundation Formulas Should Dry Skin Avoid?

    I do not think every powder or matte foundation is automatically unsuitable, but I use them carefully. Heavy powder can make flakes and rough texture more noticeable, while very matte or velvet finishes may leave dry skin looking flat.

    I am also cautious with formulas that place fast-evaporating alcohol high on the ingredient list. Alcohol can serve a useful formulation purpose, but if a formula repeatedly leaves my skin feeling tight, I consider it a poor match.

    Fragrance also deserves attention when dry skin is sensitive. Dermatology guidance notes that fragranced skin-care products can irritate some people with dry skin.

    How Should I Prep Dry Skin Before Foundation?

    How Should I Prep Dry Skin Before Foundation?

    Skin prep often makes more difference than adding another layer of makeup. I start with gentle cleansing and apply moisturizer while my skin still has some moisture. Moisturizers and emollients can help reduce water loss and support the skin barrier.

    After moisturizer settles, I apply sunscreen before makeup. The American Academy of Dermatology recommends broad-spectrum SPF 30 or higher as part of daily sun protection.

    A hydrating primer is optional. I use one when foundation grips rough areas. I also avoid aggressive exfoliation immediately before makeup because over-exfoliating can worsen dryness and irritation.

    How Do I Apply Foundation Without Making Dry Skin Look Cakey?

    My most reliable method is to work in thin layers, starting in the center of the face and blending outward.

    A damp makeup sponge works especially well because I can press and bounce foundation over dry areas instead of dragging across them. This pressing motion can help maintain a smoother appearance over flaky texture.

    A brush can work too, but I avoid repeatedly buffing visible flakes. Too much friction can make rough texture look more obvious.

    I also keep powder to a minimum and apply it only where makeup tends to move or shine, such as around the nose or forehead.

    Can Dry Skin Wear Full-Coverage Foundation?

    Yes. Dry skin can wear full coverage when the formula and technique work together.

    I prefer a buildable liquid or cream base; apply one thin layer, and then add coverage only over redness, discoloration, acne marks, or blemishes.

    This technique also works well for mature dry skin. Using less product around fine lines usually creates a smoother result than attempting to hide texture beneath a thick layer.

    Is Dewy or Matte Foundation Better for Dry Skin?

    Is Dewy or Matte Foundation Better for Dry Skin?

    I usually begin with a radiant, dewy, satin, or natural finish when skin feels tight, dull, or flaky.

    If I do not want obvious shine, I choose a natural or satin finish instead of an ultra-matte one. I can always control excess shine with a small amount of powder, while correcting a foundation that already looks too dry is more difficult.

    The ideal finish should make the complexion look hydrated without appearing greasy.

    Frequently Asked Questions (FAQs)

    1. Is Serum or Liquid Foundation Better for Dry Skin?

    Both can work well. Serum foundation is ideal when I want lightweight, skin-like coverage, while liquid foundation gives me more flexibility in coverage and finish.

    2. Should I Use Powder Over Foundation If I Have Dry Skin?

    Only where necessary. I prefer applying a small amount to areas that become shiny or crease instead of setting the entire face. This helps preserve a softer, more hydrated appearance.

    3. What Ingredients Should I Look for in the Best Foundation for Dry Skin?

    I look for glycerin, hyaluronic acid, squalane, ceramides, and compatible emollient oils. I also judge the complete formula because no single ingredient guarantees that a foundation will suit everyone.

    4. How Can I Stop Foundation From Clinging to Dry Patches?

    I moisturize first, avoid aggressive exfoliation before makeup, apply foundation in thin layers, and press it on with a damp sponge. I also keep powder away from visibly flaky areas whenever possible.

    Final Thoughts

    When I choose foundation for a dry complexion, I focus on texture, ingredients, finish, and technique. Serum, hydrating liquid, and cream formulas can all work depending on how much coverage I want and how dry my skin feels. Many of the same qualities are also worth considering when looking for the best foundation for mature skin, especially comfort, flexibility, and a finish that does not settle heavily into texture.

    The best foundation for dry skin should feel comfortable, move naturally with the complexion, and help create a smoother appearance without emphasizing flakes. Thoughtful skin preparation, flexible coverage, a radiant or natural finish, and minimal powder can make a much bigger difference than simply applying more makeup.